A broken laptop charger can bring your workflow to a sudden halt. Whether the cable will not deliver power, the plug wiggles and cuts out, or the charging light is dead, you are likely searching for a fast, affordable fix. While replacing the charger with a genuine OEM unit is always the safest choice, some users opt to repair their existing charger, especially when replacements are costly or hard to find.
This guide walks you through how to repair a broken laptop charger safely and effectively. You will learn how to diagnose the issue, choose the right repair method, and avoid deadly risks like electric shock or fire. We will cover everything from simple cable splices to DC connector replacements, plus clear warnings on what not to do.
Diagnose the Charger Problem First
Before grabbing tools, confirm the charger is actually at fault. Skip this step and you risk wasting time on a charger that was never the problem.
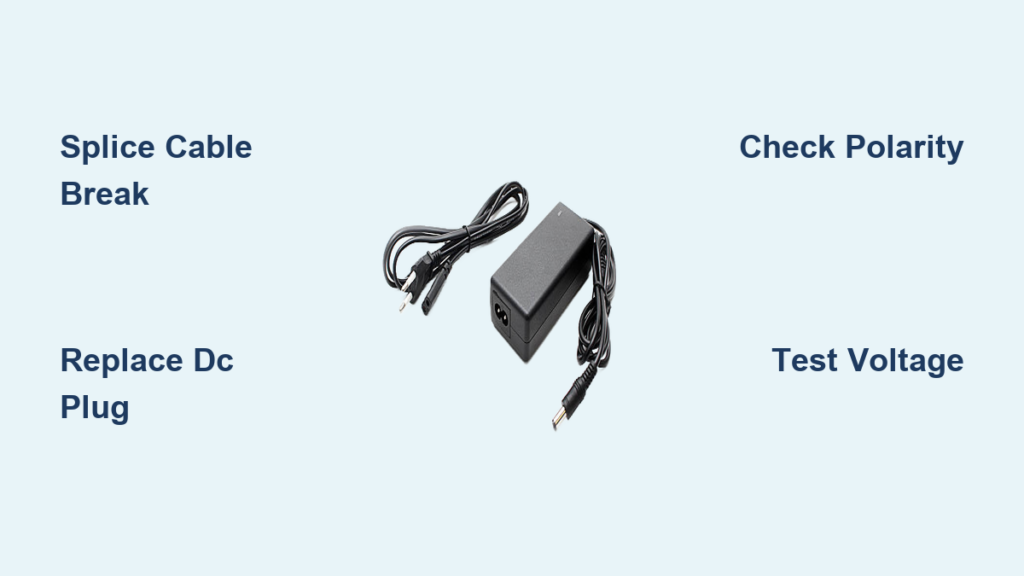
Test for Power Output
Unplug the charger and set a multimeter to DC voltage. Plug the charger into the wall, then touch the red probe to the center pin of the DC plug and the black probe to the outer metal barrel. A reading matching the label, such as 19V or 20V, means the charger is working. No reading indicates the issue is internal or in the cable.
Pro Tip: If voltage fluctuates when you wiggle the cable near the plug, you have an intermittent wire break, which is a common and fixable issue.
Rule Out the Laptop
Remove the laptop battery if possible and try powering on using only the charger. If it will not turn on, the charger may be dead. Confirm by testing with a known-good unit of the same voltage and polarity.
Identify the Failure Type

Not all charger problems are repairable. Match your symptoms to the right solution before proceeding.
Intermittent Power When Wiggling the Cable
This failure type stems from internal wire breakage due to repeated bending. The break usually occurs 1 to 2 inches from the DC plug or where the cable exits the brick. Look for visual clues such as frayed outer jacket, a stiff or kinked section, or a dead spot when bending the cable. This issue is fixable with a splice repair.
Damaged DC Plug or Broken Center Pin
Physical trauma, pet chewing, or normal wear can damage the plug. You can replace the barrel connector entirely. Never attempt to solder a broken center pin back into place, as this is unstable and dangerous.
No Power, No Lights, No Response
This symptom could indicate an internal cable break near the PCB, a failed capacitor or transformer, or a blown fuse on the primary side. This is repairable only if the fault is on the low-voltage DC side. Internal high-voltage repairs are not recommended under any circumstances.
Gather the Right Tools
Using proper tools prevents frustration and reduces risk during repair.
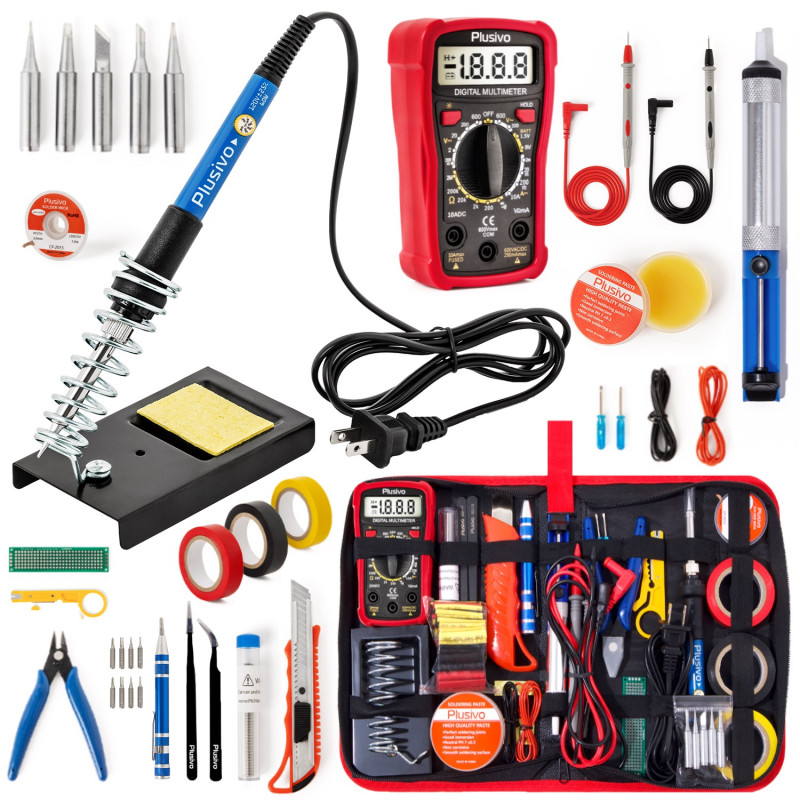
Essential Repair Kit
You will need the following items for a successful repair.
A soldering iron with temperature control, rated at 30W to 60W.
Rosin-core solder, either 60/40 tin-lead or lead-free formulation.
A wire stripper designed for 16 to 26 AWG wiring. Avoid cheap models that nick wires.
Flush cutters for clean wire trimming.
Heat-shrink tubing in three sizes: 3mm, 6mm, and 10mm.
A heat source such as a lighter or heat gun for shrinking tubing.
Helping hands with alligator clips to hold wires steady during soldering.
Safety Gear You Must Have
Safety glasses protect your eyes from solder splatter. Insulated gloves minimize shock risk. Keep a fire extinguisher nearby, as lithium batteries and faulty chargers can ignite.
Pro Tip: Never skip heat-shrink tubing. Electrical tape alone can unravel and expose live wires, creating a fire hazard.
Fix a Frayed or Broken Cable
The splice method works best for internal wire breaks, which is the most common charger failure.
Cut Out the Damaged Section
Unplug everything first. Cut the cable on both sides of the damaged zone, leaving clean wire ends. Strip approximately one-half inch of outer insulation to expose the inner conductors.
Critical Step: Slide long heat-shrink tubing, approximately 10mm, over one end before soldering. Once you make the joints, you cannot slide it on.
Strip and Tin the Wires
Separate the positive wire, usually red or white, from the negative wire, usually black or gray. Strip approximately one-quarter inch of insulation from each. Apply a small amount of solder to the tips to prevent fraying.
Check Polarity: Match wire colors to the original plug if possible. When in doubt, test continuity with a multimeter.
Solder the Connection
Use helping hands to align and hold matching wires together. Solder each joint quickly, no more than 3 seconds per connection, to avoid melting the insulation. Keep wires separate to prevent bridging and creating a short circuit. Joints should appear shiny, not lumpy or cracked.
Insulate with Heat-Shrink
Slide the pre-placed tubing over the splice. Apply even heat until it shrinks tightly around the joint. For extra safety, add a second layer of liquid electrical tape before shrinking, then wrap the entire area with electrical tape to prevent movement.
Replace a Damaged DC Connector
If the plug is cracked or the center pin is missing, replace the entire connector.
Find the Correct Replacement Plug
Match these specifications exactly.
The voltage and current rating must equal or exceed the original.
The polarity must match, whether center positive or negative.
The dimensions must match: outer diameter such as 5.5mm, inner pin size such as 2.1mm, and length.
Example: A common specification is 5.5mm by 2.1mm, center-positive. Check the label on your charger to confirm polarity.
Confirm Polarity Before Soldering
Use a multimeter in continuity mode to verify connections. Plug in the charger but do not connect it to the laptop. Touch one probe to the center pin and the other to each inner wire. The wire that beeps is the positive center connection. Label all wires clearly before cutting the old plug off.
Solder the New Connector
Cut off the damaged plug, leaving 2 to 3 inches of wire. Solder the red or positive wire to the center terminal and the black or negative wire to the outer sleeve. Double-check all connections before applying heat-shrink to each joint, then add a final sleeve over the entire base.
Danger Warning: Incorrect polarity can fry your laptop motherboard in seconds.
Test Before You Connect to Laptop
Never skip this step. Your laptop life depends on proper testing.
Check Continuity and Polarity
Set the multimeter to continuity mode. Confirm the positive wire connects to the center pin and the negative wire connects to the outer barrel. Verify there is no continuity between the two wires, which would indicate a short.
Measure Output Voltage
Plug in the charger and set the multimeter to DC voltage. Touch the red probe to the center pin and the black probe to the outer barrel. Expect a stable reading close to the labeled voltage, such as 19.5V. Fluctuations indicate a poor connection.
Perform a Load Test
Plug into the laptop with the battery removed if possible. Watch for the charging indicator light, system power-on, and heat at the repair site.
First-Use Rule: Monitor the charger for 15 to 30 minutes during first use. If it gets hot, smells strange, or sparks, unplug immediately.
Avoid These Common Repair Mistakes
Even experienced DIYers make dangerous errors that can ruin the repair or damage the laptop.
Skipping Strain Relief
Without strain relief, the repair breaks again within days. Always reinstall or create new strain relief using braided sleeving, zip ties, a rubber grommet, or epoxy at stress points.
Using Electrical Tape Only
Electrical tape peels, stretches, and exposes wires over time. Always use heat-shrink as the primary insulation method.
Ignoring Polarity
One wrong connection destroys your laptop. Double-check all polarity with a multimeter before connecting to your device.
Repairing Magnetic or USB-C Chargers
Apple MagSafe and USB-C chargers are not user-repairable. These have complex circuitry and safety systems. Replace these units rather than attempting repair.
When to Replace Instead of Repair
Some situations demand a new charger rather than a repair.
Replace the Charger If the AC plug is damaged, the brick is cracked or swollen, internal components are burnt or leaking, you lack soldering experience, or the cable was chewed by a pet and has hidden internal damage.
Fact: Third-party replacement chargers are often fire hazards. Stick to OEM or certified refurbished units.
Consider a Universal Charger
A universal charger serves as a good alternative if your model is discontinued. Look for adjustable voltage from 12V to 24V, multiple tips for different laptops, and built-in overcurrent and short-circuit protection.
Safety First: Risks You Cannot Ignore
DIY repair is not just technical. It is dangerous.
Electric Shock Hazard
Primary side voltages exceed 200V AC. Capacitors can kill even when unplugged. Always discharge and test before touching internal components.
Fire Risk from Poor Repairs
Loose wires or bad solder joints can arc. Overheating cables may ignite nearby materials. Never leave a repaired charger unattended during use or charging.
Environmental Precautions
Work in a dry, non-conductive area. Wear non-flammable clothing. Keep flammable items away from your work space.
Final Warning: Treat every repaired charger as a temporary solution. Use it only until a genuine replacement arrives.
Frequently Asked Questions About Laptop Charger Repair
Can I repair a laptop charger that has no power at all?
If the charger shows no power, no lights, and no response, the issue could be an internal break near the PCB, a failed component, or a blown fuse. You can repair it yourself only if the fault is on the low-voltage DC side. Internal high-voltage repairs are extremely dangerous and should be avoided.
Is it safe to repair a charger myself?
Repair is safe only if you have prior electronics experience, proper tools, and a thorough understanding of electrical safety. Beginners should not attempt repair due to risks of electric shock, fire, and laptop damage.
How do I know if my charger is center positive or center negative?
Check the polarity diagram printed on the charger label. Typically, the center pin is positive and the outer barrel is negative. Use a multimeter in continuity mode to confirm which wire connects to the center pin before soldering.
Can I use electrical tape instead of heat-shrink tubing?
No. Electrical tape peels, stretches, and exposes wires over time. Heat-shrink tubing provides permanent, secure insulation and should always be the primary insulation method.
What tools do I need to repair a broken charger cable?
You need a temperature-controlled soldering iron, rosin-core solder, wire strippers, flush cutters, heat-shrink tubing in multiple sizes, a heat source, helping hands with alligator clips, a multimeter, safety glasses, and insulated gloves.
When should I replace rather than repair my laptop charger?
Replace the charger if the AC plug is damaged, the brick is cracked or swollen, internal components are burnt or leaking, you lack soldering experience, or the cable was severely damaged by a pet.
Key Takeaways for Repairing a Broken Laptop Charger
Repairing a broken laptop charger is technically possible but carries significant risks including electrical shock, fire hazard, and potential damage to your laptop. Most failures occur at the cable-connector junction and can be fixed by splicing or replacing the DC connector.
Correct polarity is absolutely critical. Reversing the positive and negative connections can destroy your laptop motherboard in seconds. Always test with a multimeter before connecting to your device.
High-voltage components inside the charger brick pose electrocution and fire risks. Only attempt internal repairs if you are an experienced electronics hobbyist. Treat all repairs as temporary solutions and order a genuine OEM replacement immediately.
If you lack experience, proper tools, or confidence in your abilities, skip the soldering iron and buy a genuine charger from the manufacturer or a trusted reseller. Your laptop and your safety are not worth the risk.