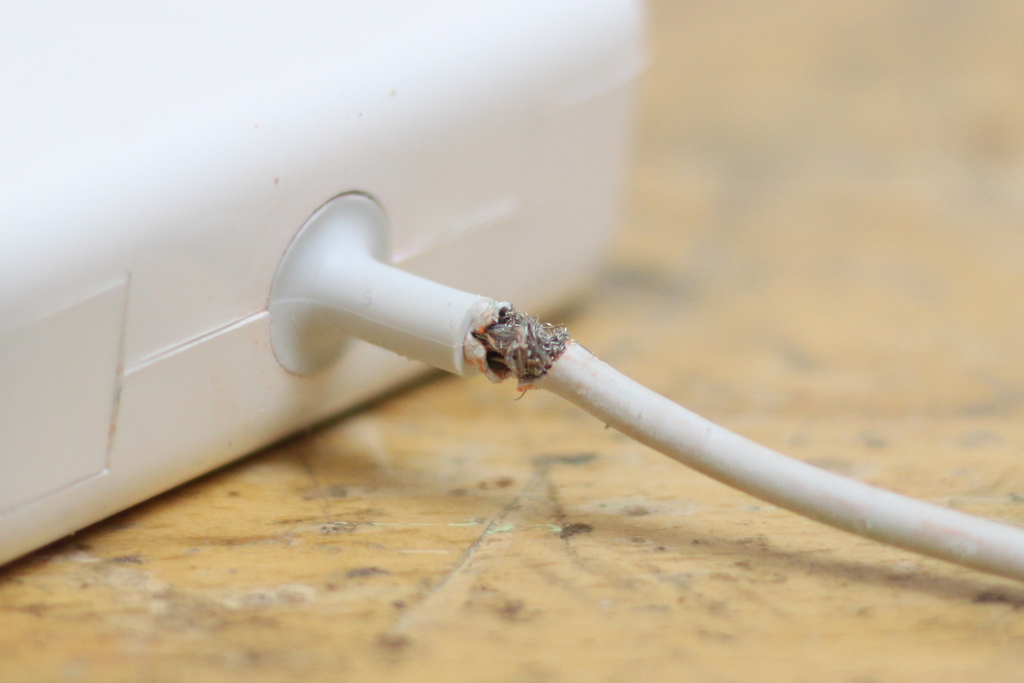
If your MacBook charger keeps fraying at the base, you’re not alone. Thousands of users face premature cable failure due to improper wrapping, especially where the thin cord meets the power adapter. This junction is the most vulnerable part of the charger, and tight coils, knots, or kinks accelerate wear. The good news is that with the right technique, you can extend your charger’s life from months to three years or more. This guide reveals Apple’s built-in system and professional cable management methods to protect your investment.
You’ll learn how to wrap your MacBook charger the right way, avoid common mistakes, and keep it travel ready while saving seventy dollars or more in replacement costs. Whether you use the manufacturer’s clips, the over-under technique, or zip ties, the goal remains the same: eliminate stress, prevent kinks, and protect the junction where the cable meets the adapter.
Use Apple’s Built-In Wrapping System
Apple designed its chargers with integrated tools to make safe, strain-free storage easy. Most users ignore these features, leading to avoidable damage. Follow this method to protect the stress points and maximize durability.
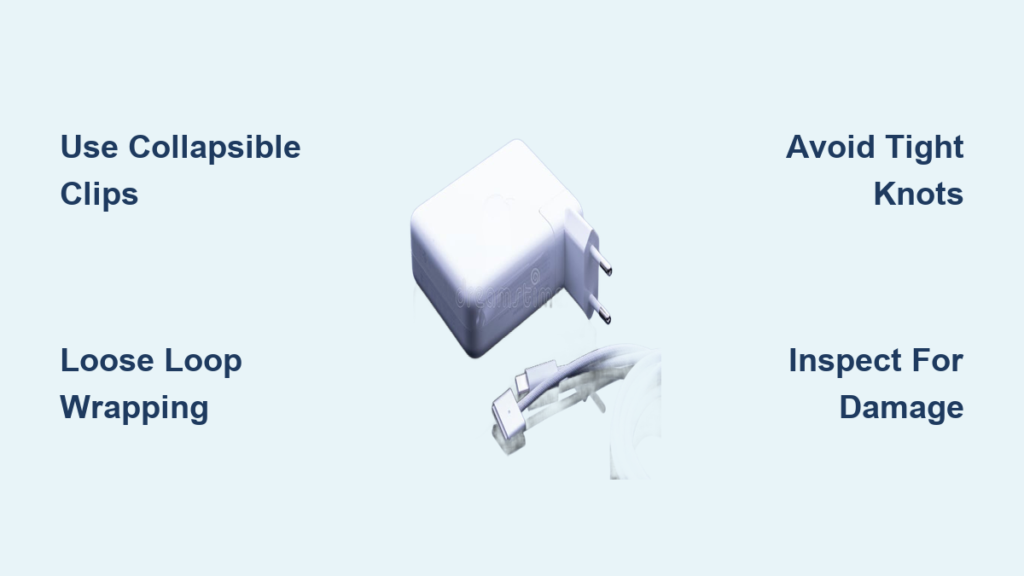
Open the Collapsible Clips
Locate the two small plastic arms, called wings, on the sides of your charger. Gently press and unfold them until they are at a ninety-degree angle. These clips are not decorative. They are engineered anchor points for wrapping the thin cable.
Wrap the Thick AC Cord First
Hold the charger with the USB-C or MagSafe end facing up. Begin wrapping the thicker AC power cord vertically around the body, from top to bottom. Keep loops loose and wide, matching the cable’s natural bend. Never pull tight or create sharp turns.
Loop the Thin Cord Around the Wings
Once the thick cord is coiled, take the thin DC cable and loop it around the extended clips. Wrap it over the thick cord to help hold everything in place. Keep the rubber stress relief casing near the adapter slightly slack. Do not stretch or compress it.
Secure with the Built-In Clip
Find the small half-inch clip along the thin cable. Fasten it onto one of the loops around the wings to lock the bundle. This prevents unraveling during transport and keeps tension off the junction.
Final Check for Tension
Inspect the wrapped charger. If the rubber casing looks pinched, stretched, or bent sharply, unwrap and try again. A properly wrapped charger should feel secure but not tight, with no kinks or pressure points.
Apply the Over-Under Wrapping Technique
For frequent travelers or anyone who handles their charger daily, the over-under method prevents internal wire fatigue caused by twisting. This pro-grade technique is used in audio and film industries to preserve expensive cables.
Prevent Twisting With Alternating Loops
Instead of wrapping the cable in the same direction every time, alternate your technique. Make one loop overhand, which means clockwise, then make the next loop underhand, which means counter-clockwise. This cancels out torsion so the internal wires do not twist or break over time.
Keep Loops Large and Natural
Form loops about six to eight inches wide, roughly the size of your palm. Let the cable follow its natural curve. Avoid wrapping around pens, adapters, or fingers, as this creates permanent kinks.
Secure With Soft Fasteners
Once coiled, use the built-in clip or a fabric tie to hold the bundle. Never use metal wires, rubber bands, or Velcro straps too tightly. They can compress and damage the insulation over time.
Try the Zip Tie Wrapping Method

For maximum durability and tangle-free storage, the zip tie method creates a compact, semi-permanent bundle perfect for backpacks and travel.
Anchor Zip Ties Near the Adapter
Slide two soft zip ties close to the power brick on the thick AC cord. Tighten just enough to hold them in place. Do not crush the cable. These act as strain reliefs, stopping torque from reaching the fragile junction.
Form Two or Three Large Loops
Gather the cable into two loops for one-meter cords or three loops for two-meter cords. Keep each loop wide and loose. Never force tight bends.
Lock the Bundle With a Handle
Pass the free end of the cord through the base loop, then thread it through the others to form an interlocked bundle. This creates a built-in carrying handle and prevents unraveling.
Trim Excess Zip Tie Material
Use scissors to cut off any leftover zip tie ends. This gives a clean finish and prevents snagging in bags.
Avoid Common Wrapping Mistakes
Even with the right tools, bad habits can ruin your charger fast. These mistakes are responsible for most early failures.
Never Wrap Into Tight Balls or Knots
Rolling the cable into a ball or tying knots concentrates stress on the thin cord near the adapter. This can split the braided sheath and expose wires within three to six months.
Do Not Ignore the Wings
Failing to use the collapsible clips defeats Apple’s intended design. Without them, all tension transfers directly to the soldered joints, leading to internal breaks.
Do Not Pull the Cord Taut
Stretching the cable during wrapping compresses the rubber stress relief casing. Over time, this causes cracking and wire fatigue.
Never Yank When Unwrapping
Always hold the adapter body and slowly unwind with your other hand. Yanking from the cord end places sudden force on delicate connections.
Avoid Rigid Wrapping Objects
Wrapping around pens, adapters, or chargers creates sharp bends that become permanent kinks. These weaken internal wires and lead to early failure.
Optimize for Travel and Portability
Travel puts extra stress on chargers. Use these strategies to keep yours safe, compact, and ready anywhere.
Use the Duckhead Plug Only
For minimalist packing, remove the full AC cord and plug in just the one-inch duckhead adapter. Use only the thin USB-C or MagSafe cable. This cuts bulk by seventy percent and eliminates the need to wrap long cords.
Unwrap With Proper Support
Always support the weight of the adapter when uncoiling. Let it hang naturally as you unwind. Never dangle it by the cord.
Inspect Before Packing
Before storing, check the entire cable for fraying or splitting in the braided sheath, exposed copper wires, and cracks in the rubber casing. If you spot damage, stop using it immediately and re-wrap correctly.
Upgrade With Rugged Third-Party Cables

If you struggle with Apple’s delicate design, consider switching to a reinforced alternative.
Choose Braided or Armored Cables
Look for third-party cables with nylon or rubberized outer sheathing for abrasion resistance, reinforced strain relief at both ends, and MFi or USB-IF certification for safety and compatibility. These can handle rougher handling and last significantly longer.
Maintain and Inspect Regularly
Long-term care is just as important as proper wrapping. Make these habits part of your routine.
Check Before Every Use
Spend ten seconds inspecting the rubber stress relief casing, connector tips, and entire cable length. Discontinue use if you see exposed wires, splits, or brittleness.
Clean With a Dry Cloth
Wipe the charger with a dry or slightly damp microfiber cloth. Never use liquids, solvents, or sprays. Avoid moisture in the ports.
Store in a Padded Compartment
Keep the wrapped charger in a protected pocket of your laptop bag. Avoid placing heavy items on top, as pressure can deform the casing over time.
Know Your Warranty Rights
Apple offers a one-year limited warranty, but physical damage from misuse is not covered. AppleCare+ may cover accidental damage, but proper care prevents the need.
Real-World Results and Longevity Tips
Data from user testing and real-world feedback shows clear patterns in charger lifespan based on wrapping habits.
Clip Method: Twelve Plus Months No Wear
Users who consistently use Apple’s built-in clips report no fraying after a year of daily use. Some extend life to three years or more with careful handling.
Knot Wrapping: Fails in Three to Six Months
Tightly knotted or coiled chargers show visible damage within half a year, often failing completely.
Zip Tie Method: Best for Travel
This method wins for durability in transit. Users report zero unraveling in backpacks and luggage, even after months of use.
Over-Under: Ideal for Frequent Use
Best for people who plug and unplug multiple times a day, this method prevents internal twisting and maintains cable integrity.
Frequently Asked Questions About Wrapping MacBook Chargers
Does wrapping my MacBook charger really affect how long it lasts?
Yes, absolutely. Improper wrapping, especially tight knots or sharp bends near the adapter junction, causes the cable to fray within three to six months. Proper techniques using the built-in clips or loose loops can extend the life to three years or more.
Can I use rubber bands to hold my wrapped charger?
Rubber bands are not recommended. They can compress the cable insulation over time, especially if stored in a packed bag. Use the built-in clip, a soft fabric tie, or a loosely fastened zip tie instead.
What is the most durable method for traveling with my MacBook charger?
The zip tie wrapping method provides the best durability for travel. It creates a compact, tangle-free bundle that resists unraveling even in checked luggage. The built-in clip method works well for everyday use.
Should I use the duckhead plug when traveling?
Yes, using only the duckhead plug eliminates the need to wrap the long AC cord, cutting bulk by about seventy percent. This is ideal for minimalist travel and reduces the risk of cable damage.
When should I replace my MacBook charger?
Replace your charger immediately if you notice exposed copper wires, fraying along the braided sheath, cracks in the rubber stress relief casing, or intermittent charging. Using a damaged charger can create safety hazards.
Key Takeaways for Protecting Your MacBook Charger
Wrapping your MacBook charger correctly is not about neatness. It is about preserving a seventy-dollar investment and avoiding daily frustration. Whether you use Apple’s clips, the over-under method, or zip ties, the goal remains the same: eliminate stress, prevent kinks, and protect the junction where the cable meets the adapter.
The most important practices include using the collapsible clips that Apple built into the charger, keeping loops loose and following the natural curve of the cable, and inspecting the entire length before each use for signs of damage. Avoid tight knots, sharp bends, and yanking the cord when unwrapping, as these habits cause premature failure.
Spend twenty seconds wrapping your charger the right way, and it could last three times longer. Start today, and your future self will thank you.