
Your laptop stopped charging and the power brick lights up but the connection flickers when you move the cable. Before spending $60 or more on a replacement, you might wonder if you can open a laptop charger adapter and fix it yourself. The answer is yes, but with important caveats. Most modern laptop chargers are sealed using ultrasonic welding or strong adhesives, making non-destructive disassembly nearly impossible. Yet thousands of users successfully repair them every year, saving money and reducing e-waste. This guide walks you through proven methods to open your laptop charger adapter safely, identify common faults like broken cables or failed capacitors, and reassemble it for continued use.
You’ll learn which tools work best for different sealed cases, how to avoid dangerous electrical hazards from stored charges in capacitors, and when replacement is genuinely the smarter choice. Whether you’re replacing a frayed DC cable or diagnosing why your laptop won’t charge, this step-by-step guide covers everything from initial inspection to final testing.
Check Repair Feasibility Before Starting
Not every laptop charger adapter is worth opening. Many modern adapters from Dell, Apple, and HP are built specifically to resist tampering, and attempting to open them often results in permanent case damage with no path to successful repair.
Look for Hidden Screws First
Some serviceable models use screws instead of welding. Inspect these common hiding spots:
- Rubber feet on the bottom: peel them back gently
- Labels or stickers covering seams: lift corners carefully
- IEC inlet cover where the power cord plugs in: may hide a screw beneath
If you find screws, remove them with a Phillips screwdriver and try separating the case halves by hand before resorting to destructive methods.
Identify the Sealing Method
Most laptop charger adapters use one of these sealing techniques:
- Ultrasonic (sonic) welding: creates a seamless bond between plastic halves
- Adhesive or epoxy: glue applied along the seam or inside the case
- Potting compound: black resin encases internal circuitry (common in Dell XPS 15 adapters)
Shine a flashlight along the seam. A perfectly smooth, unbroken line usually indicates sonic welding, which is the hardest to open without destroying the case.
Essential Safety Precautions

Opening a laptop charger involves real risks. Even when unplugged, internal components can store lethal voltages that remain dangerous for hours after disconnecting power.
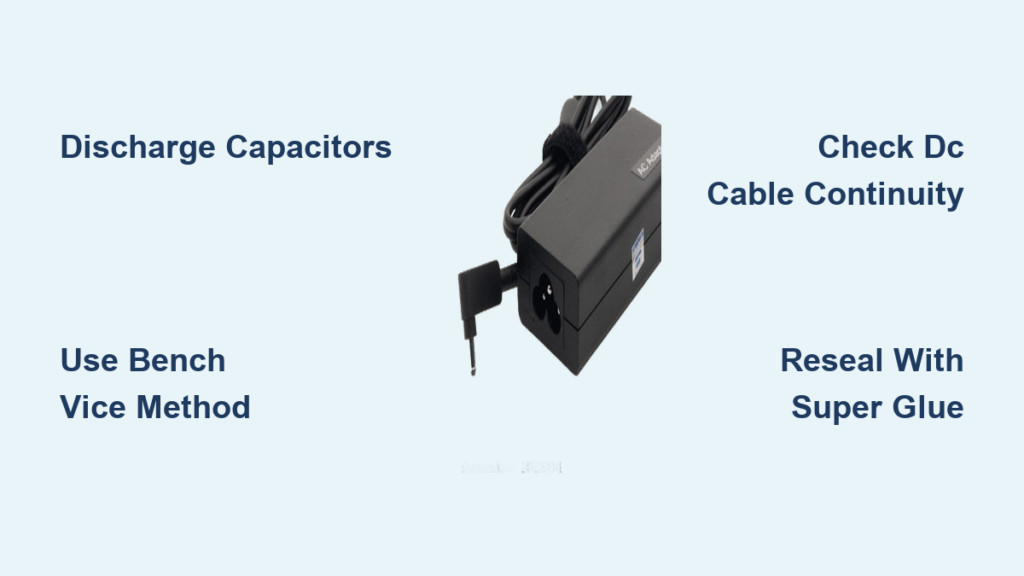
Discharge Capacitors Before Handling
- Unplug the adapter from the wall outlet
- Wait 2 to 4 hours before opening to allow high-voltage capacitors to self-discharge naturally
- Never assume the unit is safe just because the LED is off
Protect Yourself During Disassembly
Wear safety goggles to protect eyes from flying plastic shards, use insulated gloves to prevent accidental contact with live parts, and always work on a non-conductive surface like a wooden table. Use tools with insulated handles when working near internal components, as a short circuit can destroy the adapter or cause injury.
Work Safely With Solvents
If using gasoline or acetone to weaken bonds, work in a well-ventilated area away from open flames or sparks. Clean all residue thoroughly with isopropyl alcohol (90% or higher) before reassembly. Large capacitors can deliver a painful or fatal shock. If you’re uncomfortable with any step, stop and consider replacement instead.
Best Tools for Opening a Laptop Charger
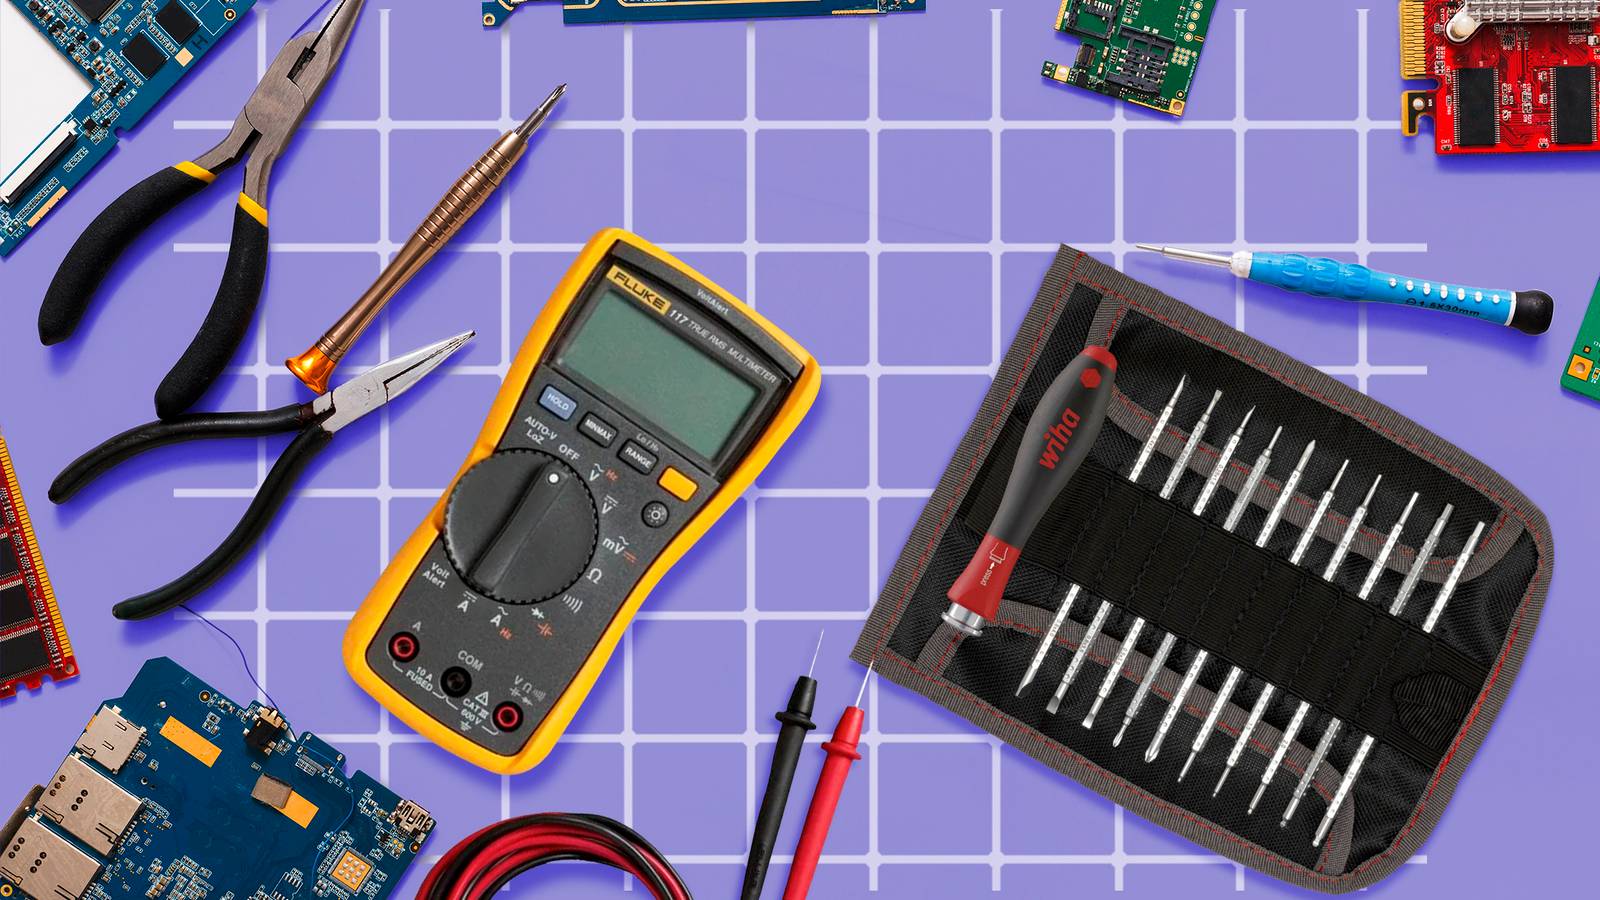
Success depends heavily on using the right tool for your specific charger construction. Here are the essential tools you’ll need:
- Flat-head screwdriver with short blade for prying along seams without deep penetration
- Adjustable pliers (Vise-Grip style) for controlled pressure without shock damage
- Bench vice for even compression, the preferred method among experts
- Utility knife or snap blade for scraping through thin welded layers
- Hot knife or modified soldering iron for melting through plastic cleanly
- Freezer-safe container for the cold embrittlement method
- Super glue (cyanoacrylate) for resealing after repair
- Soldering iron and solder for replacing DC cables
- Multimeter for testing continuity and output voltage
Pro Tip: Use a 3mm drill bit as a spacer in your bench vice to prevent over-compression and cracking the case.
Step-by-Step Opening Methods
Bench Vice Compression Method
This is the most controlled and widely successful technique for opening a laptop charger adapter.
- Place the charger in the bench vice, aligned so the seam runs parallel to the jaws
- Insert a 3mm drill bit between each jaw and the charger to prevent crushing
- Slowly tighten the vice until you hear a pop or feel resistance give way
- Rotate the adapter 180 degrees and repeat on the remaining seam
The case should split open with minimal internal damage. Users SmallCog and jamess report this method works on approximately 80% of sealed adapters.
Adjustable Pliers Technique
If you don’t have a bench vice, use locking pliers for targeted pressure.
- Position the pliers at one end of the seam
- Squeeze firmly to initiate a crack
- Slide the pliers along the seam, repeating until the halves separate
This method, preferred by mariushm, applies more controlled pressure than hammering and reduces the risk of shock damage to internal solder joints.
Snap Blade Scraping Technique
For minimal internal component risk, scrape rather than smash.
- Hold a broken utility blade at a shallow angle against the seam
- Run it along the seam with firm pressure, applying multiple passes
- Continue until the blade cuts through the welded layer
User t1d achieved clean separation with no PCB damage using this method. The seams are typically thinner than the case walls, making this effective despite taking more time.
Freezer and Mallet Method
Cold temperatures make plastic brittle and easier to crack.
- Place the charger in a sealed bag and freeze for 4 to 6 hours
- Remove and place on a hard wooden surface
- Use a rubber mallet to strike around the seam
Critical: Never hold the unit while striking. Flying debris or internal component failure can cause serious injury.
Heat Softening Method
Heat can weaken adhesives and make plastic easier to cut.
- Apply hot air (heat gun) along the seam for 30 to 60 seconds
- Use a utility knife to slice through the softened plastic
Warning: Overheating can warp the case. Keep the heat gun moving constantly and avoid concentrating heat in one spot.
Inspect Internal Components for Faults

Once open, inspect these common failure points to diagnose what needs fixing.
Test the DC Output Cable
Most failures occur near the adapter housing or DC plug where repeated flexing breaks internal wires.
Perform a wiggle test: plug the adapter into the laptop and gently wiggle the cable near the connector. If power flickers, the inner wires are broken. Use a multimeter in continuity mode to confirm. Probe the wires at both ends. One wire (usually black) should show constant continuity. The other may connect only intermittently if damaged.
Check Capacitors for Failure
Swollen or leaking capacitors are common in older adapters.
Look for these warning signs:
- Bulging or domed top on the capacitor
- Cracked pressure vent on the top
- Brown residue indicating electrolyte leakage
Pro Tip: Use an ESR meter to test capacitors without desoldering them first.
Examine Solder Joints
Thermal stress can crack solder near transformer leads, DC cable entry points, and heat sinks. Look for hairline cracks or disconnected pads around these areas.
Replace a Damaged DC Cable
If the cable is broken near the connector, replacement is straightforward.
Remove the Old Cable
- Desolder the wires from the PCB: black wire goes to ground (negative), white wire to positive, blue wire (if present) to the ID/sense pin
- Pull the cable gently through the strain relief protector
Warning: Cutting the ID pin wire may allow power but block full charging. Laptops like Dell and Lenovo display “charger not supported” errors if this wire is disconnected.
Prepare the New Cable
- Cut 6 to 8 inches from a replacement cable (18 to 20 AWG, 30V or higher rating)
- Strip the outer sleeve and save it for reuse
- Strip and tin the inner wires: twist and solder black wires together, cover with black heat shrink, then tin the white (positive) wire
- Apply silicone lubricant to the tip for easier insertion through the strain relief
Loosen the Strain Relief
Use a hand-turned drill bit or small rod. Insert into the protector hole and rotate to expand the inner diameter, creating space for the new cable.
Solder and Reconnect
- Feed the new cable through the protector and into the case
- Solder white to positive terminal, black to ground, and blue to the ID pin (if used)
- Trim excess wire and double-check polarity
Reverse polarity can permanently damage your laptop.
Reassemble and Seal the Adapter
You cannot restore the original factory seal, but you can make a durable repair.
Align and Glue
- Fit both halves together, ensuring the cable protector clicks into place
- Apply super glue (cyanoacrylate) along the entire seam
- Reinforce weak spots, especially around the cable exit
- Wrap masking tape around the unit to hold it during curing (10 to 30 minutes)
- Let cure fully for up to 24 hours for maximum strength
Alternative: For white plastic (ABS, common in Apple chargers), use acetone welding. Apply acetone with a brush and rub in a small piece of donor plastic to fuse the seam.
Add Reinforcement if Needed
If the case is cracked, wrap with electrical tape or use heat-shrink tubing for added protection.
Test the Repaired Adapter
Never skip testing. Your laptop’s safety depends on proper verification.
Visual and Electrical Inspection
- Ensure no loose wires or solder bridges exist
- Confirm the strain relief holds the cable securely
- Plug into the wall and verify the LED turns on (if equipped)
- Use a multimeter to measure output voltage
The reading should match the label (for example, 19.5V or 20V). More than 0.5V deviation indicates a deeper problem.
Connect to Your Laptop
- Plug in and verify charging begins
- Look for no error messages like “Not Charging”
- Monitor for overheating, buzzing or whining noises, or burning smells
Stop immediately if any of these occur and disconnect power.
When to Choose Replacement Instead
Some adapters are not worth opening.
Dell XPS 15 Adapter Challenges
The Dell XPS 15 power adapter presents specific difficulties:
- Curved, thin case design provides poor grip points
- Fully potted internals with circuitry encased in black epoxy
- No access to components without destroying everything
User experience shows one technician destroyed the case and still couldn’t reach the PCB. The potting compound makes repair attempts futile.
Repair vs. Replacement Comparison
| Factor | Repair | Replacement |
|---|---|---|
| Cost | $3 to $10 | $60 to $100 |
| Time | 1 to 3 hours | Instant |
| Success Rate | High for non-potted units | Guaranteed |
| Safety | Moderate risk | OEM safety certified |
If your adapter is potted or you lack proper tools, replacement is safer and more reliable.
Frequently Asked Questions About Opening Laptop Charger Adapters
Can all laptop charger adapters be opened?
No. Most modern adapters are sealed using ultrasonic welding, adhesives, or potting compounds. Some older models have hidden screws and can be opened non-destructively, but this is increasingly rare. Dell XPS 15 adapters and similar potted units should not be opened.
Is it safe to open a laptop charger myself?
It can be safe if you follow proper safety protocols. Unplug the adapter and wait 2 to 4 hours for capacitors to discharge. Wear safety goggles and insulated gloves, work on a non-conductive surface, and use insulated tools. However, if you’re uncomfortable working with high-voltage electronics, seek professional help or replace the adapter.
What happens if I break the cable inside the adapter?
You can replace the DC cable by desoldering the old wires and soldering in a new one. Just ensure you match the polarity correctly: black to ground, white to positive, and blue (if present) to the ID pin. Failing to reconnect the ID pin may cause your laptop to display “charger not supported” errors.
How do I know if my adapter needs repair or replacement?
If the adapter’s LED lights up but your laptop shows charging errors or charges intermittently, the DC cable or capacitors are likely faulty and repairable. If the adapter is completely dead, makes buzzing sounds, or smells burned, replacement is safer. Potted adapters (like many Dell models) should typically be replaced rather than repaired.
Can I reseal the adapter after opening it?
Yes. Apply super glue (cyanoacrylate) along the seam after reassembly. For white plastic (ABS), you can use acetone welding for a stronger bond. Allow 24 hours for full curing before use. Some users wrap the repaired unit with electrical tape or heat-shrink tubing for added physical protection.
Will repairing my adapter void my laptop warranty?
Opening the adapter itself won’t void your laptop warranty, but any damage caused by improper repair could affect your laptop. Additionally, any remaining original warranty on the adapter is voided. Always test thoroughly before connecting to your laptop.
Key Takeaways for Opening Your Laptop Charger Adapter
Opening a laptop charger adapter is definitely possible, but it’s inherently destructive by design. Success depends on your specific model, the tools you have available, and your tolerance for case damage. The bench vice method with a 3mm drill bit spacer works best for most sealed adapters, while snap blade scraping offers the lowest risk to internal components.
Always prioritize safety by discharging capacitors for several hours before handling, wearing protective gear, and working on non-conductive surfaces. Check the DC cable first when diagnosing charging issues, as that’s the most common failure point and the easiest repair. Replace rather than repair potted adapters like many Dell XPS 15 units, where the internal circuitry is encased in epoxy.
For common cable failures, a simple opening and resolder can breathe new life into an otherwise dead charger, saving $50 or more versus buying a new OEM adapter. However, if your adapter shows signs of serious damage, makes unusual noises, or smells burned, playing it safe with a certified replacement is the smarter choice for your laptop’s longevity.


