A dirty MacBook charger port can cause slow charging, intermittent connections, or complete charging failure. Whether you have a USB-C port on a modern MacBook Air or a MagSafe connector on an older model, debris like lint, dust, food particles, and sticky residues can block electrical contact and disrupt performance. This buildup not only affects functionality but can also lead to long-term damage to sensitive internal components if left untreated.
This guide provides a complete, step-by-step approach to safely clean both USB-C and MagSafe charger ports using proven methods and non-conductive tools. You’ll learn how to identify your port type, assess contamination levels, choose the right cleaning tools, perform safe cleaning procedures, troubleshoot persistent issues, and prevent future buildup without risking your MacBook’s hardware.
Identify Your MacBook Charger Port Type
Understanding your port type is the first step toward effective cleaning. MacBooks use two distinct charging systems, each with different cleaning requirements and risk factors.
USB-C Ports on Modern MacBooks
USB-C ports appeared on MacBooks starting in 2015 and now power all current MacBook Air and MacBook Pro models. These small, oval-shaped ports handle charging, data transfer, and video output through multiple gold-plated contact pins inside. The narrow, deep design makes them prone to lint accumulation in corners and edges.
Signs of USB-C contamination include intermittent charging, a wobbly feeling when inserting the charger, random disconnections, and visible lint or grime at the port entrance. The gold-plated pins are extremely sensitive to damage from metal tools, which can short-circuit the port and cause permanent hardware failure.
MagSafe Ports on Older and Newer Models
MagSafe connectors use magnetic technology that snap securely into place. Introduced in 2006 and revived with MagSafe 3 in 2021, these ports appear on select M1/M2/M3 MacBook Pro and MacBook Air models. While less prone to deep lint penetration, the strong magnets attract ferrous (metal) particles that interfere with the connection.
Common MagSafe contamination symptoms include a charger that doesn’t snap firmly, a loose or wobbly fit, intermittent charging, and visible metallic dust around the center magnet. Oxidation appears as a dull, tarnished layer on the contact rings when inspected with a flashlight and magnifier.
Assess How Dirty Your Port Is

Not all contamination requires the same cleaning approach. Understanding the severity helps you choose the right method and avoid unnecessary disassembly.
Light Buildup Requiring Routine Maintenance
If your MacBook charges normally but occasionally disconnects, or you notice slight fuzz near the port, you likely have light lint or dust accumulation. This level is common and easily resolved with non-invasive tools like compressed air or a soft brush. Monthly maintenance prevents escalation to more serious issues.
Moderate Buildup Needing Thorough Cleaning
When lint, food crumbs, or oxidation are clearly visible and charging becomes unreliable, moderate cleaning is required. The port may still function intermittently, but performance is significantly degraded. Use plastic spudgers, dental picks, and isopropyl alcohol with micro-swabs for this level of contamination.
Severe Contamination From Sticky Spills
Spills like honey, soda, or juice leave behind sticky, conductive residue that traps debris and promotes corrosion. Surface cleaning won’t reach hardened residue. Warning signs include a sticky feeling when inserting the charger, brownish residue visible under magnification, and no charging after multiple cleaning attempts. Internal disassembly may be necessary for severe cases.
Gather Safe Cleaning Tools
Using the wrong tools can damage your port permanently. Only use non-conductive, soft, and precise tools designed for electronics cleaning.
Essential Non-Conductive Tools
Wooden or plastic toothpicks scrape lint from corners without conducting electricity. Plastic spudgers provide precision removal of stuck debris. Dental picks with curved tips reach tight spaces effectively. Fine-tipped non-metallic tweezers extract visible fibers or crumbs. Soft nylon brushes remove loose dust from MagSafe rings. Compressed air in short bursts blows out surface debris when the can is held upright.
Supplies for Oxidation and Residue
Isopropyl alcohol at 90% or higher dissolves grime and evaporates quickly without leaving residue. Micro-swabs wipe USB-C port edges without forcing liquid inside. White vinyl erasers gently remove oxidation from MagSafe contacts. Lint-free microfiber cloths clean charger tips and outer port areas.
Inspection Equipment
A magnifying glass or digital microscope helps identify bent pins, corrosion, or embedded debris. A flashlight illuminates the port interior for better visibility. A vacuum with a rubber funnel provides non-contact debris removal when used on low suction.
Clean USB-C Port Step by Step
USB-C ports require the most caution during cleaning due to their electrical sensitivity. Follow these steps precisely to avoid damaging the gold-plated contact pins.
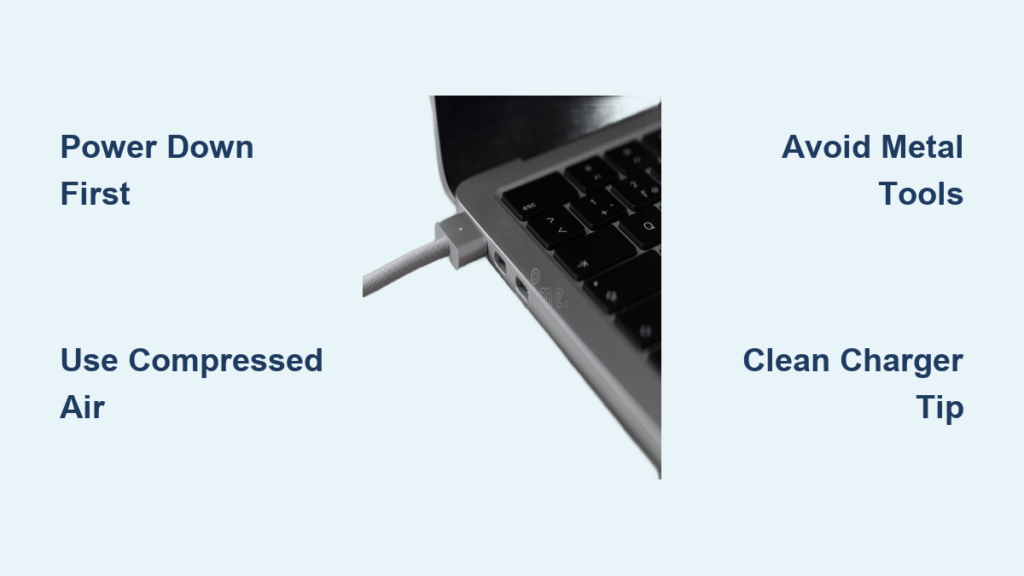
Power Down and Prepare
Turn off your MacBook completely and disconnect all cables. This prevents accidental shorting or software glitches during cleaning. Wait five minutes to ensure full shutdown, especially on Apple silicon Macs.
Blow Out Loose Debris
Use short bursts of compressed air to dislodge lint and dust. Hold the can upright to avoid propellant discharge. Tilt the MacBook slightly so debris falls outward rather than deeper into the port. Avoid prolonged spraying, which can push dirt deeper.
Remove Stubborn Lint
Inspect the port with a flashlight and magnifier. Use a wooden toothpick or plastic spudger to gently scrape along the edges and corners where lint accumulates. Work slowly and pull debris outward. Do not force the tool or apply pressure toward the interior.
Wipe With Alcohol If Needed
If oxidation or sticky residue is visible, dampen a micro-swab with 90% isopropyl alcohol. Gently wipe only the accessible edges of the port. Do not pour or drip liquid into the port. Let the port dry for 10-15 minutes before reconnecting the charger.
Clean MagSafe Port Effectively

MagSafe ports are more forgiving than USB-C but still require careful attention, especially around the magnetic components that attract metal debris.
Brush the Surface First
Use a clean, dry soft-bristle toothbrush to scrub the port surface. Brush in circular motions to loosen lint and magnetic particles. Focus on the outer ring and magnet housing. Avoid pressing too hard, which could damage the contact rings.
Remove Embedded Debris
Use a wooden toothpick or dental pick to gently lift out stubborn fibers or food particles. Work under magnification to avoid damaging the center pin. Pull debris outward rather than pushing toward the center.
Clean Contact Rings
For tarnished or oxidized metal rings, use a clean white vinyl eraser. Rub lightly in circular motions across the contacts. Wipe with a dry microfiber cloth. Optionally, dampen a cotton swab with isopropyl alcohol, wipe the contacts, and let dry for five minutes before reconnecting.
Clean the Charger Tip Too
A dirty charger tip transfers grime back into the port immediately after cleaning. Both the port and the connector require attention for lasting results.
Cleaning MagSafe Connectors
Wipe the MagSafe connector with a dry microfiber cloth. For sticky residue, slightly dampen the cloth with isopropyl alcohol. Gently clean the metal contact rings. Let the connector dry completely before use.
Cleaning USB-C Plugs
Use a dry lint-free cloth to wipe the USB-C plug. If needed, dampen a cotton swab with alcohol and wipe the metal contacts. Never immerse the charger in liquid. Allow the connector to dry fully before plugging it in.
Handle Severe Sticky Residue
When standard methods fail due to honey, soda, or syrup seeping into the port, deeper cleaning becomes necessary. This process requires disassembly and should only be attempted by experienced users.
Internal Cleaning Procedure
Power down and unplug all cables. Remove the bottom case using a Pentalobe screwdriver. Disconnect the USB-C port assembly from the logic board. Unscrew the port from the frame. Clean externally using distilled water on a paper towel and a soft brush to remove sticky film. Dry thoroughly by air-drying for 24 hours or placing in a sealed container with silica gel packets. Reassemble carefully.
When to Skip DIY Methods
Do not attempt internal cleaning if you lack experience with electronics repair. Seek professional help if burn marks, charring, or melting are visible in the port. Stop if the port feels loose or misaligned. Professional repair is necessary if liquid damage occurred, especially with sugary drinks.
Avoid Dangerous Cleaning Methods
Certain tools and techniques risk permanent damage to your MacBook’s charging port. Steer clear of these approaches entirely.
Tools That Cause Damage
Metal paper clips, needles, or knives can short-circuit USB-C pins or bend contacts. Wet cloths or liquid sprays cause liquid ingress and corrosion. Excessive force cracks the port housing or damages solder joints. Tap water leaves mineral deposits that corrode metal. Aggressive air bursts force debris deeper or introduce moisture.
Troubleshoot After Cleaning
If cleaning doesn’t resolve charging issues, systematic troubleshooting identifies whether the problem is software-related or hardware-based.
Test With Different Equipment
Try a known-good USB-C or MagSafe charger to rule out cable issues. Test the same cable on another device to isolate whether the problem is the charger or the port.
Restart and Reset MacBook
On Apple silicon Macs, shut down completely, wait 30 seconds, then power on. On Intel Macs, reset the SMC by shutting down, pressing the power button for 10 seconds, releasing, waiting five seconds, then powering on. Also reset NVRAM by turning on and immediately pressing Option + Command + P + R for 20 seconds.
Check Software Settings
Go to System Settings, then Privacy and Security. Enable “Allow accessories to connect” and choose “Ask for new accessories” or “Automatically when unlocked.” Open Terminal and enter “sudo killall -9 usbd” to force macOS to reload USB drivers.
Verify Hardware Detection
Hold Option, click the Apple menu, and select System Information. Go to USB or Thunderbolt/USB4. Plug in a device. If detected, the port works and the issue was software. If not detected, hardware failure is likely.
Know When to Seek Professional Help
Some situations require expert intervention rather than continued DIY attempts.
Signs You Need Professional Repair
Visible burn marks, charring, or melting indicate serious internal damage. A port that feels loose or misaligned needs professional realignment. No improvement after multiple cleaning attempts suggests internal damage. Liquid damage, especially from sugary drinks, often requires professional cleaning to prevent corrosion from spreading.
Warranty Considerations
Unauthorized disassembly may void your warranty. Contact Apple Support or visit an Apple Authorized Service Provider if your MacBook is still covered. Professional diagnostics can identify issues that cleaning cannot resolve.
Prevent Future Port Problems
Regular maintenance prevents most charging issues and extends the life of your MacBook’s port.
Maintenance Schedule
Inspect the port with a flashlight monthly. Clean with air or a soft brush every three to six months. Clean the charger tip monthly. Perform deep cleaning only when symptoms arise.
Best Prevention Habits
Avoid eating near your MacBook to prevent crumbs and spills. Store your laptop in a clean, dry environment. Use protective port covers if available for your model. Keep bags and pockets lint-free to reduce debris transfer.
Key Takeaways for Cleaning Your MacBook Charger Port
Cleaning your MacBook charger port doesn’t require special skills, but it does demand the right tools and careful technique. Most charging issues stem from simple debris buildup rather than hardware failure. USB-C ports require extra caution due to their electrical sensitivity, while MagSafe ports need attention to magnetic debris accumulation.
Remember the golden rule: when in doubt, use non-conductive tools and avoid metal at all costs. Start with compressed air and wooden toothpicks for routine maintenance. Use isopropyl alcohol only when oxidation or sticky residue is visible. Clean the charger tip monthly to prevent recontamination. If cleaning doesn’t resolve the issue, troubleshoot systematically or seek professional help rather than risking further damage.
Frequently Asked Questions About Cleaning MacBook Charger Ports
Can I use a paperclip to clean lint from my MacBook USB-C port?
No. Metal tools like paperclips risk short-circuiting the gold-plated pins inside USB-C ports. This can cause permanent damage to your MacBook’s logic board. Use wooden toothpicks, plastic spudgers, or dental picks instead.
How often should I clean my MacBook charger port?
Inspect your port monthly and perform light cleaning every three to six months. Clean the charger tip monthly. The frequency depends on your usage environment and how often you transport your MacBook.
Why does my MagSafe charger feel loose?
A loose MagSafe connection usually indicates debris or ferrous (metal) particles attracted by the magnet. Use a soft brush and wooden toothpick to remove this debris. Oxidation on the contact rings can also cause poor connections.
Can isopropyl alcohol damage my MacBook port?
Isopropyl alcohol at 90% or higher is safe when applied correctly. Dampen a micro-swab rather than pouring liquid into the port. Allow 10-15 minutes of drying time before reconnecting the charger.
What should I do if my MacBook still won’t charge after cleaning?
Test with a different charger first to rule out cable issues. Restart your MacBook and reset SMC or NVRAM if needed. Check USB security settings in System Settings. If the port still doesn’t work, seek professional diagnostics.