
You’ve turned the key, but your car won’t start. The battery is dead again. Before you call for a jump start or spend money on a replacement, there’s a smarter solution: a Schumacher battery charger. These reliable chargers can revive a drained battery, extend its lifespan, and prevent future breakdowns. Knowing how to use a Schumacher battery charger correctly is essential for safe, effective charging whether you own an SC1564, SC1363, or a basic 15A model.
This guide walks you through every step from setup to disconnection, with model-specific tips, safety protocols, and troubleshooting advice so you can charge with confidence.
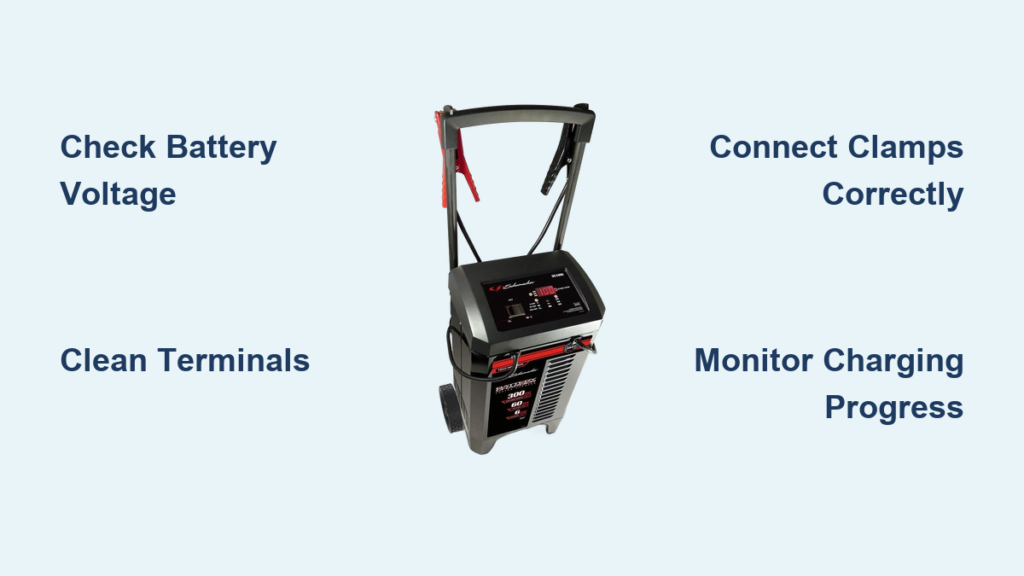
Prepare Your Battery and Charger
Before plugging in, ensure both your battery and charger are ready for safe operation. Skipping preparation can lead to poor charging, damage, or safety hazards.
Check Battery Voltage and Condition
Use a multimeter to measure your battery voltage. A fully charged 12V battery reads between 12.6 and 12.8 volts. Below 12.2 volts indicates a discharged state. Below 6 volts likely means the battery is unrecoverable due to deep sulfation.
Do not charge if the battery is cracked, leaking, bulging, or frozen. A frozen battery must thaw completely before charging. If voltage reads between 6.8 and 10.7V, the battery is severely depleted but may still be revived with extended charging.
Clean Terminals for Better Connection
Corrosion blocks current flow and causes poor charging. Clean both terminals using a wire brush and a paste of baking soda and water. Wipe dry with a clean cloth. Ensure terminals show bright metal free of grease or oxidation before connecting clamps.
Turn Off All Vehicle Systems
Remove the key from the ignition. Turn off lights, radio, and all accessories. For older or sensitive vehicles, consider disconnecting the negative terminal before starting the charging process.
Connect the Charger Safely

Proper connection prevents sparks, reverse polarity damage, and short circuits. These are common causes of charger or battery failure.
Identify Positive and Negative Terminals
Locate the battery positive terminal marked with a plus sign and usually covered by a red cap. The negative terminal is marked with a minus sign and typically has a black cap. If labels are worn, trace the cables. Red leads to positive, black leads to negative.
Attach Clamps in Correct Order
Connect the red clamp to the positive terminal first. Then connect the black clamp to the negative terminal or to an unpainted metal part of the chassis. This chassis ground method works well when the negative terminal is corroded or hard to reach, such as with trunk-mounted batteries.
Ensure clamps are tight and not touching each other or nearby metal. Never let clamps touch during connection because this can create sparks and damage electronics.
Power On and Select Settings
Once connected, power up the charger and choose the right mode for your battery type and charging goal.
Plug In and Power Up
Insert the charger into a 120V AC outlet. Most Schumacher models power on automatically. The display or LED lights activate within seconds. Always plug in after connecting clamps, not before.
Choose Battery Type and Voltage
For smart models like the SC1564, press Mode to cycle through battery types. Options include Standard for flooded lead-acid, AGM, Gel, Lithium on compatible models, and Deep Cycle. Match the setting to your battery chemistry. Using Standard on an AGM battery may undercharge it.
Set voltage to 6V or 12V. Most cars use 12V.
Select Charge Rate
Amperage determines charging speed. Use 2A for maintenance and long-term storage, expecting 1 to 2 days for a full charge. Use 6 to 8A for regular charging, taking 4 to 6 hours. Use 15A for quick recovery, taking 1.5 to 4 hours. Use 30A Boost for dead batteries, taking 30 to 60 minutes. Use 100A Start for engine cranking assist, taking 1 to 2 minutes.
Higher amps mean faster charging, but never exceed battery specifications. Use lower amperage for weak or old batteries.
Start Charging
Automatic models begin charging after a 30-second delay. Manual models require pressing the Start/Stop button to begin. The SC1564 alternates display between voltage, charge percentage, and status icon. A deeply discharged battery may show 1% at 10.7V. This is normal.
Monitor the Charging Process
Stay informed with real-time feedback from your charger display or lights.
Read the Display and Lights
The SC1564 digital display shows voltage, percentage, and status icons. Full charge displays as Fully Charged or 100%. The SC1363 uses LEDs where yellow means charging and green means full. Basic 15A models show yellow or orange during charging, but some users report LEDs staying yellow even when fully charged. Always double-check with a multimeter if possible.
Track Charging Progress
A typical charging timeline on an SC1564 for a deeply discharged battery starts at 10.7V showing 1%. After 2 minutes, voltage reaches 12.0V due to surface charge. At 1.5 hours, charge reaches 20%. At 3.5 hours, charge reaches 77%. After 4 hours, the display resets to 100% and stays there.
Charging slows during the absorption stage. Do not panic if progress seems stalled.
Understand Charging Stages
Smart Schumacher chargers use three-phase charging. The bulk stage applies high current until the battery reaches approximately 80% capacity. The absorption stage holds voltage constant at approximately 14.4V while current tapers off to complete charging. The float stage delivers a small periodic current of 1 to 2A to maintain full charge without overcharging.
Float mode keeps the battery healthy for weeks or months without overcharging.
Complete and Disconnect Properly
Removing the charger incorrectly can cause sparks or damage. Follow the reverse order to stay safe.
Confirm Full Charge
Wait for a green LED if functional, or Fully Charged message on display, or the charger switching to float mode indicated by a pulsing light or reduced current. If in doubt, measure voltage after disconnecting. A full 12V battery should read 12.6 to 13.5V after 30 minutes.
Turn Off and Unplug
Press Stop if available, then unplug from the wall outlet. Never remove clamps while the charger is still powered.
Remove Clamps in Reverse Order
Remove the black negative clamp first. Then remove the red positive clamp second. This prevents accidental grounding through tools or metal surfaces.
Verify and Test After Charging
Do not assume charging is complete just because the light turned green. Confirm success with a voltage check and engine test.
Check Voltage with Multimeter
Wait 30 minutes after disconnection, then test. A reading of 12.6 to 13.5V indicates a fully charged healthy battery. Below 12.4V may indicate internal damage or sulfation.
Test Engine Start
Reconnect the battery if it was removed. Try starting the engine. Smooth cranking indicates a good battery. Clicking or slow turnover indicates a weak battery or another issue.
Model-Specific Tips and Features
Different Schumacher models have unique functions. Know yours to get the most out of the charger.
SC1564: Fully Automatic Charger and Maintainer
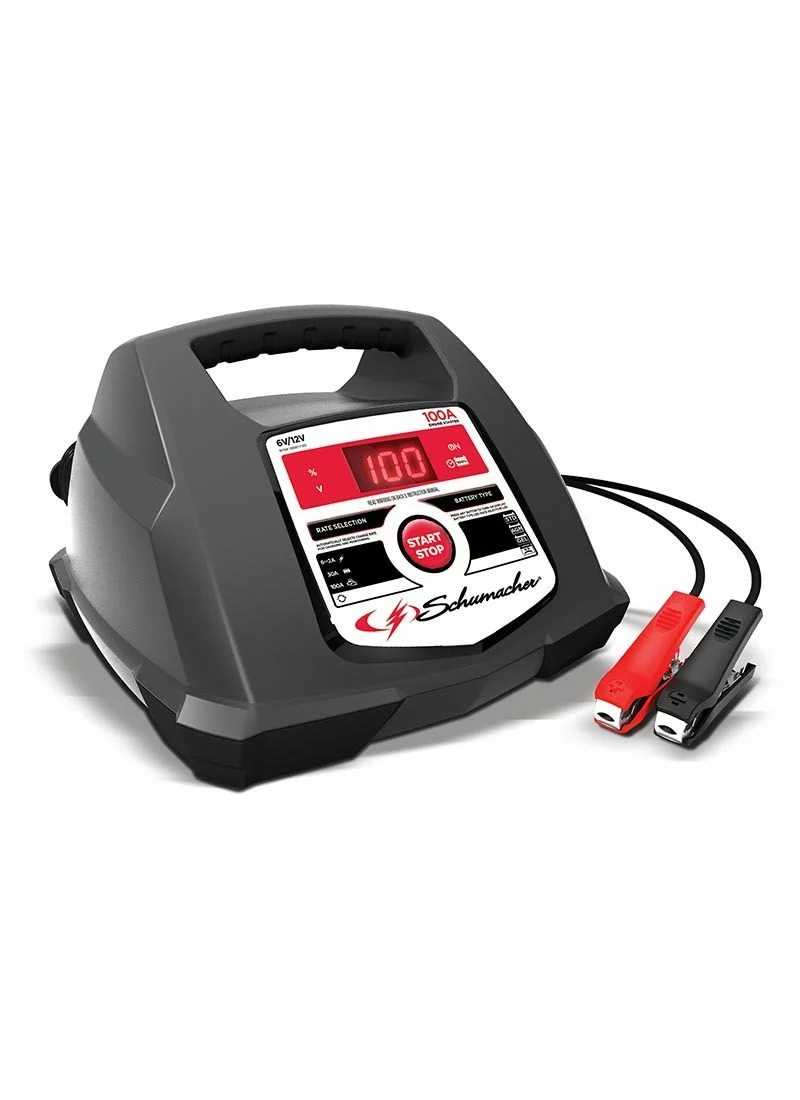
This model handles 6V and 12V batteries. It supports Standard, AGM, Gel, Lithium, and Deep Cycle types. Modes include Auto for adaptive 2 to 6A charging, Boost at 30A for fast recovery, and Start at 100A for engine cranking assist. The smart display shows charge percentage, voltage, and error icons. Safety features include reverse polarity, overheat, and overcharge protection.
This model is ideal for cars, trucks, motorcycles, and boats.
SC1363: 8A Automatic Charger
This model outputs 12V at 8A or 6V at 2A. It weighs only 3.5 pounds, making it lightweight and portable. Safety features include reverse hook-up protection and multi-stage charging. Certifications include UL, ULC, and DOE compliance.
This model works well for hobbyists and home garages.
15A Walmart Model
This basic model outputs 15A on high setting or approximately 3A on low setting. The boat icon indicates high amperage, while the battery icon indicates low. A limitation is that the LED may not change color when fully charged. Despite this, it reaches 13.8V during charging, which is normal and mimics alternator output.
Avoid Common Mistakes
Even experienced users make errors. Here is how to avoid them.
Wrong Polarity Connection
The symptom is the charger not starting, flashing lights, or an unhappy face icon. The fix is to swap clamps so red connects to positive and black connects to negative. Most Schumacher models have reverse polarity protection, so no damage occurs if corrected.
Leaving Trickle Charger On Too Long
The risk is overcharging, electrolyte loss, and reduced battery lifespan. Never leave manual or trickle chargers connected beyond 1 to 2 days. Use automatic chargers with float mode for safe long-term use.
Charging a Frozen Battery
Never charge a frozen battery because it can crack or explode. Wait until the battery fully thaws, then charge slowly.
Troubleshoot Charging Issues
If the charger is not working, diagnose the problem step by step.
No Power or Lights
Check whether the charger is plugged in and whether the outlet is live. Test with another outlet or device. The internal fuse may be blown. Consult the manual.
Not Charging Despite Connection
Check clamp tightness and terminal corrosion. Verify correct polarity. Test the battery. Below 6V may be unrecoverable.
Unhappy Face on SC1564
This icon means poor connection or faulty battery. Clean terminals, reconnect, and test battery health. If persistent, the battery may be sulfated or aged.
Loud Humming Noise
This is normal during 15A or Boost mode because high current causes transformer hum. It is not a defect and stops when charging ends.
Maintain Charger and Battery
Proper care extends the life of both your charger and battery.
Battery Maintenance Tips
Charge the battery every 2 to 3 weeks if the vehicle is not driven. For storage, use float mode or a trickle charger monthly. Store in a cool, dry place because extreme heat kills batteries.
Charger Care
Store the charger dry and indoors. Avoid moisture and freezing temperatures. Clean clamps and casing with a dry cloth. Inspect cables for fraying or cuts. Use built-in cable wrap for neat storage.
Frequently Asked Questions About Schumacher Battery Chargers
Can I use a Schumacher charger on lithium batteries?
Only specific models like the SC1564 support lithium batteries. Most Schumacher chargers are designed for lead-acid batteries only. Always check the manual for compatibility.
How long does it take to charge a car battery?
It depends on charger amperage and battery size. A 15A charger can revive a dead 12V battery in 1.5 to 4 hours. A 2A maintenance charger takes 1 to 2 days.
Can I leave the charger connected overnight?
Automatic chargers with float mode are safe for extended periods. Manual or trickle chargers should not be left connected overnight. Best practice is to disconnect after full charge unless using float mode.
Why won’t my car start after charging?
Possible causes include an old battery over 3 to 5 years old, sulfation from long discharge, alternator failure where the battery drains after starting, or loose or corroded terminals.
Where can I find the user manual?
Download manuals from Schumacher’s website. Model numbers include 0099001932-R0, 0099001932-R1, 0099001939E-R2, and 0099001939E-R3.
How do I extend my charger lifespan?
Store properly in a dry location. Avoid moisture and extreme temperatures. Use with compatible batteries only. Clean clamps regularly.
Key Takeaways for Using Your Schumacher Charger
Using a Schumacher battery charger effectively involves a systematic approach. First, assess battery condition with a multimeter and clean terminals thoroughly. Second, connect red to positive and black to negative or chassis ground. Third, select correct settings for battery type, voltage, and charge rate. Fourth, monitor progress through display or LED indicators. Fifth, wait for full charge confirmation before disconnecting. Sixth, unplug first, then remove clamps in reverse order. Seventh, verify with a multimeter and perform an engine start test.
With proper use, a Schumacher battery charger becomes an essential tool for reviving dead batteries, preventing future failures, and extending battery lifespan. Keep this guide handy, refer to your model’s manual, and charge with confidence.


