
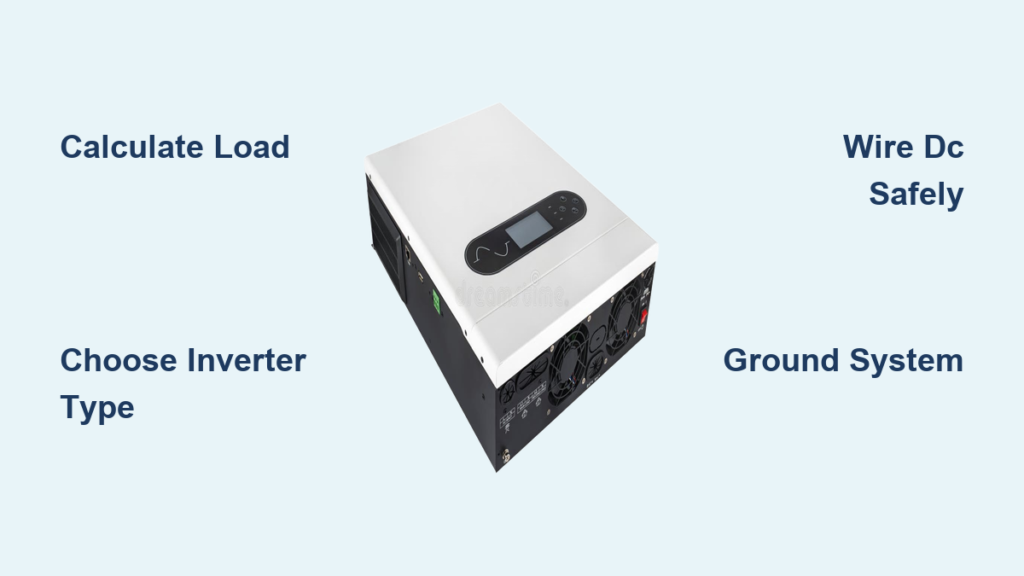
Installing an inverter at home is a practical way to gain energy independence, keep your lights on during outages, and make the most of solar power. Whether you want to backup essential appliances or set up a complete solar system, knowing how to install an inverter at home correctly ensures safety, performance, and years of reliable operation. This guide covers everything you need, from calculating your power needs and selecting the right equipment to wiring, grounding, and testing your system.
Calculate Your Home Power Requirements
Before purchasing any equipment, you must know exactly how much power your household needs. Getting this wrong means either running out of capacity or overspending on an oversized system.
List All Appliances You Want to Power
Start by writing down every device the inverter will run during an outage. Focus on essentials like refrigerators, lights, fans, TVs, routers, and medical equipment. For each appliance, find the running watts and surge watts on the nameplate or in the user manual. Surge watts matter because motors like those in fridges and air conditioners draw two to three times more power when starting up.
Example calculation for a typical home:
Refrigerator uses 200W running but 800W surge
Ten LED lights use 100W total
55-inch TV uses 120W
Router uses 15W
Your continuous load is 435W, but your maximum surge reaches 1065W
Choose an inverter with a continuous rating 20 to 25 percent above your total load. For the example above, a 1.5 kVA to 2 kVA pure sine wave inverter handles the job properly.
Match Inverter Size to Your Use Case
Small inverters around 800 to 1000 VA work for basic lighting, phone charging, and small fans. Medium inverters between 1.5 and 3 kVA handle fridges, TVs, lights, and Wi-Fi routers. Large inverters from 3 to 10 kVA power entire homes including air conditioners and water heaters.
Always prioritize pure sine wave inverters for modern electronics. Modified sine wave inverters can damage laptops, medical devices, and other sensitive equipment.
Choose the Right Inverter Type
Selecting the correct inverter type directly impacts your system’s efficiency and reliability. The wrong choice leads to poor performance or compatibility issues.
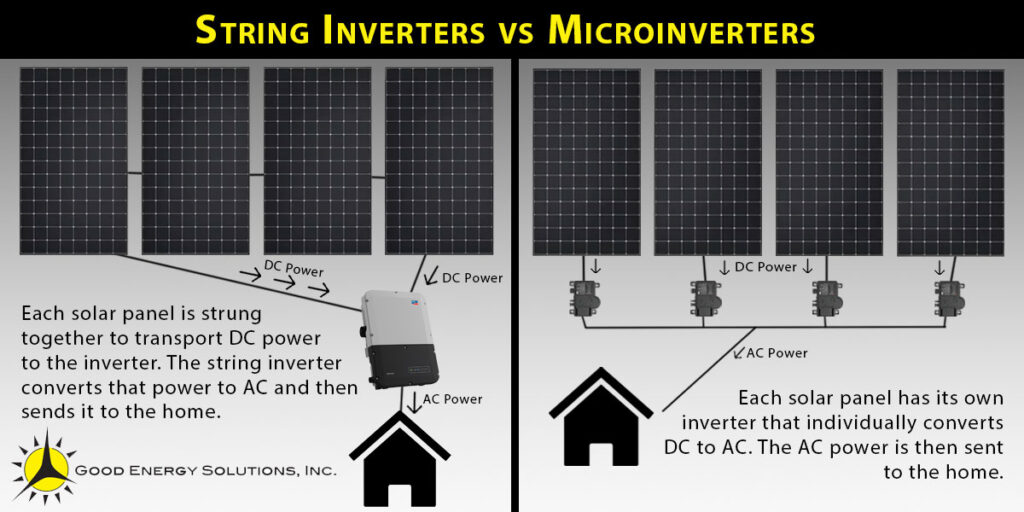
String Inverters Work Best for Simple Roofs
String inverters connect multiple solar panels in series. They suit homes with unshaded, uniform roof layouts where all panels receive similar sunlight. These units cost less and install simply, but one poorly performing panel reduces the entire string’s output.
Microinverters Handle Complex Roofs
Microinverters attach to each individual solar panel, converting DC to AC right at the source. They maximize energy harvest in partial shade and provide panel-level monitoring. Expect higher upfront costs and more components to maintain.
Hybrid Inverters Combine Best of Both Worlds
Hybrid inverters support grid-tied operation while integrating battery backup. Choose this type if you want energy storage, outage protection, or the ability to shift usage to peak hours. These units handle charging, discharging, and managing power flow between solar, battery, and grid.
Plug-and-Play Inverters Suit Urban Renters
Balcony or plug-and-play inverters come pre-configured for one to two solar panels. In countries like Germany, models up to 800W plug into standard outlets without permits. These work perfectly for renters or anyone wanting minimal-barrier solar entry.
Size Your Battery Bank Correctly
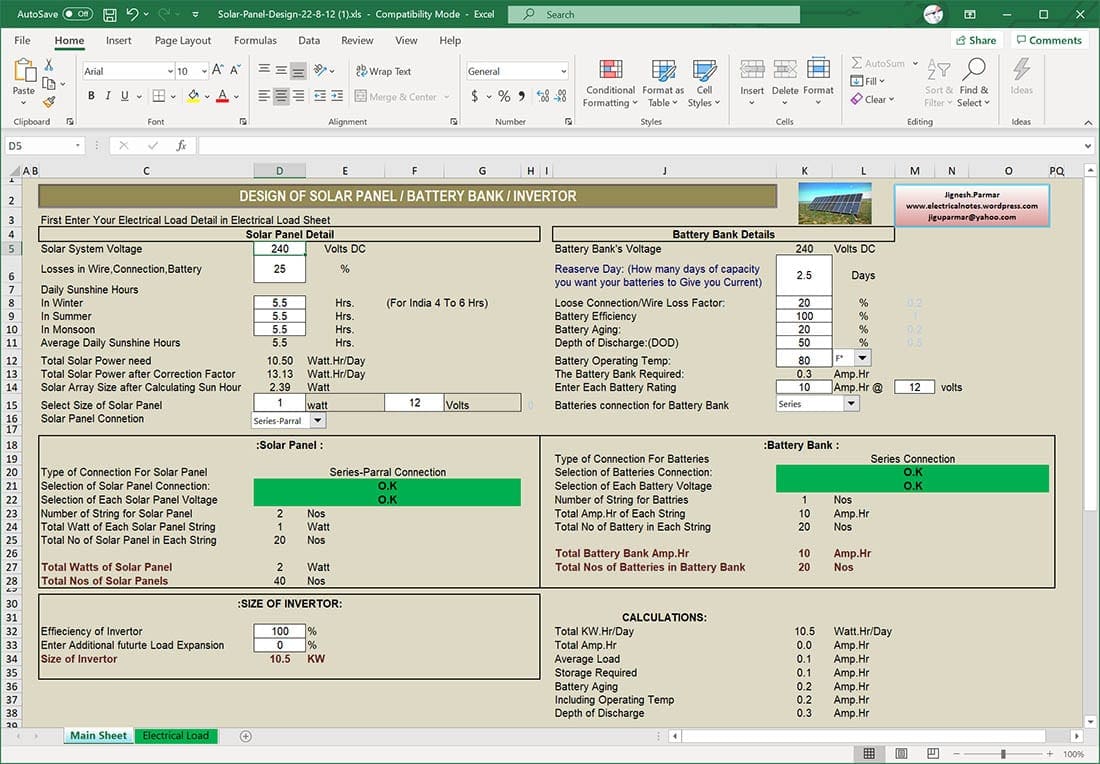
Battery capacity determines how long your home runs during an outage. Undersizing leaves you in the dark quickly; oversizing wastes money.
Use the Backup Time Formula
Calculate battery capacity using this formula: multiply your total load in watts by desired backup hours, then divide by battery voltage times inverter efficiency (use 0.9).
For a 500W load needing 4 hours of backup on a 24V system: 500 times 4 equals 2000, divided by 24 times 0.9 equals approximately 93 Ah. Round up to a 100Ah/24V battery or use two 100Ah/12V batteries connected in series.
Pick Battery Chemistry Wisely
Lead-acid batteries (AGM or Gel) cost less but require ventilation and regular maintenance. Lithium batteries (LiFePO4) last longer, need zero maintenance, and handle deeper discharges, though they cost more upfront. Never use car batteries for home backup systems. They are not designed for deep cycling and fail within weeks.
Select the Ideal Installation Location
Where you mount the inverter affects performance, safety, and lifespan. Poor placement causes overheating, efficiency loss, and premature failure.
Prioritize Ventilation and Temperature
Inverters generate significant heat during operation. Install in a dry, shaded area with at least 30 centimeters (12 inches) of clearance on all sides for airflow. Avoid enclosed closets, direct sunlight, or areas above 50 degrees Celsius. Most inverters rely on bottom or rear fans for cooling, so mounting vertically is critical.
Choose Accessible Indoor Locations
Garages, utility rooms, and basements offer the best conditions. These spaces stay cool, dry, and allow easy access for monitoring and maintenance. If outdoor mounting is necessary, use an IP65-rated weatherproof enclosure and install under a roof overhang to shield against rain and dust.
Minimize Cable Runs
Place the inverter close to your battery bank to reduce DC voltage drop. Position it near your main electrical panel for easy AC integration. If using solar input, keep wiring distance short between panels and inverter. Shorter cables mean less energy loss and lower fire risk.
Gather Required Tools and Materials
Having the right tools ensures a smooth, safe installation. Missing equipment forces repeated trips to the hardware store and increases frustration.
Essential Tools Checklist
You need screwdrivers (Phillips and flathead), an electric drill with hammer function for concrete mounting, cable strippers and crimpers, a multimeter for testing voltage and continuity, a clamp meter for measuring live current, insulated wrenches and sockets, and a level for straight mounting.
Required Components
Collect your mounting rack (steel or aluminum, rated for inverter weight), UV-resistant DC cables (4 to 6 mm²), AC cables (2.5 to 6 mm² depending on current), MC4 connectors for solar panel links, DC and AC disconnects, fuses and fuse blocks especially near the battery, a grounding kit with 16 mm² copper wire and grounding rod, conduit and cable glands for outdoor protection, and personal protective equipment including insulated gloves and safety glasses.
Label every cable clearly at both ends before installation begins.
Mount the Inverter Securely
A stable, level mount prevents damage and ensures proper cooling. Loose mounting creates vibration, noise, and potential failure.
Follow Mounting Steps Precisely
Hold the inverter against the wall and mark screw hole positions. Drill pilot holes using appropriate bits (masonry bit for concrete, wood bit for timber). Insert wall anchors if needed. Attach the mounting bracket and verify it is level using your level tool. Hang the inverter on the bracket and secure with screws.
Most inverters must mount vertically because internal fans blow upward or downward. Laying the unit flat traps heat and causes automatic thermal shutdown.
Use stainless steel screws and anti-vibration pads when mounting on metal surfaces to prevent corrosion and reduce noise.
Wire the DC Side Safely
DC connections carry high current and pose arc flash risks. Even in low light, solar panels generate dangerous voltage. Treat every wire as live until you verify otherwise.
Connect Solar Panels Properly
For string inverters, wire panels in series using MC4 connectors (positive to negative). Run cables through UV-resistant conduit from the array to the inverter. Install a DC isolator switch between panels and inverter for safe emergency shutdown.
For microinverters, attach one unit to each panel and connect the AC output directly to your household wiring through a junction box.
Cover solar panels with a tarp during installation to prevent live DC generation.
Hook Up Batteries Last
Use thick cables (25 to 50 mm²) to handle high current safely. Install an inline fuse within 18 inches of the battery terminal to prevent fires if a short occurs. Connect the negative cable first, then the positive cable, to reduce spark risk. Use red for positive and black for negative, labeling both clearly.
Never connect the battery before completing all other wiring. This final connection should be your last step.
Connect the AC Output
How you link the inverter to your home electrical system depends on your specific setup and local regulations.
Plug-and-Play Setup for Balcony Systems
Use a pre-wired inverter with a Schuko (CEE 7/7) plug. Plug into a dedicated, grounded outlet on its own circuit. Ensure the outlet has RCD or GFCI protection. Do not overload the circuit, keeping total draw under local limits (typically 800W in Germany).
No permits are needed if you stay within legal output limits.
Hardwire to Main Panel for Larger Systems
Turn off the main power supply and apply lockout/tagout procedures. Install a double-pole circuit breaker in your distribution board. Run AC cable from the inverter to this breaker using 4 mm² or larger wire. Connect the live wire to the breaker, neutral to the neutral busbar, and ground to the earth busbar. Label the circuit clearly as “Solar Inverter.”
Follow your local electrical code (NEC in the USA, IEC 60364 in Europe). Permits and inspections are typically required for grid-tied systems.
Ground the Entire System
Proper grounding prevents electric shock, equipment damage, and fire from surge events. Skipping this step is dangerous and often illegal.
Install a Single-Point Ground System
Drive an 8-foot (2.4 meter) copper grounding rod into soil near the inverter. Connect the inverter’s grounding terminal to the rod using 16 mm² bare copper wire. Bond all metal parts including the mounting rack, conduit, and panel enclosures to the same ground point. Use corrosion-resistant clamps and lugs.
Never create multiple ground paths, which cause ground loops and interference. Test ground resistance annually; it should remain below 5 ohms.
Power Up and Configure Settings
With wiring complete, configure the inverter for your region and system requirements. Proper configuration prevents grid code violations and optimizes performance.
Turn On in the Correct Sequence
First verify all connections are tight and properly insulated. Turn on solar input by uncovering panels. Enable battery connection if applicable. Power on the inverter using the front switch. Check the display for error codes or warnings.
Set Critical Parameters
Use the inverter interface or mobile app to configure the grid code for your country (VDE-AR-N 4105 for Germany, IEEE 1547 for USA). Select output mode (grid-tied, off-grid, or hybrid). Set battery parameters including charging voltage and low-voltage disconnect. Configure start and stop behavior for automatic restart after grid failure. Enable monitoring features for data logging and remote alerts.
Always save settings after configuration.
Test System Performance Thoroughly
Verification ensures safety, efficiency, and code compliance before relying on your system.
Perform Key Checks
Test AC output voltage with a multimeter expecting 230V plus or minus 5 percent (or 120V in the USA). Measure current under load using a clamp meter, which should match appliance draw. Check insulation resistance using a megger, expecting more than 1 megohm between live parts and ground. Test power flow by plugging in a heater load and verifying the inverter powers it without tripping. Simulate grid failure on hybrid systems to confirm automatic disconnection and home backup operation.
If the inverter trips or shows errors, consult the manual or reset and retest.
Troubleshoot Common Issues
Even well-installed systems develop problems over time. Knowing how to diagnose quickly saves time and money.
Fix Inverter Not Starting
Check battery voltage, which should remain above 11V for a 12V system. Inspect all fuses and replace any blown ones. Verify DC input from solar panels shows voltage under light conditions.
Resolve Error Codes
E01 indicates overvoltage, so reduce input or check MPPT settings. E02 means overheating, requiring better ventilation. Grid Lost errors mean reconfigure grid code or check utility power supply.
Address Low Output
Dirty solar panels reduce efficiency by up to 25 percent, so clean them regularly. Shorten DC cables to reduce voltage drop. Eliminate shading on panels from trees or debris.
Stop Frequent Tripping
Reduce load and ensure you are not exceeding inverter capacity. Check for short circuits in wiring connections. Verify the inverter is not overheating due to poor ventilation.
For persistent issues, contact a certified technician, especially for grid interconnection faults.
Maintain for Long-Term Reliability
Regular upkeep prevents failures and extends system life beyond a decade.
Monthly Tasks
Perform visual inspection looking for loose wires, corrosion, or physical damage. Check the display for voltage, load, and error readings.
Quarterly Actions
Clean the exterior with a dry cloth. Clear dust from cooling vents and fans. Inspect battery terminals and clean any corrosion with baking soda and water solution.
Annual Maintenance
Measure system voltage and current using a multimeter. Test grounding resistance keeping it below 5 ohms. Update inverter firmware through the manufacturer’s website. Inspect all cables and conduit for wear or damage.
Battery Care Specifics
Lead-acid batteries need distilled water top-ups for flooded types and monthly equalization charges. Lithium batteries (LiFePO4) require no maintenance but avoid discharging below 20 percent state of charge. Store all batteries in cool, dry places.
Know When to Call a Professional
Some tasks exceed DIY safety and legal limits. Recognizing your boundaries prevents injury and code violations.
Seek Expert Help For
Designing large solar or hybrid systems requires engineering expertise. Applying for permits and utility interconnection involves legal complexity. Hardwiring into the main electrical panel must be done by licensed electricians in most jurisdictions. Installing high-current battery banks poses serious safety risks. Diagnosing persistent faults or firmware errors may require manufacturer authorization.
In most countries, only licensed electricians can legally connect systems to the grid or work on main panels. Even if you handle pre-wiring yourself, have a certified installer finalize grid connections to maintain warranty and code compliance.
Follow Wiring Standards and Safety Rules
Adhering to electrical codes prevents hazards and ensures system integrity. Never bypass safety features.
Use Correct Cable Sizes
For 10A current, use 14 AWG (2.5 mm²) copper wire. For 20A, use 12 AWG (4 mm²). For 30A, use 10 AWG (6 mm²). For 50A, use 6 AWG (16 mm²). For 100A, use 2 AWG (35 mm²). Always oversize cables for long runs to prevent voltage drop exceeding 3 percent.
Enforce Critical Safety Practices
De-energize all sources before working. Verify no voltage exists using a multimeter. Wear insulated gloves and safety glasses at all times. Use insulated tools to prevent accidental shorts. Never work alone on high-voltage systems.
Never back-feed the grid without proper transfer switches or anti-islanding protection.
Key Takeaways for Installing Your Home Inverter
Installing an inverter at home boosts energy resilience and efficiency when done correctly. Calculate your power needs accurately and oversize your inverter by 20 to 25 percent to handle surge loads. Choose between string, microinverter, hybrid, or plug-and-play types based on your roof layout and backup requirements. Position the inverter in a cool, ventilated area close to batteries and your electrical panel. Wire DC connections first, then AC, and always ground the entire system before testing. For plug-and-play balcony systems, DIY installation is safe within legal limits. For full solar or hybrid setups, combine your planning and preparation with professional installation for grid connection, permitting, and final safety verification. Follow manufacturer guidelines precisely, perform regular maintenance, and your inverter will deliver reliable power for over a decade.
Frequently Asked Questions About Installing an Inverter at Home
Can I install an inverter myself, or do I need an electrician?
Small plug-and-play inverters up to 800W can often be self-installed without permits in many regions. However, hardwiring to your main electrical panel or installing grid-tied solar systems typically requires a licensed electrician for safety and code compliance.
How do I calculate what size inverter I need?
Add up the running watts of all appliances you want to power simultaneously. Then add the highest surge wattage from motor-driven devices. Choose an inverter with a continuous rating 20 to 25 percent above your total.
What is the difference between pure sine wave and modified sine wave inverters?
Pure sine wave inverters produce AC power identical to utility grid power, making them safe for sensitive electronics, medical devices, and modern appliances. Modified sine wave inverters are cheaper but can cause interference or damage to sensitive equipment.
How long will my battery backup last during a power outage?
Battery runtime depends on your total load and battery capacity. Using the formula: (battery capacity times voltage times inverter efficiency) divided by total watts gives you approximate hours of backup.
Do I need permits to install a home inverter system?
Permit requirements vary by location and system size. Small plug-and-play systems often require no permits. Grid-tied solar systems typically need permits, inspections, and utility approval for connection.
How often should I maintain my inverter system?
Perform visual inspections monthly, clean cooling vents quarterly, and conduct comprehensive annual testing including voltage checks, grounding tests, and firmware updates. Battery maintenance varies by chemistry.


