Your phone won’t charge properly. The cable wiggles in place. You get intermittent connections or error messages. Before you assume the battery or charger is broken, consider the real culprit: a dirty charging port. Over time, dust, lint, and debris build up in the tiny opening where your cable plugs in, especially if you carry your phone in pockets or bags. This buildup blocks full insertion and disrupts electrical contact. According to repair experts, over half of “faulty charging” issues are actually caused by something simple: a grimy port. The good news? With the right tools and method, you can fix it yourself in minutes.
This guide shows you how to clean your phone’s charging port safely and effectively without damaging delicate internal components. We’ll walk you through step-by-step cleaning methods, from basic dust removal to tackling sticky residue or corrosion. You’ll learn which tools to use and which to avoid, how to inspect the port like a pro, and how to prevent future buildup.
Essential Cleaning Tools
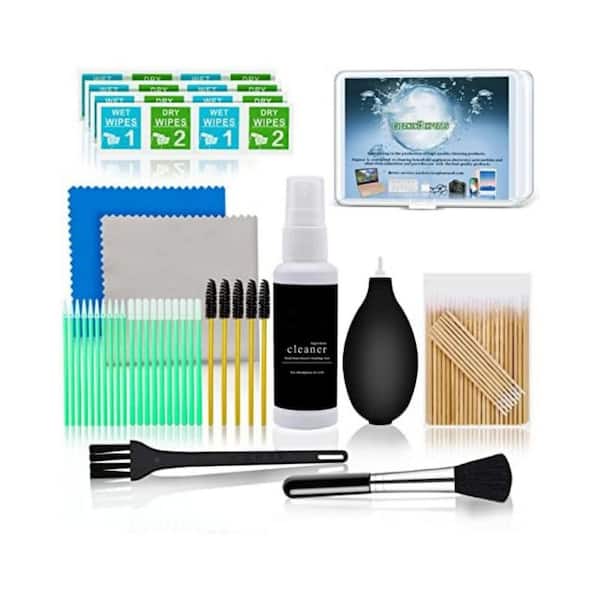
Using the right tools is critical to avoid damaging your phone’s sensitive charging port. Always opt for non-conductive, soft, and precise instruments.
Safe Tools for Delicate Ports
- Compressed air (canned or bulb-style): Removes loose debris without contact
- Wooden or plastic toothpick: Gently dislodges compacted lint
- Soft-bristled brush (makeup or clean toothbrush): Sweeps away particles
- Microfiber cloth: Wipes exterior without scratching
- Flashlight: Reveals hidden dirt and alignment issues
- Plastic floss pick: Flat edge cleans both sides of USB-C contacts
- Trimmed zip tie: Flexible, non-conductive scraping tool
- 99% isopropyl alcohol: Dissolves gunk, only when powered off
- SIM tool (plastic): Works well for narrow Lightning or Pixel ports
Pro Tip: Shine a flashlight at an angle into the port. If you see dark clumps or fibers, cleaning will likely solve your charging issue.
Household Alternatives (Use with Caution)
If specialty tools aren’t available:
- Dry cotton swab: Lightly dab, don’t push deep
- Plastic eraser: Rub gently on port edges to lift debris
- Pen cap (plastic): Scrape lint from rim
- Straw plus breath: Gentle airflow alternative (avoid moisture)
- Adhesive tape: Press lightly to lift surface dust
Tools That Damage Ports

Some common items seem helpful but pose serious risks. Avoid them entirely.
High-Risk Items to Skip
| Tool | Why It’s Dangerous |
|---|---|
| Metal objects (paperclips, needles) | Can short-circuit or bend internal pins |
| Cotton swabs with loose fibers | Leave cotton bits behind, worsening blockage |
| Water or household cleaners | Cause corrosion or trigger moisture sensors |
| Blowing with your mouth | Adds moisture that damages electronics |
| Vacuum with strong suction | May dislodge internal components |
| Hairdryer or heat | Risk of melting plastic or warping parts |
| Knives or scissors | High chance of irreversible physical damage |
Warning: One user damaged their microphone PCB by using a knife near the port. Metal tools increase the risk of shorts, especially on exposed USB-C pins.
Step-by-Step Cleaning Methods
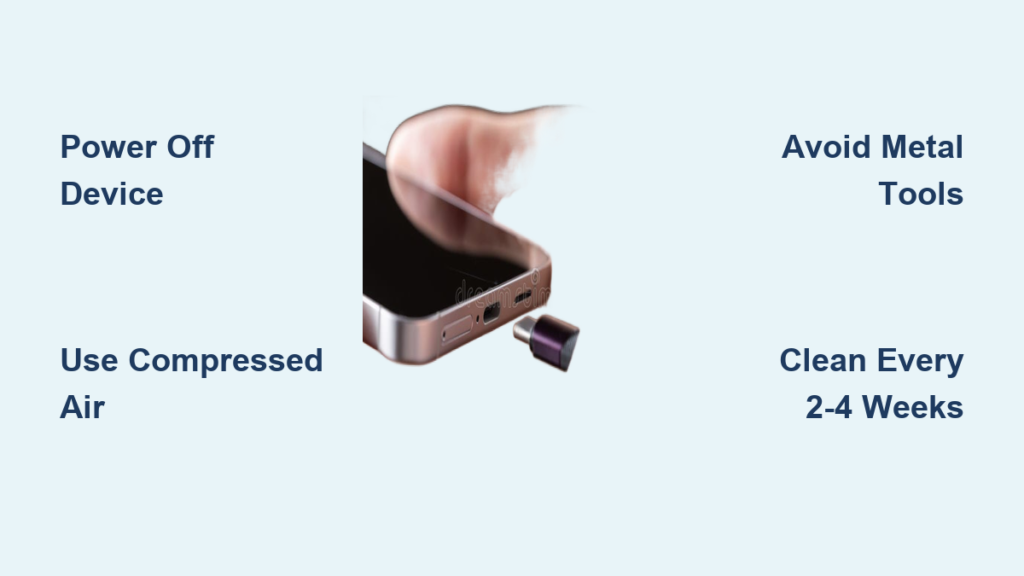
Start with the gentlest method and escalate only if needed. Always power off your device first.
Basic Dust Removal (Every 2-4 Weeks)
For routine maintenance when charging slows or feels loose.
- Power off your phone: Prevents electrical shorts during cleaning.
- Inspect port with a flashlight: Look for visible lint, discoloration, or partial blockage.
- Use compressed air: Hold can upright; use 1-2 short bursts from 1 inch away.
- Brush gently with soft bristles: Use circular motions, don’t force bristles deep.
- Wipe exterior with microfiber: Removes oils and smudges.
- Test charging: Plug in cable. If it clicks and charges steadily, you’re done.
Time Estimate: 3-5 minutes. Ideal for weekly upkeep.
Intermediate Lint Cleaning (Stubborn Buildup)
When basic steps fail and the cable doesn’t seat fully.
- Power off device.
- Use wooden toothpick: Gently scrape along port edges and bottom. Use minimal pressure.
- Insert plastic floss pick or zip tie: Slide along both sides of the central “tongue” in USB-C ports.
- Blow out loosened debris with air.
- Wipe with microfiber.
- Test charging.
User Feedback: Many report pulling out “fuzzy logs” of lint after months of buildup. A restored “click” means full contact is back.
Advanced Cleaning (Sticky Residue or Corrosion)
Only for gummy deposits (dried soda) or suspected oxidation.
- Power off phone.
- Apply 99% isopropyl alcohol: Dampen a toothpick tip, never pour. Touch to sticky areas.
- Scrape gently with plastic tool: Let alcohol dissolve grime before removing.
- Blow with air to dry and clear.
- Optional: Use Deoxit D100L for corrosion (electronics-safe).
- Wait 30+ minutes for full drying.
- Test charging.
Caution: Avoid liquids on non-water-resistant phones. IP67/IP68 models tolerate minor exposure but still need full drying.
Cleaning Speaker and Mic Ports
Debris in audio ports causes muffled sound or failed voice calls.
Where to Look
- iPhone: Bottom (left/right of charger), top earpiece
- Samsung: Bottom, top, and side microphone grilles
- Other Androids: Check near charging port and front bezel
Safe Cleaning Steps
- Power off device.
- Brush with soft bristles: Use light strokes across grilles.
- Use compressed air: Short bursts at a slight angle.
- Apply tape method: Press sticky side lightly over grille, then peel off to lift dust.
- Remove case and clean separately: Cases often trap and transfer debris.
Note: Some screen protectors block top speakers. Reposition if sound is muffled.
Wet Charging Port? Here’s What to Do

Moisture triggers false error messages and can cause real damage.
Immediate Actions
- Power off immediately.
- Do not plug in any cable.
- Dry naturally in warm, dry air: Place on a table for 24-48 hours.
- Use a fan (no heat): Speeds evaporation safely.
- Avoid rice, hairdryers, or microwaves: Rice is ineffective; heat risks damage.
- Test only after full drying.
Myth Busting: “Water detected” alerts are not always from recent exposure. Residue or condensation can trigger sensors. Drying usually clears it.
Prevent Future Buildup
Keep your port clean longer with these simple habits.
Protective Accessories
- Phone cases with port covers (OtterBox Defender, UAG)
- USB-C or Lightning dust plugs (silicone caps)
- Recessed port designs (some rugged cases)
- Temporary tape cover (when traveling in dusty areas)
Smart Usage Tips
- Store phone in a dedicated inner pocket or pouch
- Avoid eating or drinking near your device
- Use high-quality cables that fit snugly, no wobbling
- Clean port every 2-4 weeks
- Charge in clean, dry environments
Pro Insight: Users who clean monthly report fewer cable frays and faster charging over time.
When to See a Professional
DIY cleaning works in most cases, but not all.
Signs You Need Expert Help
- Charging fails after thorough cleaning
- Port feels loose or wobbly
- Visible bent or broken pins
- Corrosion persists despite alcohol treatment
- Device doesn’t recognize any cables or accessories
Trusted Repair Options
- Apple Store or authorized provider (for iPhones)
- Samsung Service Centers (for Galaxy devices)
- uBreakiFix, Best Buy, or local certified shops
Expert Advice: Many repair stores offer port cleaning for $10-$25. It’s worth it if you’re unsure. Better than risking $800 on a damaged phone.
Device-Specific Tips

Different ports need slightly different approaches.
iPhone (Lightning Port)
- Use wooden toothpick or plastic SIM tool
- Avoid metal. Pins are fragile
- Apple recommends a dry, soft brush
- Use wireless charging (iPhone 8+) as backup
Android (USB-C Port)
- Wider opening collects more lint
- Clean both sides of the central “tongue”
- Plastic floss picks work better than cotton swabs
- Some users use safety pins (not recommended)
Tablets and iPads
- Same methods apply
- Larger ports may trap more debris
- Side-mounted speakers also need cleaning
Benefits of Regular Cleaning
Maintaining a clean port isn’t just about charging. It boosts overall performance.
Long-Term Advantages
- Restores fast charging speeds
- Prevents data sync errors
- Reduces wear on cables
- Extends phone lifespan
- Improves speaker and mic clarity
- Avoids $50-$150 repair bills
User Result: One Pixel XL owner pulled out so much lint it looked like a “mini beard.” Charging returned instantly.
Best Practices Checklist
Follow these do’s and don’ts for safe, effective cleaning.
Do:
- Power off before cleaning
- Use non-conductive tools (plastic, wood)
- Inspect with a flashlight first
- Clean every few weeks
- Use compressed air for routine upkeep
- Allow full drying after liquid use
- Consider wireless charging to reduce port wear
Don’t:
- Use metal objects (pins, tweezers)
- Insert cotton swabs deeply
- Apply water or glass cleaner
- Blow into port with your mouth
- Force cables into a blocked port
- Use heat to dry a wet phone
- Ignore recurring charging issues
Frequently Asked Questions About Cleaning Phone Charger Ports
Why does my phone stop charging even though the cable fits?
Dust and lint accumulate in the charging port over time, especially if you carry your phone in pockets or bags. This debris blocks full cable insertion and prevents proper electrical contact. Cleaning the port often restores charging functionality.
Can I use a paperclip to clean my charging port?
No. Metal objects like paperclips can bend internal pins, cause short circuits, or damage sensitive components. Always use non-conductive tools like wooden toothpicks, plastic floss picks, or compressed air.
How often should I clean my phone’s charging port?
Clean your charging port every 2-4 weeks as routine maintenance. Clean more frequently if you carry your phone in dusty environments or pockets where lint accumulates quickly.
Is it safe to use isopropyl alcohol on my charging port?
Yes, 99% isopropyl alcohol is safe when used correctly. Apply a small amount to a toothpick or cloth, never pour it directly. Always power off your device first and allow 30+ minutes to dry before charging again.
Why does my phone say “liquid detected” when the port is dry?
Moisture sensors can trigger from residue, condensation, or even humidity. The port may not actually be wet. Allow the device to dry fully in room temperature air for 24-48 hours before testing again.
What should I do if cleaning doesn’t fix my charging issue?
If cleaning fails to restore charging, inspect the port for visible damage like bent pins. If damage is present or the port feels loose, visit a professional repair service rather than attempting further DIY methods.
Key Takeaways for Cleaning Your Phone Charger Port
Regular cleaning keeps your phone working like new. Think of it as maintenance, just like wiping the screen or updating software. With the right tools and habits, you’ll avoid most charging frustrations and extend your device’s life. Always use non-conductive tools like wooden toothpicks, plastic floss picks, and compressed air. Avoid metal objects, cotton swabs, and liquids that could cause damage. Power off your device before cleaning and allow full drying time if any moisture is involved. Clean your port every 2-4 weeks to prevent buildup and maintain fast, reliable charging. When in doubt, skip the DIY and visit a professional. Your phone’s tiny port deserves big care.