
You’re stuck with a dead Ryobi 40V battery and no charger in sight. Maybe you lost it, maybe it failed, but your job is not waiting. The good news: you can charge a Ryobi 40V battery without the original charger, though it requires technical know-how, the right tools, and strict safety practices.
Lithium-ion batteries like the Ryobi 40V are not simple power packs. They are smart systems with built-in protection called a Battery Management System (BMS). Attempting to charge them incorrectly risks permanent damage, fire, or voiding any remaining warranty. This guide walks you through five proven methods to get your tools running again safely.
Charge With a Bench Power Supply

Using a bench power supply is the most precise way to charge a Ryobi 40V battery without its OEM charger. This method gives full control over voltage and current, mimicking professional charging protocols.
Activate the T1 Pin First
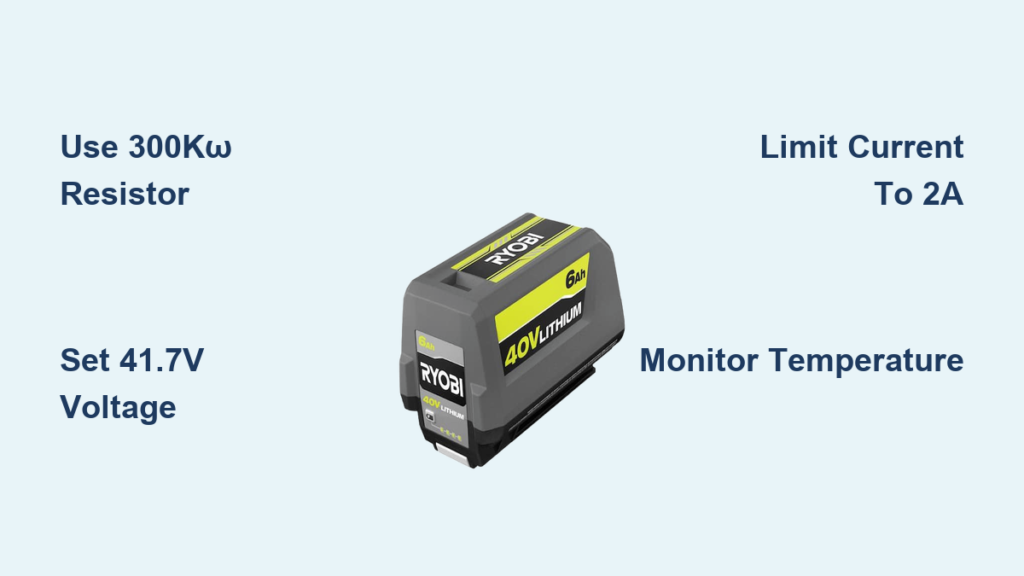
Before applying power, you must activate the battery BMS by connecting a 300 kΩ resistor from the positive terminal to the T1 pin. Without this, the battery will block all charging, even if correct voltage is applied.
The T1 pin is Ryobi’s proprietary handshake signal. The BMS checks for this resistance to confirm a legitimate charger is connected.
Use a 1/4W or higher resistor. Secure connections with spade clips or solder. Leave the resistor in place during the entire charge process.
Set Correct Voltage and Current
Configure your adjustable DC power supply as follows.
For voltage, use 41.7V for 10S (most common 40V packs) or 46.2V max for 11S configurations.
For current limit, start at 1A to 2A. Never exceed 0.5C (for example, 2A for a 4Ah battery).
Ensure the supply is in CC/CV (Constant Current / Constant Voltage) mode.
Connect and Monitor Charging
Attach the red positive lead to the battery positive terminal. Attach the black negative lead to the battery negative terminal. Power on the supply.
Charging begins in CC mode. Current stays steady while voltage climbs. Once target voltage is reached, it switches to CV mode and current tapers down.
When current drops to 10 to 20 percent of the set value (for example, 0.1 to 0.2A), charging is complete.
Never leave the battery unattended. Check battery temperature every 10 to 15 minutes. If the battery feels warm, stop immediately.
Solar Charging With MPPT Controller
For off-grid users, solar-powered charging offers independence from wall outlets, but direct panel-to-battery connection is dangerous. A regulated system is essential.
Required Setup
You will need a solar panel (150W plus recommended, 120W minimum), an MPPT charge controller that supports 48V output (such as EPEVER, Renogy, or Victron), a 300 kΩ resistor, and DC output cables with secure connectors.
Configure MPPT Output
Set your MPPT controller to deliver 41.7V (ideal for 10S) or 46.2V (for 11S). Current should be limited to 2A or less.
Some controllers allow custom lithium profiles. Use them if available.
Connect Battery Safely
Install the 300 kΩ resistor between the positive terminal and T1. Connect the battery to the MPPT output, positive to positive and negative to negative. Enable charging.
Use a 3D-printed adapter (available on Thingiverse) to secure terminals and embed the resistor. This prevents shorts and simplifies repeat use.
Users have successfully charged Ryobi 40V batteries using Victron SmartSolar and Megasolar MPPT units. Efficiency is high and no AC conversion is needed.
Power the Original Charger Off-Grid

Instead of bypassing the OEM charger, use it and power it from alternative sources. This method preserves all factory safety features.
Use Inverter With Solar Battery Bank
Connect a pure sine wave inverter (200W minimum) to a 12V battery bank. Plug the original Ryobi 40V charger into the inverter. Run the system from solar-charged batteries.
Ryobi 40V chargers draw approximately 90W. A 150W plus solar array is needed for reliable operation.
This approach gives you full BMS communication, overheat protection, and no risk of incorrect voltage. The disadvantage is efficiency loss of 15 to 20 percent due to DC to AC to DC conversion.
DC-DC Boost to Power Charger Internally
More advanced users can cut the AC plug off the original charger and feed DC directly into its input circuit.
Remove the AC plug and expose the internal wires. Connect to a boost DC-DC converter or MPPT solar controller. Set output to 41.7V DC. Power the charger electronics directly.
This avoids inverter losses and keeps OEM safety intact. Confirmed by user mountainbuck1 using an MPPT Boost Controller with 24V to 72V input.
Use a Programmable CC/CV Module

Low-cost buck-boost modules can act as mini chargers, but only high-quality ones should be used.
Choose the Right Module
Recommended modules include MT-50, XL4015, or LM2596-based CC/CV modules. Rated for 50W to 150W depending on battery size. Must have stable voltage and current regulation.
Avoid cheap, unbranded modules. They often fail under load.
Wiring and Settings
Attach the 300 kΩ resistor to the T1 pin. Wire module output to battery terminals. Adjust settings to CV of 41.7V (10S) or 46.2V (11S) and CC of 1 to 2A based on battery capacity.
Use a multimeter and clamp meter to verify output before connecting.
Poor regulation can cause overvoltage or thermal runaway. Always monitor the first few charges closely.
Revive a Dead Ryobi 40V Battery
If your battery has been stored too long, its voltage may have dropped below 30V, triggering BMS lockout. It will not charge even with the right setup.
Check Voltage First
Use a multimeter to measure battery voltage. If below 30V, the BMS is likely in sleep mode. If reading 0V, the pack may be permanently damaged.
Jump-Start With Good Battery
Take a known working 40V Ryobi battery. Connect it in parallel, positive to positive and negative to negative. Wait 5 to 10 minutes for charge transfer. Disconnect and attempt normal charging.
This often wakes up the BMS and restores function.
Alternative Low-Current Wake-Up
Set power supply to 41.7V with current limited to 0.5A. Apply for 10 to 15 minutes. Gradually increase voltage until BMS activates. Resume normal CC/CV charging.
Multiple users have revived bricked 40V batteries using this method.
Why the 300 kΩ Resistor Is Critical
You cannot skip the resistor. It is the key to unlocking the BMS.
How the T1 Pin Works
The original Ryobi charger sends a signal through the T1 pin to verify compatibility. The BMS expects a 300 kΩ resistance between positive and T1.
No signal means no charging. Wrong resistance means the BMS ignores input. Only 300 kΩ enables charge mode.
Testing confirmed that only with 300 kΩ did charging begin. Lower values used on 18V models do not work for 40V batteries.
This resistor is your digital key. Without it, the battery stays locked.
Safety Rules You Must Follow
Lithium-ion batteries demand respect. One mistake can lead to fire or explosion.
Non-Negotiable Safety Practices
Never exceed 4.2V per cell. 46.2V is the absolute maximum. Always limit current because unregulated current kills cells. Charge on a non-flammable surface such as stone, metal, or sand tray. Use a LiPo charging bag as backup containment. Monitor temperature and stop if the battery warms up. Avoid damaged or swollen batteries and dispose of them properly.
BMS Is Not Foolproof
While the BMS protects against over-discharge and shorts, it cannot prevent all failures, especially when voltage is too high, the T1 pin is not activated, or the supply is unstable.
Abuse can permanently lock the BMS. Once locked, recovery may be impossible.
When DIY Is Not Worth the Risk
If you are not experienced with electronics, safer alternatives exist.
Use a Compatible 40V Charger
Third-party 40V lithium chargers (for example, EGO or Greenworks) may work if output voltage matches (41.7V to 46.2V), polarity is correct, and the connector fits securely.
Verify compatibility before use. Test with a multimeter first.
Portable Power Station Solution
Devices like Jackery 500, GoalZero Sherpa 100AC, or EcoFlow River have AC outlets. Plug in the original Ryobi charger and let it run off the station battery. Recharge the station via solar or grid.
This is simple, safe, and effective, ideal for beginners. Ensure the station can handle 100W or more output for full-speed charging.
Troubleshoot Charging Failures
Even with correct setup, problems can occur.
Common Issues and Solutions
If there are no lights and no response, the BMS is likely in sleep mode. Jump-start with a good battery.
If the battery overheats, excessive current is the cause. Reduce to 1A and improve airflow.
If voltage is not rising, check for bad connections or a failed cell. Clean terminals and check continuity.
If the charger is not recognized, the T1 signal is missing. Install the 300 kΩ resistor.
If charging is intermittent, loose wires or corrosion are likely. Secure connections and clean with alcohol.
Recharge before dropping below 20 percent. Store at 50 to 60 percent charge. Clean terminals monthly.
Warranty and Replacement Options
If DIY fails, do not give up.
Check Warranty Status
Ryobi offers a 3-year warranty on 40V batteries. Contact Ryobi Customer Service or visit the Service Center Locator. Bring proof of purchase.
Retailer Return Policies
Home Depot and Lowe often replace defective batteries even outside the standard return window. If multiple batteries fail, emphasize possible batch defect.
Some users receive authorization codes for in-store pickup. Replacement is faster and safer than risky repairs.
Key Takeaways for Charging Your Ryobi 40V Without a Charger
Charging a Ryobi 40V battery without its charger is possible but not without risk. Choose the method that fits your skill level and needs.
For experts, use a bench power supply with 300 kΩ resistor and CC/CV control. This offers precision and full visibility.
For solar users, pair an MPPT controller with a 3D-printed adapter and resistor. This is efficient, off-grid, and scalable.
For beginners, use the original charger powered by a portable power station or solar inverter system. This is the safest and most reliable approach.
Never charge individual cells outside the pack, use car jump starters or unregulated supplies, or force charge without T1 activation.
The safest way to charge a Ryobi 40V battery without a charger is to use the original charger powered by an alternative source. When that is not possible, a regulated CC/CV system with 300 kΩ resistor is your best DIY option, but treat it with the caution lithium-ion demands.
Frequently Asked Questions About Charging Ryobi 40V Batteries Without a Charger
Can I use a car battery to charge my Ryobi 40V battery?
No, you cannot directly use a car battery. Car batteries are 12V and output unregulated current, which will damage the Ryobi BMS. You would need a DC-DC boost converter and voltage regulation, plus the 300 kΩ resistor, making it impractical compared to other methods.
What happens if I charge my Ryobi 40V battery without the 300 kΩ resistor?
The BMS will block charging entirely. The T1 pin is Ryobi’s handshake mechanism. Without the 300 kΩ resistance, the battery thinks no legitimate charger is connected and refuses to accept power, even if correct voltage is applied.
How long does it take to charge a Ryobi 40V battery with an alternative method?
Charging time depends on the current setting and battery capacity. Using a 2A limit on a 4Ah battery takes approximately 2 to 3 hours. Lower currents extend this time significantly but are safer for battery health.
Is it safe to use third-party chargers with Ryobi 40V batteries?
It can be safe if the third-party charger matches the voltage (41.7V to 46.2V), has correct polarity, and includes proper current limiting. Always test with a multimeter before relying on a third-party charger.
Can I fix a Ryobi 40V battery that will not hold charge?
If the battery will not hold charge, one or more cells may be failed. You cannot safely repair individual cells inside the pack. Replacement is typically the only option unless the BMS is simply in sleep mode, which a jump-start can sometimes resolve.


