
Imagine waking up off-grid, brewing coffee with your electric kettle, charging your laptop, and watching the morning news, all without a generator humming or a shore power cord plugged in. This level of freedom is possible with a properly installed power inverter in your camper. A power inverter converts 12V DC electricity from your house battery bank into 120V AC power, enabling you to run standard household appliances while boondocking. Whether you are a weekend warrior or a full-time RVer, installing an inverter unlocks true energy independence. This guide walks you through every step, from selecting the right inverter to hardwiring it safely, so you can power your lifestyle anywhere, anytime.
Choose the Right Inverter Type for Your Camper
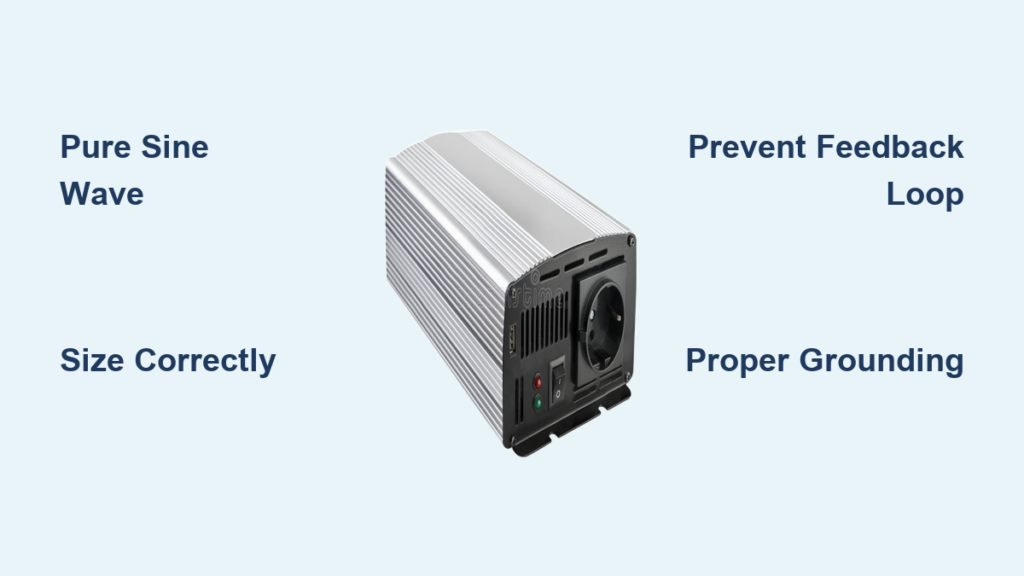
Pure Sine Wave vs. Modified Sine Wave Inverters
Always choose a pure sine wave inverter for your camper. Unlike modified sine wave models, pure sine wave inverters produce clean, grid-quality power that safely runs sensitive electronics like laptops, medical devices, microwaves, and modern TVs. Modified sine wave inverters can cause humming, overheating, or even damage to these devices. While they are cheaper, the risk is not worth it in a confined space where equipment failure could leave you stranded.
Standalone Inverters vs. Inverter Chargers
Decide between a standalone inverter and an inverter charger based on your needs. A standalone unit only converts DC to AC and requires manual management of your converter to avoid feedback loops. It is cheaper and works for basic setups. An inverter charger, however, combines an inverter, converter, and automatic transfer switch in one unit. It seamlessly switches between shore power and battery power, charges your batteries when AC is available, and eliminates feedback loop risks. For full-time boondockers or those planning solar integration, an inverter charger is the smarter long-term investment.
Size Your Inverter Correctly for Your Power Needs
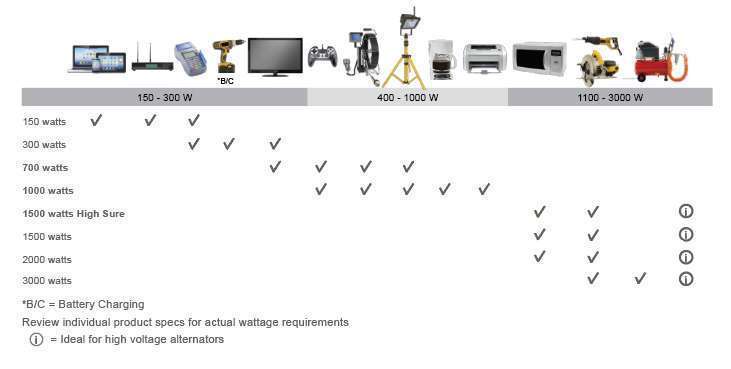
Calculate Total Wattage Requirements
Start by listing all AC devices you plan to run simultaneously. Check their labels for running wattage and add two to three times for startup surges, especially for microwaves, fridges, or power tools. Include a 15 to 25 percent safety margin. For example, a coffee maker at 800W, laptop at 60W, TV at 100W, and blender at 400W totals 1,360W. Adding 15 percent gives you 1,564W, so round up to a 2,000W pure sine wave inverter.
Match Inverter Voltage to Your Battery System
Small inverters up to 1,000W work on 12V systems. For 2,000W and above, ensure your battery bank supports the load. High-wattage inverters at 3,000W or more often require 24V or 48V systems to reduce current draw and voltage drop. A 3,000W inverter on a 12V system pulls over 250 amps, demanding heavy cabling and a robust lithium battery bank.
Prevent Feedback Loop Damage to Your System

Why Feedback Loops Occur
When your inverter powers the AC panel, the onboard converter may try to convert that same 120V AC back to 12V DC to charge the battery. This creates a dangerous loop that wastes power, overheats components, and can destroy both the inverter and converter.
Solutions for Avoiding Feedback Loops
Several proven methods prevent feedback loops. Turn off the converter breaker by flipping the AC breaker feeding the converter before using the inverter. Unplug the converter by physically disconnecting AC and DC wires from the converter for a permanent and safe solution. Use an inverter charger that replaces the converter entirely, making loops impossible. Install a subpanel to power only select circuits via inverter, bypassing converter-fed lines. Use a manual transfer switch to isolate inverter output from the shore power path.
Select Your Installation Method
Plug-In Method for Occasional Use
For occasional use, plug a standalone inverter into a DC source like a battery and connect devices via extension cord. No hardwiring is needed. This method is ideal for charging phones, running a fan, or powering a small appliance. The pros are that it is fast, safe, and removable. The cons are that it is not integrated and creates cord clutter.
Hardwire Dedicated Outlets for Selective Power
Wire specific wall outlets directly to the inverter. These outlets work only when the inverter is on. Other circuits remain on shore power. This reduces battery drain and avoids converter interaction. Choose the outlets to power, run 10 AWG or 12 AWG AC wire from inverter to outlets, connect live, neutral, and ground wires, and label outlets clearly.
Full Integration with Transfer Switch
Use a manual or automatic transfer switch to route either shore, generator, or inverter power to your distribution panel. This powers all outlets seamlessly. The primary transfer switch selects between shore and generator, while a secondary transfer switch adds inverter as a third option. When shore power is lost, switch to inverter mode.
Inverter Charger Integration for Best Long-Term Performance
Cut the shore power feed to your distribution panel and route it through the inverter charger. The unit automatically powers the panel from battery when off-grid and switches to charging mode when shore power returns. Cut the shore power line near the panel, run 10 AWG for 30A or 6 AWG for 50A wire to the inverter, connect shore power to inverter input, connect inverter output to panel input, disconnect and cap off original converter wires, ground inverter to chassis, and connect DC cables with proper fusing.
Mount and Ground the Inverter Properly
Choose the Right Location
Mount the inverter within 6 feet of the battery bank to minimize DC voltage drop. Ensure at least 3 to 6 inches of clearance around vents for cooling. Avoid flooded lead-acid battery compartments due to hydrogen gas risk. AGM and lithium batteries can be co-located safely. Use factory mounting holes or vibration-resistant brackets and secure tightly to prevent damage from road vibration.
Ground the Unit Correctly
Locate the grounding lug on the inverter. Attach a 6 to 8 AWG copper wire and connect it to the chassis frame or a common ground bus bar. This prevents electrical noise, ensures safety, and reduces shock risk.
Connect DC Wiring Safely
Use Correct Cable Size
Undersized cables cause voltage drop, overheating, and inverter shutdown. Use 2/0 AWG for 2,000 to 3,000W on 12V systems, 1/0 AWG for 2,000W, and 4 AWG for 1,000W. Keep runs short and straight. Use welding cable for cost-effective, high-current performance.
Install a DC Fuse
Place an ANL or Class T fuse within 18 inches of the battery positive terminal. This protects against short circuits and fire. For a 3,000W inverter, use a 300A fuse.
Make Secure Connections
Connect the positive lead to battery positive via fuse and the negative lead to battery negative or chassis ground. Torque terminals to specification, typically 12 to 14 N·m. Cover with insulating caps to prevent accidental contact. Always disconnect the battery, negative first, before wiring and use a multimeter to confirm no live current.
Wire the AC Side Correctly
For Transfer Switch or Subpanel Setups
Use 10 AWG copper wire for 30A systems up to 3,500W. For 50A systems, use 6 AWG. Connect black to transfer switch or outlet, white to neutral bar, and green or bare to ground bar. Use junction boxes for secure splices and label all wires.
For Inverter Charger Installations
Cut the shore power feed to the distribution panel. Identify the line side, powered when shore is connected, and the load side, which feeds the panel. Connect shore power to inverter AC input and inverter AC output to panel input. Use a multimeter to verify line versus load before cutting.
Seal Wall Penetrations
Drill holes slightly larger than cable bundles. Use rubber grommets or silicone sealant on both sides to prevent water intrusion and corrosion.
Add a Remote On/Off Switch
Most inverters include a low-voltage remote port. Run a 20-foot cable to a toggle or rocker switch mounted in an accessible location like a kitchen cabinet or entryway. This lets you turn the inverter on and off without opening the battery bay. Some users wire it to a dashboard switch for one-touch control.
Test the System Thoroughly
Power On Sequence
Reconnect the battery, negative last. Turn on the inverter via remote. Check the display, which should show battery voltage and no error codes.
Load Testing
Plug in a lamp or phone charger. Measure AC output with a multimeter, which should read approximately 120V. Gradually add heavier loads like a microwave or blender. Watch for shutdowns, which indicate low voltage or overload.
Transfer Function Test
Plug in shore power. The inverter should pass through or shut off. Unplug shore power. The inverter should engage automatically if equipped with ATS. Confirm battery voltage rises when charging on inverter charger models.
Optimize Battery Performance for Extended Runtime
Lithium vs. Lead-Acid Batteries
Lithium LiFePO4 batteries offer two to three times longer runtime, 90 to 100 percent depth of discharge, and 95 percent or higher efficiency. AGM and flooded lead-acid are limited to 50 percent depth of discharge and degrade faster under heavy loads. With lithium batteries, a 100Ah lithium bank at 12V provides approximately 1,026Wh of usable energy, running an 800W coffee maker for about 1.3 hours or a 60W laptop for about 17 hours.
Estimate Runtime
Use the formula: Runtime equals battery capacity times voltage times depth of discharge times efficiency, divided by appliance wattage. Add solar panels to recharge during the day and extend off-grid capability indefinitely.
Troubleshoot Common Inverter Issues
Inverter Shuts Off Under Load
Likely causes include low battery voltage, undersized cables, or loose connections. Check the charge level, upgrade to 2/0 AWG cable, and retighten all terminals.
No Power Output
Check polarity, meaning positive and negative may be reversed. Check fuses, meaning the ANL fuse may be blown. Check the remote switch, meaning it may not be turned on.
Overheating
Ensure 3 to 6 inches of clearance around vents. Relocate the inverter if mounted in an enclosed space.
Humming Noise
This is caused by modified sine wave inverters. Upgrade to a pure sine wave model.
Fails to Switch to Shore Power
Test the transfer switch and replace it if defective.
Frequently Asked Questions About Installing a Power Inverter in a Camper
Can I Install a Power Inverter Myself in My Camper
Yes, if you have basic electrical knowledge and follow safety protocols. The job requires understanding both DC and AC wiring, proper fusing, and grounding. If you are uncomfortable working with electrical systems, hire a professional.
What Size Inverter Do I Need for a Camper
The size depends on your simultaneous loads. Add up the wattage of all devices you plan to run at once, include startup surges, and add a 15 to 25 percent safety margin. For most campers, a 2,000W pure sine wave inverter covers basic needs like a coffee maker, TV, and laptop charging.
Do I Need to Remove My Converter When Installing an Inverter
Not necessarily. You can turn off the converter breaker when using the inverter, unplug the converter, use an inverter charger that replaces it, or install a subpanel to isolate circuits. The key is preventing the feedback loop that damages equipment.
How Long Will My Battery Run an Inverter
Runtime depends on battery capacity and load. A 100Ah lithium battery at 12V provides approximately 1,026Wh of usable energy. Divide this by your appliance wattage to get hours of runtime. A 60W device runs about 17 hours, while an 800W coffee maker runs about 1.3 hours.
Can I Run My Rooftop Air Conditioner With an Inverter
Yes, but you need at least a 3,000W inverter and 400Ah or larger lithium battery capacity. Air conditioners have high startup surges that require significant battery reserves. Plan for adequate battery bank size and consider solar recharging for extended use.
Key Takeaways for Installing Your Camper Inverter
Installing a power inverter transforms your camper into a self-sufficient mobile home capable of running standard household appliances off-grid. Whether you choose a simple plug-in setup or a full inverter charger integration, the key is selecting the right pure sine wave inverter, sizing it correctly for your power needs, and preventing feedback loops that can damage your system. Always use properly sized DC cabling with appropriate fusing, ground the unit correctly, and test thoroughly before relying on it in remote locations. With lithium batteries and optional solar integration, your off-grid potential becomes truly limitless. Label all circuits, document your system, and enjoy the quiet freedom of true boondocking.


