
If your car won’t start, a reliable battery charger can be the difference between a quick fix and a costly tow. The Duralast battery charger is a trusted, affordable solution designed for everyday drivers and DIYers who need fast, safe charging for 12V automotive batteries. Whether you’re reviving a dead battery in a car, truck, motorcycle, or classic vehicle like a 1971 VW Bus, this guide walks you through every step from setup to full charge with clear, actionable instructions.
Using a Duralast charger correctly ensures not only faster recovery but also extends your battery’s lifespan. These units feature spark-free technology, reverse polarity alerts, and automatic shut-off, making them safe even for first-time users. You’ll learn how to connect clamps properly, choose the right charge mode, avoid common mistakes, and troubleshoot issues on the spot.
Safety First: Prepare Before Powering On
Before plugging in or touching any clamps, ensure your environment and equipment are safe. Duralast chargers are built with multiple protections, but user caution is still essential.
Check Charger Placement and Environment
Place the charger on a dry, stable surface away from water, flammable materials, or moving parts. Never set it directly under the hood where it could be crushed when closing. Keep it elevated if possible on a workbench, fender cover, or nearby stool.
Ensure the area is well-ventilated, especially when charging older lead-acid batteries that may emit hydrogen gas during charging.
Inspect Cables and Terminals
Examine the red positive and black negative clamps for:
• Frayed or cracked insulation
• Corrosion on metal jaws
• Loose connections at the charger end
Damaged cables reduce efficiency and increase fire risk. Replace them immediately if compromised.
On the battery side, look for:
• White or green corrosion around terminals
• Loose or wobbling posts
• Low fluid levels in non-sealed batteries
Clean terminals with a wire brush and baking soda solution if needed. Rinse with water and dry thoroughly before connecting.
Pro Tip: For vehicles with hard-to-reach batteries like older VWs, clean terminals before attaching clamps to avoid sparks from poor contact.
Connect in the Right Order: Plug, Then Clamp
Getting the sequence wrong can damage electronics or cause sparks. Follow this foolproof order every time.
Step 1: Plug Charger Into Wall Outlet
Always plug the Duralast charger into a working 120V AC outlet before connecting to the battery. The unit does not store power. It needs constant electricity to operate.
Test the outlet by plugging in another device first. If the charger shows no lights or display, check the circuit breaker or try a different outlet.
Step 2: Attach Red Clamp to Positive Terminal
Use the red clamp to connect to the battery’s positive terminal. Open the jaw and squeeze it firmly onto clean, bare metal. Avoid attaching to painted or corroded surfaces.
Ensure a solid connection. Wiggle the clamp to confirm it is secure.
Step 3: Attach Black Clamp to Negative or Ground
Connect the black clamp to either the negative terminal or a bare metal part of the chassis like a bolt or engine block for added safety. Grounding the negative reduces spark risk near the battery, which is crucial in enclosed spaces or when hydrogen gas might be present.
Warning: Never reverse the clamps. If you do, the Duralast charger will beep or flash a warning but won’t be damaged. Just disconnect and correct the polarity.
Select Battery Type and Charge Mode
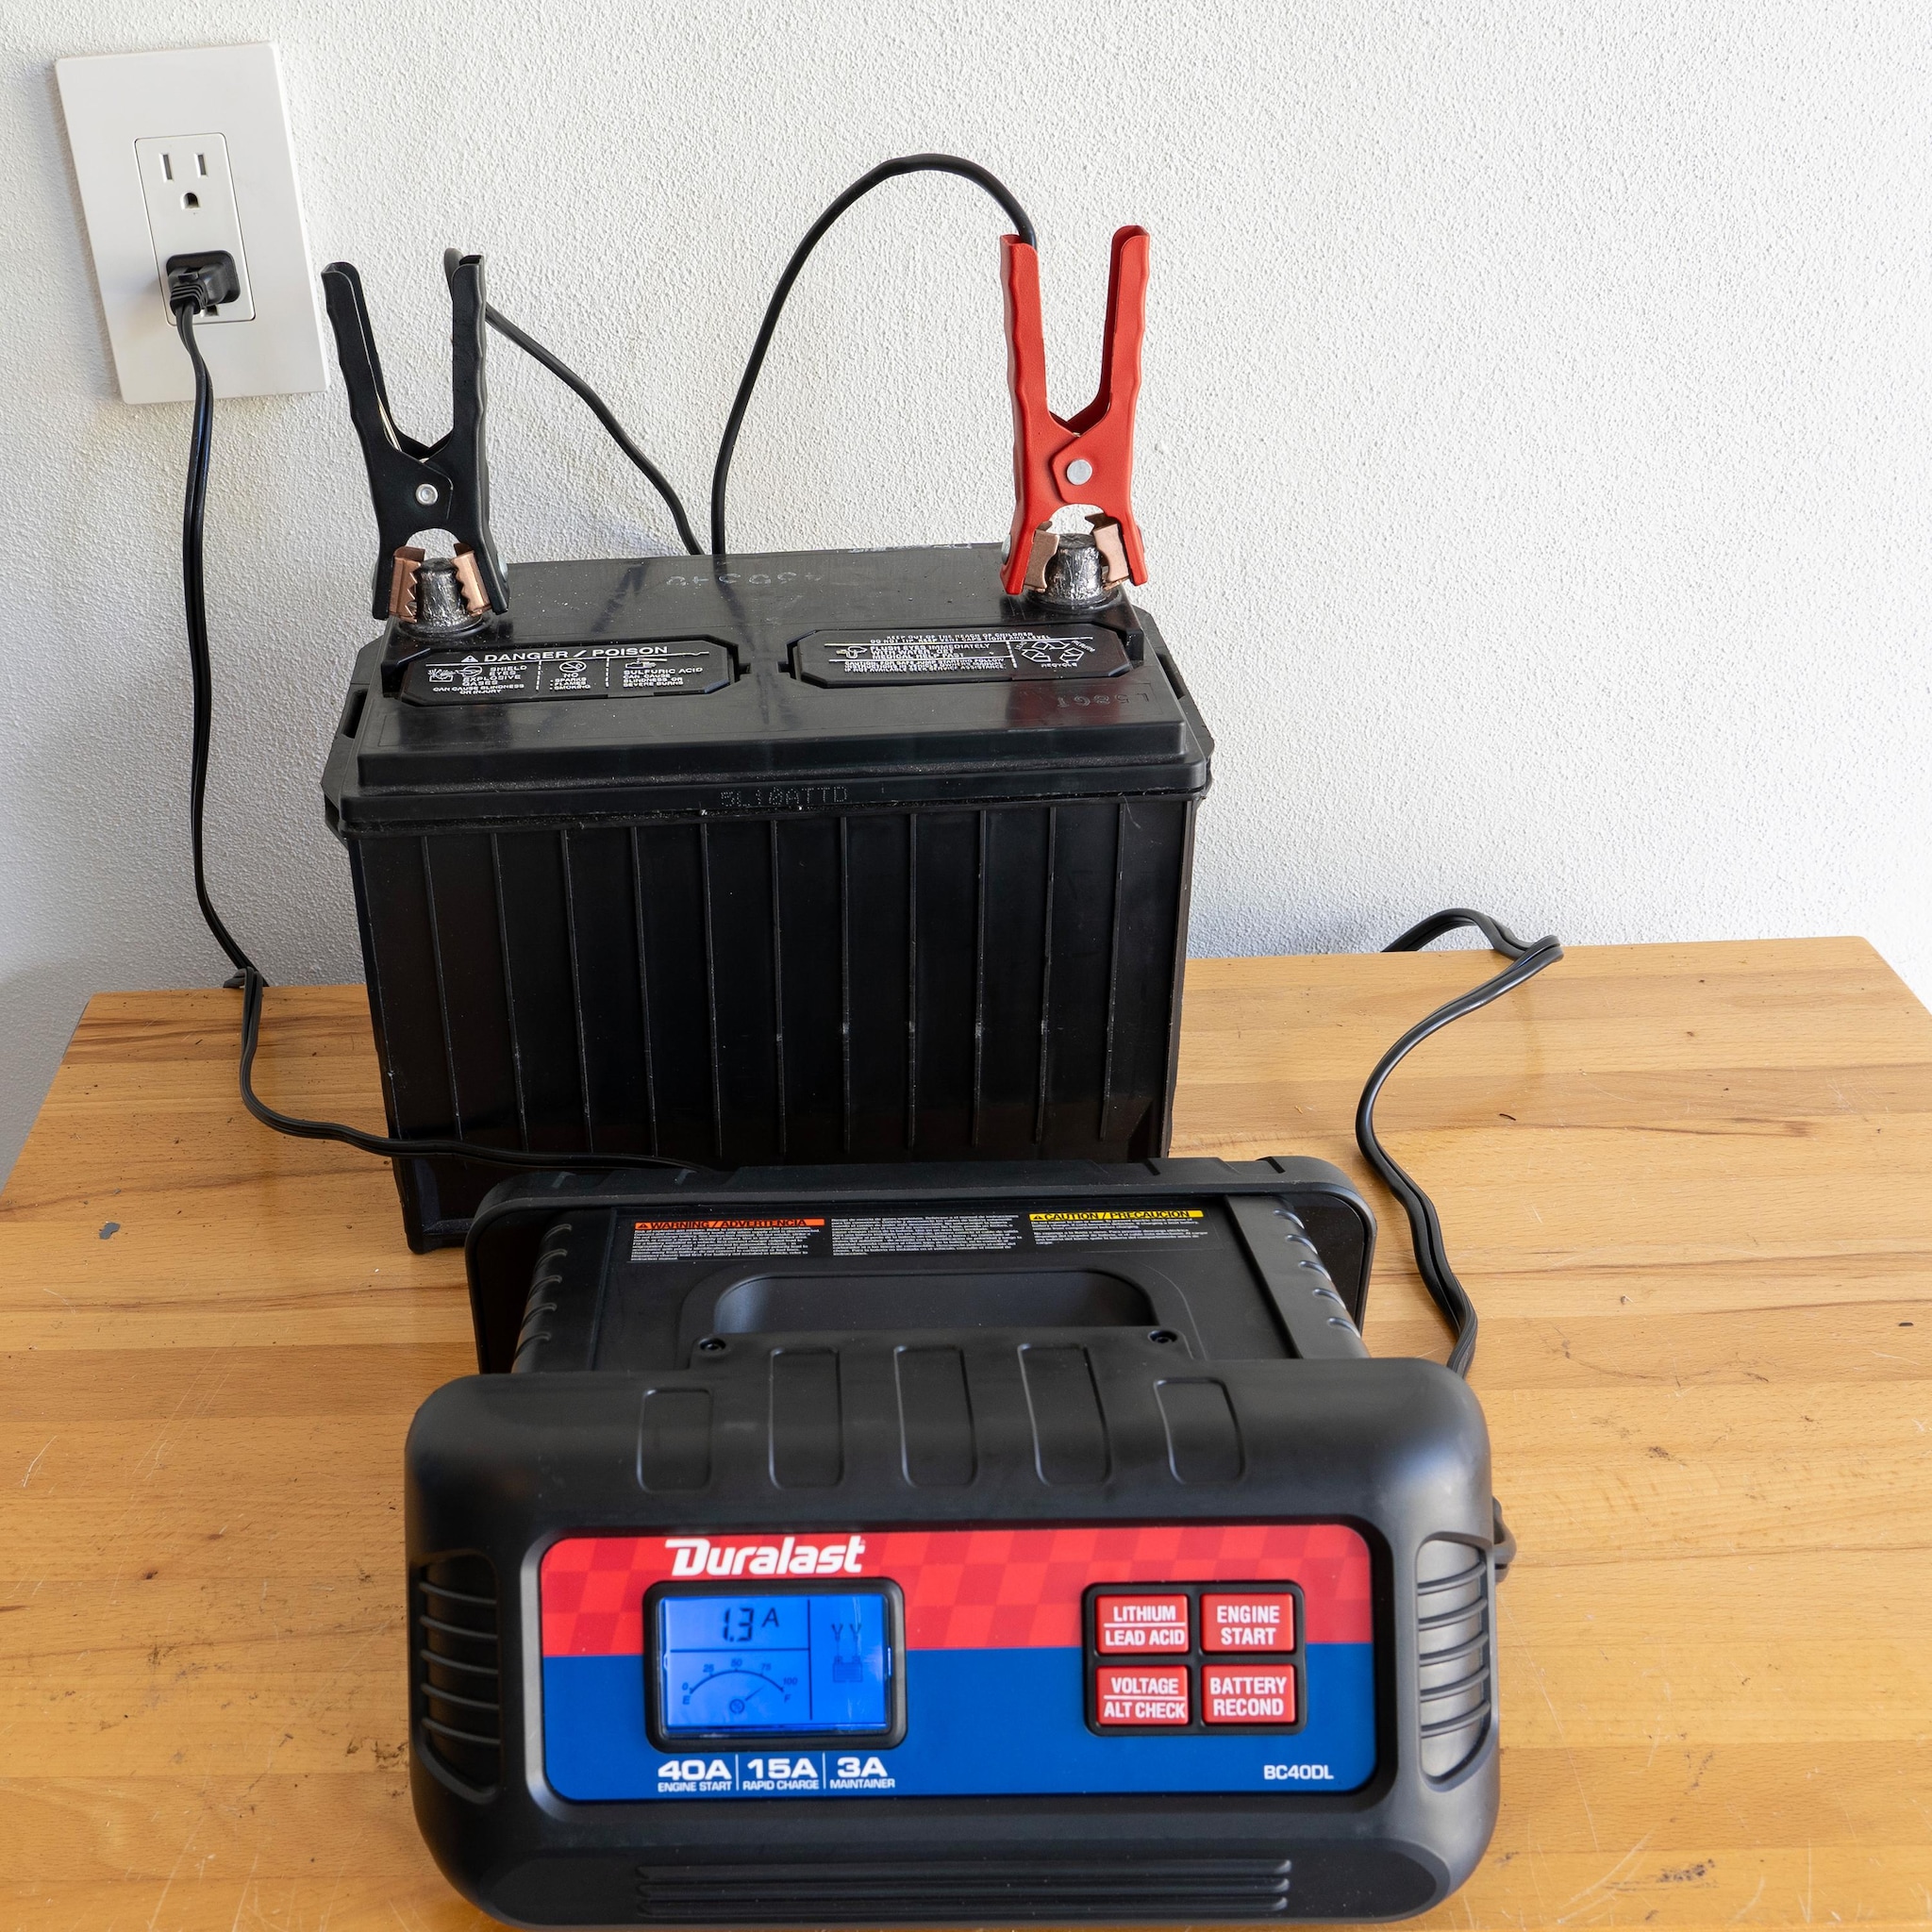
Modern Duralast models like the BC40DL let you match the charging profile to your battery chemistry. Choosing the right mode prevents overcharging and maximizes battery life.
Choose the Correct Battery Chemistry
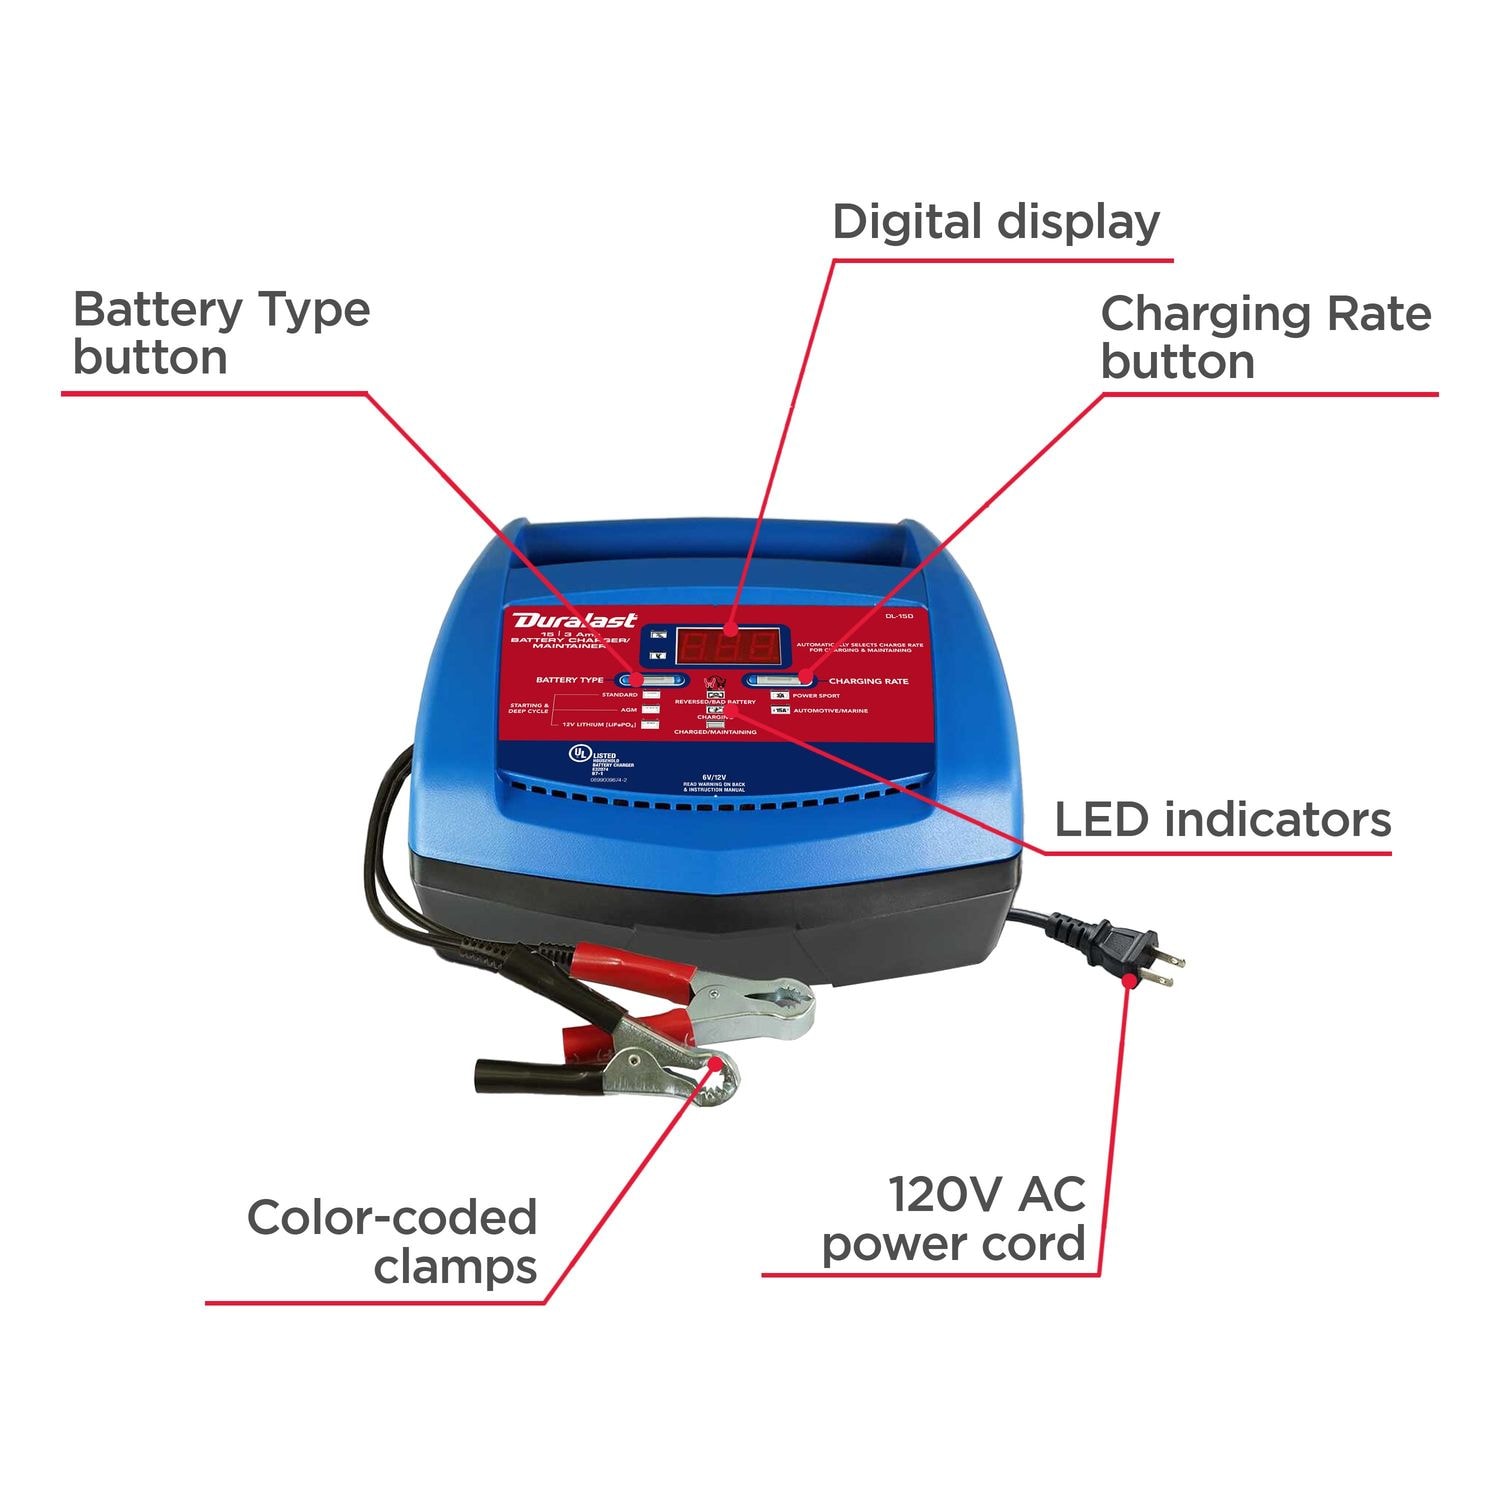
Press the Mode button or turn the dial to select one of these:
• Flooded (Standard Lead-Acid)
• AGM (Absorbent Glass Mat)
• Gel
Most standard car batteries are flooded. AGM batteries are common in newer vehicles with start-stop systems. Gel types are used in specialty applications like RVs or motorcycles.
When in doubt, refer to your battery label or vehicle manual.
Pick the Right Amp Setting
Select charge speed based on battery size and urgency:
• 3 Amps: Slow, safe charging for small or deeply discharged batteries (motorcycles, ATVs, lawn mowers)
• 15 Amps: Faster charging for standard automotive batteries (cars, trucks, SUVs)
Expert Insight: Use 3A for older batteries or long-term maintenance. High amperage generates heat, which can shorten battery life if used excessively.
Start Charging and Monitor Progress
Once settings are selected, the Duralast charger powers on automatically and begins delivering current.
Watch the Display or Indicator Lights
On digital models like the BC40DL:
• Initial reading may show battery state (like 71 percent)
• Voltage climbs steadily as charging progresses
• Mode icon confirms correct selection (AGM, Flooded, etc.)
Analog models use a needle gauge to show output current and approximate charge level.
The charger adjusts voltage and current automatically throughout the cycle. No user input needed.
Allow Sufficient Charge Time
Typical charging times:
• 15A mode: 1 to 2 hours for a standard 12V battery
• 3A mode: 6 to 12 hours, depending on discharge level
For deeply discharged batteries, allow at least 30 minutes of continuous charging before attempting to start the engine.
Real-World Note: In classic cars like a 1971 VW Bus, parasitic drain or corroded wiring may require longer charging even after voltage appears normal.
When Charging Is Complete: Shut Down Safely
Disconnecting improperly can cause voltage spikes that damage vehicle electronics. Always follow this reverse sequence.
Turn Off and Unplug First
- Switch off the charger if it has a power button
- Unplug from the wall outlet
Do not skip this step. Removing clamps while powered risks electrical surges.
Remove Clamps in Reverse Order
- Take off the black (negative) clamp first
- Then remove the red (positive) clamp
This minimizes the chance of accidental short circuits.
Store the charger in a dry place with cords neatly coiled. Avoid kinks or tight bends in the cable.
Use Case: Charging a 1971 VW Bus Battery
Older vehicles pose unique challenges like weak grounds, corroded terminals, and aging solenoids. Here’s how to get your vintage VW running again.
Clean and Inspect Before Connecting
Many VW Bus no-start issues stem from dirty terminals or bad grounding. Clean both battery posts thoroughly with a wire brush.
Check the starter solenoid under the rear engine cover. If it clicks but the engine doesn’t turn, the battery may still be too weak even if voltage reads okay.
Use 3A or 15A Based on Need
• For maintenance or slow recovery: Use 3A overnight
• For quicker restart attempts: Use 15A for 1 to 2 hours
Select 12V lead-acid mode unless you’ve upgraded to AGM.
Allow at least 30 minutes of charging before trying to start. If the starter still doesn’t engage:
• Test the relay
• Verify ground cable integrity
• Recheck clamp connections
Regular charging prevents sulfation and keeps vintage batteries healthy.
Maintain Battery Health with Trickle Charging
Even when parked, batteries lose charge over time, especially in seasonal vehicles.
Combat Parasitic Draw
Modern electronics and aftermarket accessories can drain a battery by up to 40 percent per week. To prevent this:
• Charge weekly using 3A mode
• Or leave the Duralast in maintain/float mode if supported
This keeps the battery topped off without overcharging.
Store Batteries Properly
For long-term storage:
• Fully charge the battery
• Switch to 3A maintainer mode
• Reconnect periodically if float mode isn’t available
Avoid letting batteries sit below 12.4V for extended periods. This leads to sulfation and permanent capacity loss.
Troubleshoot Common Problems Quickly
Even with safeguards, issues can arise. Use this guide to diagnose and fix them fast.
No Power or Display
Cause: Dead outlet or loose plug.
Fix: Test outlet with another device. Ensure charger is fully plugged in.
Reverse Polarity Alert
Cause: Red clamp on negative, black on positive.
Fix: Swap clamps. Red to (+), black to (–).
The charger won’t be damaged, but it won’t charge until corrected.
Charger Won’t Start
Cause: Poor terminal contact or corrosion.
Fix: Clean terminals, reattach clamps firmly.
Battery Charges But Won’t Hold Power
Cause: Aging battery or internal failure.
Fix: Test with a multimeter or load tester. Replace if voltage drops rapidly after disconnect.
Solenoid Clicks But Engine Won’t Crank
Cause: Weak battery, faulty starter, or bad wiring.
Fix: Charge longer at 15A. Inspect starter circuit and ground connection.
Quick Test: After charging, measure battery voltage. A healthy 12V battery should read 12.6V or higher when resting (fully charged). Below 12.4V means needs charging. Below 12.0V means deeply discharged or failing.
Maximize Charger Lifespan and Performance
Your Duralast charger is built to last, but regular care keeps it working reliably.
Clean Clamps and Cables Regularly
Wipe down clamps after each use. Remove corrosion with a baking soda paste and dry thoroughly.
Avoid yanking cables from the charger. Pull by the plug, not the cord.
Use Proper Extension Cords
If needed, use a 12 to 14 gauge outdoor-rated extension cord no longer than 25 feet. Thinner cords overheat and reduce charging efficiency.
Follow On-Panel Instructions
Duralast chargers feature numbered diagrams on the front panel showing correct connections and settings. Refer to them each time until the process becomes second nature.
Final Tip: Watch official Duralast tutorial videos online if available, but remember the device is designed for intuitive use even without video help.
Frequently Asked Questions About Duralast Battery Chargers
Can I use a Duralast charger on AGM batteries?
Yes. Duralast chargers like the BC40DL support AGM (Absorbent Glass Mat) batteries. Simply select the AGM mode using the Mode button or dial before charging. This ensures the correct voltage profile for your battery chemistry.
How long does it take to charge a car battery with a Duralast charger?
At 15 amps, a standard 12V car battery typically takes 1 to 2 hours to fully charge. At 3 amps, charging takes 6 to 12 hours depending on how discharged the battery was.
What should I do if my Duralast charger shows a reverse polarity warning?
This means the red and black clamps are connected incorrectly. Simply turn off the charger, unplug it from the wall, disconnect the clamps, and reconnect them with red to the positive terminal and black to the negative terminal. The charger won’t be damaged by this error.
Can I leave my Duralast charger connected overnight?
Yes, if your model has an automatic maintenance or float mode. This mode keeps the battery topped off without overcharging. If your charger doesn’t have this feature, monitor the battery and disconnect once fully charged to avoid damage.
Why won’t my Duralast charger turn on?
First, check that the charger is plugged into a working 120V outlet. Test the outlet with another device. Also inspect the power cord for damage and ensure it’s fully seated in the charger.
Is it safe to charge a battery inside my car?
Yes, but with precautions. Ensure the area is well-ventilated. Keep the charger on a stable surface away from moving engine parts. Never place the charger where it could fall or get crushed when closing the hood.
Key Takeaways for Using Your Duralast Battery Charger
The Duralast battery charger combines safety, simplicity, and smart technology to make battery charging accessible to everyone. By following these steps, you protect both your vehicle and yourself.
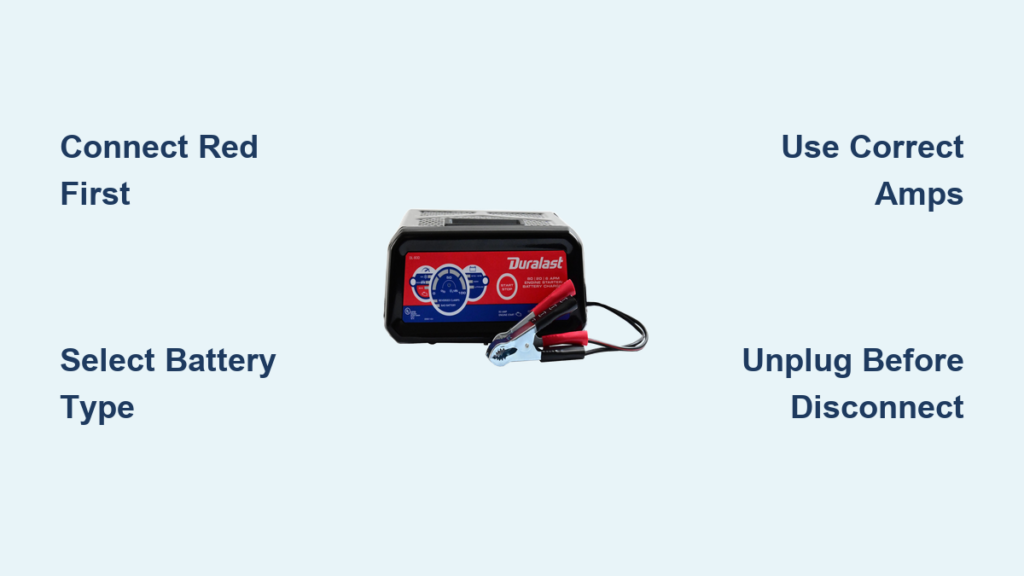
First, always prioritize safety by placing the charger on a dry, stable surface and connecting clamps in the correct order (red to positive, black to negative). Never skip the step of unplugging before disconnecting clamps.
Second, match your settings to your battery type. Select the correct chemistry (Flooded, AGM, or Gel) and choose 3 amps for maintenance or 15 amps for faster charging. Using the wrong settings can reduce battery life.
Third, allow adequate charge time. Deeply discharged batteries need at least 30 minutes before attempting to start the engine. For older vehicles like a 1971 VW Bus, plan for longer charging sessions to overcome parasitic drain.
Whether you’re jump-starting a truck or maintaining a classic car, this tool delivers reliable performance. Use it regularly, store it properly, and it will serve you for years.


