
Is your car battery dead on a cold morning? Does your boat sit idle for months but needs to start when you need it? You’re not alone, and an EverStart battery charger could be your go-to solution. Designed for everyday drivers, weekend adventurers, and seasonal equipment owners, these chargers offer everything from emergency jump-starts to long-term maintenance. But knowing how to use an EverStart battery charger correctly is key to safety, efficiency, and battery life.
This guide walks you through every step safely and confidently. You’ll learn how to connect clamps properly, interpret indicator lights, select the right mode for your specific model, troubleshoot common issues, and avoid costly mistakes. Whether you own the Max, Maxx50, or a lithium-capable model, we cover the procedures specific to your unit.
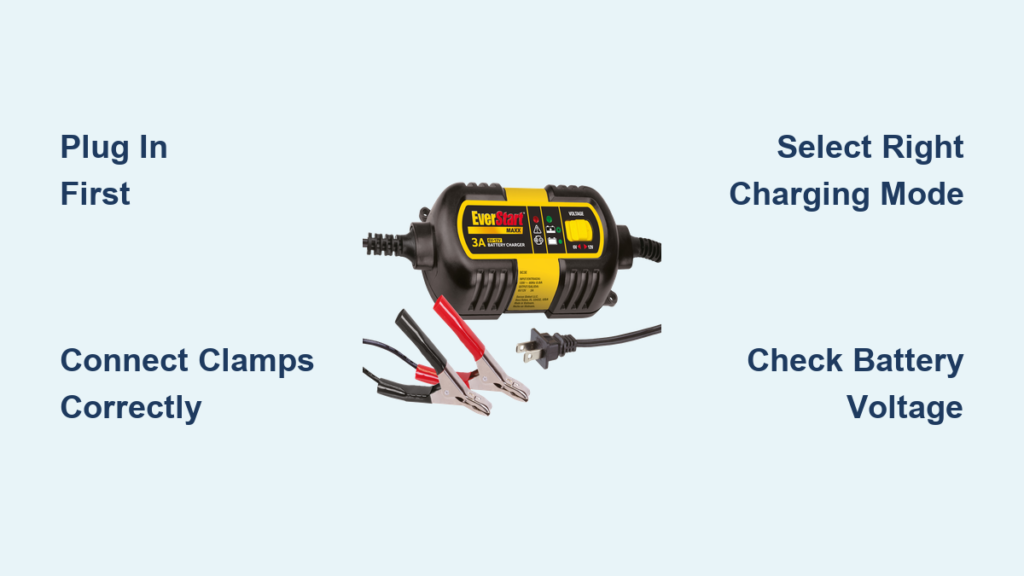
Power Up Safely Before Charging
Always plug the charger into a 120-volt AC outlet before attaching clamps. This sequence prevents sparks near the battery, reducing the risk of igniting hydrogen gas. Once plugged in, the LCD or indicator lights should activate, confirming power is flowing. If nothing lights up, test the outlet or check for tripped breakers.
Use a grounded indoor outlet whenever possible. Avoid daisy-chaining extension cords. If you must use one, choose a heavy-duty cord rated for continuous use. Never operate the charger in wet or damp areas.
Prepare the Battery and Workspace
Work in a well-ventilated space because batteries release flammable hydrogen when charging. Open the garage door or work outdoors if needed. Turn off all vehicle electronics and remove the key. For flooded lead-acid batteries, check fluid levels and add distilled water if plates are exposed.
Clean the terminals with a wire brush to remove corrosion. A poor connection can trigger error lights or prevent charging. Ensure the battery case isn’t cracked or leaking. Replace it if damaged.
Gear Up for Safety
Wear safety glasses and rubber gloves when handling batteries. Keep metal tools and jewelry away from the battery top to avoid accidental short circuits. Never smoke or use open flames nearby.
Inspect the charger before use. Look for frayed wires, cracked housing, or corroded clamps. If any part is damaged, do not use it. Store the unit indoors when not in use because moisture and extreme temperatures degrade performance over time.
Connect Clamps the Right Way

Always unplug the charger before connecting or removing clamps. This simple step prevents sparks and potential damage. The connection sequence matters for safety and proper function.
Follow these steps to connect properly:
- Attach the red clamp to the positive (+) terminal
- Attach the black clamp to the negative (-) terminal or a clean, unpainted metal point on the frame
- Make sure both clamps are tight and won’t slip off during charging
Grounding the black clamp to the chassis reduces spark risk near the battery where hydrogen gas may accumulate. This is safer than connecting directly to the negative terminal.
Avoid Reverse Polarity Mistakes
All EverStart models have reverse polarity protection. If you accidentally swap the clamps, the charger will alert you. Max models show “+/-” on the LCD and emit a continuous beep. The Maxx50 displays a rapidly blinking red light and won’t charge. Other models show no response or a flashing error light.
Immediately disconnect and correct the clamps if polarity is reversed. The charger won’t operate until polarity is fixed. Never let the clamps touch each other during use because this can cause sparks, damage the unit, or ignite gases.
Use Model-Specific Functions
EverStart chargers come in several models, each with different capabilities. Knowing your specific model number is essential for correct operation. Find this number on the label on the back or bottom of the unit.
EverStart Max (BC40BE) Jump-Start Procedure
This model delivers 40A engine start assist and intelligent diagnostics via an LCD screen. Here’s how to use it safely.
To start the engine, follow these steps:
- Plug in and connect clamps to the battery
- Wait for solid arrow and battery gauge on the display
- Press the Engine Start button
- A 60-second countdown begins with arrows animating downward
- After the beep, crank the engine for 3 to 5 seconds
If the engine doesn’t start, wait 4 to 5 minutes before retrying. This cooldown prevents overheating and system lockout.
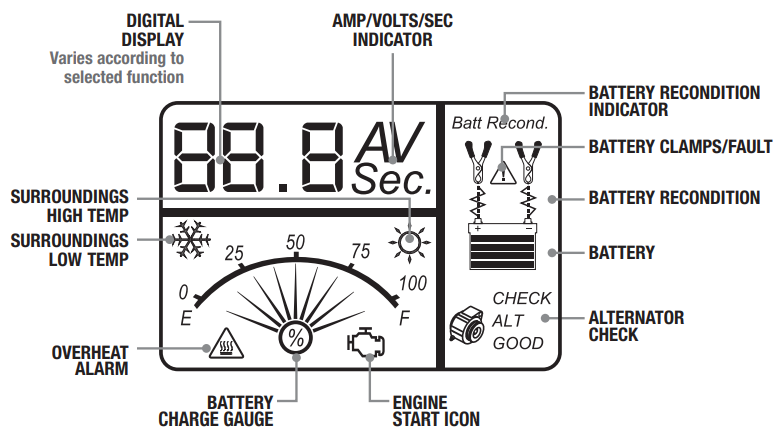
Read the LCD display to monitor progress. Flashing icons indicate standby mode. A filling battery gauge shows charging in progress. The “+/-” symbol in the battery icon means reverse polarity. A flashing engine icon means the unit is ready to crank.
Use Recondition mode for sulfated batteries. This runs for 8 to 12 hours. Activate Alternator Check only after the engine runs and the battery is charged.
EverStart Maxx50 Smart Charging
With 50A start assist and auto-restart, this model excels for boats, RVs, and seasonal vehicles. It charges intelligently, starting at a higher amperage and tapering down as voltage stabilizes.
Monitor the indicator lights during use. A steady red light means charging is in progress. A solid green light means the battery is fully charged. A blinking red light indicates an error, so check connections and battery health.
The Maxx50 charges at approximately 2.5 to 2.6A initially, then tapers to 1.4 to 1.5A as voltage stabilizes. This protects battery life. Once full, it switches to maintenance mode and re-engages if voltage drops.
Use Standard Charge for daily use. Use Rapid Charge sparingly for fast recharge. Use Maintenance Mode ideal for winter storage. Leave it connected indefinitely because it self-regulates to prevent overcharging.
Maxx Charger with Lithium Button
This model supports LiFePO4 lithium batteries, but only if you manually select the correct mode. The default mode is lead-acid, so you must switch it if charging lithium.
Select chemistry before charging by pressing the button once to switch to lithium mode. Never switch modes while charging. Unplug first, then press the button, and reconnect.
If you charge a lead-acid battery in lithium mode, the higher voltage may reduce lifespan over time. If you charge lithium in lead-acid mode, it will undercharge and reduce capacity. There is no indicator light showing the mode, so monitor voltage with a multimeter to verify. Lead-acid charges to approximately 14.4V and floats at approximately 13.6V. Lithium reaches approximately 14.6V and holds.
Maxx 3A and BM1E Maintenance Chargers
These are fully automatic and ideal for lawn mowers, ATVs, and backup batteries. They lack engine-start capability, so do not attempt jump-starts with these models.
The Maxx 3A outputs 3A and supports both 6V and 12V batteries. It has auto-shutoff and float mode. The indicator shows flashing red or green during charging and solid green when full.
The BM1E 1A Battery Maintainer is compact and safe for long-term use. The indicator shows orange during charging and green when full. This model has been used continuously for 2 years on idle trucks with zero failures. It activates only when voltage drops.
Choose the Right Charging Mode
Different situations call for different charging modes. Using the correct mode extends battery life and ensures efficient charging.
When to Use Rapid Charge
Rapid Charge delivers 15 to 16A for quick recovery of deeply discharged batteries. Use this mode only when necessary because frequent rapid charging reduces battery lifespan. It automatically tapers as the battery charges. This mode is not recommended for daily use.
Maintenance Mode for Long-Term Storage
All EverStart models offer trickle or float charging to prevent self-discharge. This mode is safe for weeks or months of continuous use. The Maxx50 and Maxx 3A auto-restart if voltage drops. Use this mode for winter storage or infrequently used vehicles. The Maxx50 in maintenance mode works well for RVs and boats.
Recondition Mode for Sulfated Batteries
Sulfation occurs when a battery sits discharged. Recondition mode applies a controlled overcharge to break down sulfate crystals. This mode works best for mildly degraded lead-acid batteries. It runs for 8 to 12 hours, so don’t interrupt the process. This mode is not effective on shorted or dead batteries. If voltage is below 2V, the battery is likely unrecoverable.
Alternator Check Testing
Available on Max and Maxx50 models, this function tests your vehicle’s alternator. Charge the battery fully first. Start the engine. Connect the charger with clamps on the battery. Switch to Alternator Check mode.
A good alternator reads 13.8 to 14.7V. Lower readings suggest charging system issues. Use this mode only when the engine is running, and don’t attempt it on a weak battery.
Match Charger to Battery Type

Not all chargers work with all battery types. Using the wrong combination can damage the battery or charger.
Compatibility by Model
The Max (BC40BE) works with lead-acid, AGM, and gel batteries. The Maxx50 supports lead-acid, AGM, and gel. The Maxx with Lithium Button handles lead-acid, AGM, gel, and lithium. The Maxx 3A supports lead-acid and has limited AGM and gel compatibility. The BM1E works with lead-acid, AGM, and gel.
Not all Maxx models support lithium. Only use LiFePO4 batteries if your unit has the Lithium/Lead Acid button.
Voltage Requirements
Batteries must have at least 2V to initiate charging. A 0V reading likely means the battery is internally shorted and needs replacement. Cold batteries may read lower but recover when warmed. Charge above 32°F for best results because cold batteries charge slower and efficiency drops 20 to 30% in freezing temperatures.
Fix Common Issues Fast
Understanding error signals helps you troubleshoot quickly and get back to charging.
No Display When Plugged In
Check the outlet by testing it with another device. Reset the circuit breaker. If these don’t work, contact support because there may be an internal fuse failure.
Beeping with Reverse Polarity Alert
If you see “+/-” on the screen and hear beeping, reverse polarity is the cause. Swap the red and black clamps immediately. Make sure clamps aren’t touching metal or each other.
Blinking Red Light on Maxx50
This indicates a poor connection, reverse polarity, or a bad battery. Reattach clamps and clean terminals. Test the battery voltage. If it’s below 2V, replacement may be needed. Check the ground connection and secure the black clamp to a clean metal surface.
Charger Runs But Battery Won’t Charge
The battery may be sulfated or aged. Try recondition mode. An internal short shows as 0V and means the battery is likely dead. Verify charger compatibility, especially if charging lithium without the correct mode selected.
Charger Cycles On and Off
This usually indicates a loose connection. Tighten the clamps. It could also mean a failing battery where voltage drops under load. Try a different chassis ground point.
Optimize Cold Weather Charging
EverStart chargers work below freezing, but charging slows significantly. A battery at 20°F may take twice as long to charge as one at room temperature.
Bring the battery indoors or warm it gradually before charging when possible. A battery reading 12.0V in cold weather may test at 12.6V when warmed. Avoid charging a frozen battery because it may crack. If uncertain, let it warm to above 32°F before connecting.
Use lower amperage in cold weather. High current can cause gassing in cold batteries. Use standard or maintenance mode instead of rapid charge.
Extend Charger Life
Store and maintain your charger properly to ensure years of reliable service.
Keep the charger indoors away from moisture and temperature extremes. Clean the clamps periodically with a baking soda and water mix followed by a wire brush. Wind the cord loosely because tight coiling damages internal wires. Inspect the charger annually for fraying or corrosion.
Test the charger regularly even if unused. Plug it in every few months to verify function. A working indicator light confirms it’s ready when you need it. Maxx50 models have lasted 3 or more years with proper care.
Find Manuals and Support
Download the right manual by visiting manualslive.com and entering your model number. Find the model number on the label on the back or bottom of the unit.
The warranty covers defects in materials and workmanship. Exclusions include damage from reverse polarity, water, misuse, or incorrect battery use. Support is available through Walmart, and in-store replacement is often faster than online.
Frequently Asked Questions About EverStart Battery Chargers
Can I use an EverStart charger on a lithium battery?
Only specific models with a Lithium/Lead Acid button support lithium batteries. The Maxx charger with this button can charge LiFePO4 batteries when you manually select lithium mode. Other models are designed only for lead-acid batteries.
How long does it take to charge a car battery with an EverStart charger?
A 50% discharged 12V battery takes approximately 6 to 8 hours on a 3A mode. The Maxx50 starts at 2.5 to 2.6A and tapers as the battery charges. Higher amperage rapid modes charge faster but should be used sparingly.
Is it safe to leave an EverStart charger connected overnight?
Yes, maintenance chargers like the BM1E and Maxx 3A are fully automatic and safe for indefinite connection. The Maxx50 can also be left connected in maintenance mode because it auto-regulates to prevent overcharging.
What does the blinking red light mean on my Maxx50?
A blinking red light indicates an error. Check for poor connection, reverse polarity, or a battery that may be bad. Reconnect clamps, clean terminals, and test battery voltage. If voltage is below 2V, the battery likely needs replacement.
Can I jump-start my car with a Maxx 3A or BM1E maintainer?
No, these models are maintenance chargers only and lack engine-start capability. Use the Max for 40A start assist or the Maxx50 for 50A start assist if you need jump-starting ability.
Key Takeaways for Using Your EverStart Battery Charger
Knowing how to use an EverStart battery charger correctly ensures safety, extends battery life, and prevents costly errors. Always connect clamps in the correct order, with red to positive and black to chassis or negative. Plug in before connecting clamps and unplug before disconnecting them.
Select the right mode for your battery type and situation. Use maintenance mode for long-term storage, rapid charge sparingly, and recondition mode for sulfated batteries. For dual-mode chargers, manually select the correct chemistry before charging lithium batteries.
With proper care and correct usage, your EverStart charger can deliver years of reliable service for your vehicles and equipment.


