If your phone, laptop, or tablet only charges when the cable is bent just right, you’re dealing with a classic sign of an unstable power connection. This frustrating issue affects millions of users across devices and brands, where charging starts and stops with the slightest movement. The root cause usually lies in one of three places: a damaged charging cable, a dirty or broken charging port, or a faulty power adapter. Left unchecked, this intermittent connection often worsens until charging fails completely.
The good news is that most cases can be diagnosed and resolved quickly, often with simple cleaning or a cable swap. This guide walks you through a proven, step-by-step process to identify the exact source of the problem, apply effective fixes, and prevent future failures. Whether it is your iPhone, Android phone, or laptop, you will learn how to restore reliable charging without holding the cord at a 45-degree angle.
Identify the Problem Source
Before attempting repairs, you must pinpoint whether the fault lies in the cable, port, or power source. Misdiagnosis leads to wasted time and money on unnecessary replacements.
Test with a Known-Good Cable
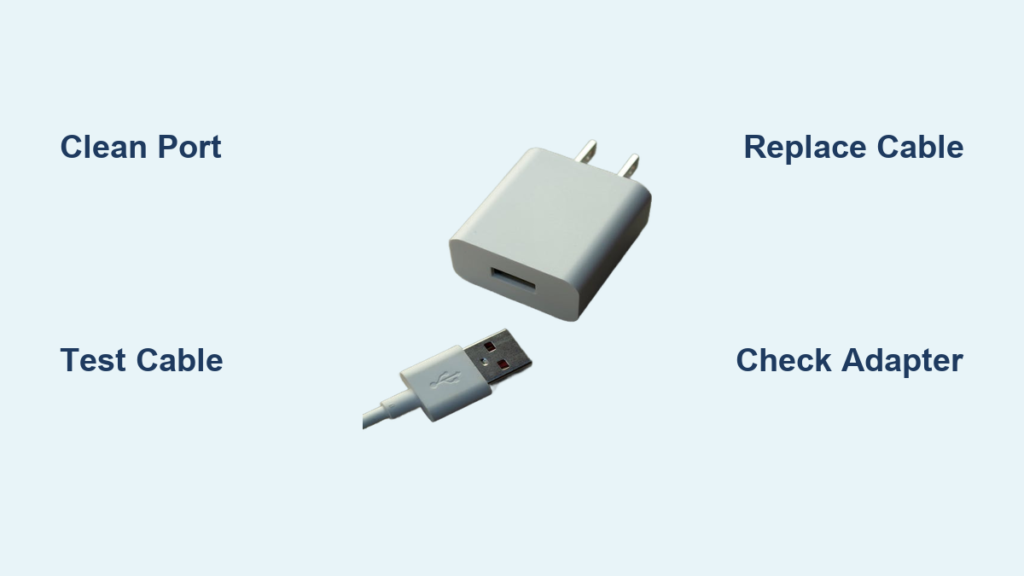
Replace your current charger with a certified, high-quality cable, preferably OEM or MFi-certified for Apple devices. Plug it in and observe whether charging starts immediately and whether the connection remains stable. If the new cable works perfectly, your original charger is damaged and needs replacement. If the problem persists across multiple cables, the issue likely lies in your device’s charging port. Try at least two different cables to confirm consistent angle dependency.
Check Multiple Power Sources
A failing wall adapter, USB hub, or computer port can mimic cable or port problems. Rule this out by using a different wall outlet, testing with a power bank or laptop USB port, and swapping adapters. If the device charges normally on one source but not another, the original power supply is the culprit rather than your cable or device.
Inspect the Cable for Physical Damage
Examine the entire length of the cable, focusing on stress points near the plug heads. Look for fraying, kinks, or exposed wires. Gently bend the cable near the connector while plugged in. If charging flickers, internal wires are likely broken. Even if the outer sheath looks intact, internal conductor breaks are common from repeated bending, especially with L-shaped plugs. Never use a cable with exposed wires, as it poses a fire and short-circuit risk.
Clean the Charging Port Safely

Debris buildup, especially lint and pocket fluff, is the number one cause of angle-dependent charging in smartphones. This simple fix resolves the majority of cases.
Gather the Right Tools
Use only non-conductive, precision tools to avoid damaging sensitive contacts. The safest options include a plastic dental pick for scraping, a wooden toothpick for lint extraction, fine-tipped tweezers for removing clumps, and compressed air in canned or bulb form. A flashlight helps illuminate the port interior. Avoid metal tools like pins or knives unless absolutely necessary.
Step-by-Step Cleaning Process
Power off the device to prevent electrical damage during cleaning. Shine a flashlight into the port at an angle to spot debris. Blow out loose particles using compressed air, holding the can upright to avoid moisture spray. Gently scrape the sides with a plastic pick or wooden toothpick using side-to-side motions, never pushing straight down. Remove visible lint clumps with tweezers under magnification if possible. Repeat blowing and scraping until no more debris appears. Perform a final inspection to confirm the port looks clean and symmetrical.
Use Electronics Cleaner for Stubborn Grime
For corroded or sticky residue, use a circuit board cleaner like CRC QD Electronics Cleaner. Spray a short burst through a straw into the port while outdoors or in a well-ventilated area. Place a paper towel over the port to catch overspray and condensation. Let it dry for five to ten minutes before charging. This dissolves grime without leaving residue, ideal for long-neglected ports.
Replace or Repair the Charging Cable
If cleaning does not help and testing confirms cable failure, replacement is the most reliable fix rather than attempting repairs.
Why DIY Cable Repair Rarely Works
Internal wire breaks, especially in USB-C or Lightning cables, are nearly impossible to repair permanently at home. Microscopic wires are hard to solder correctly, and the risk of reversed polarity can fry your device. Lack of strain relief in DIY fixes leads to rapid re-failure. No consumer-grade tool can reliably rejoin broken conductors inside a thin cable jacket.
Temporary Fixes for Frayed Cables
If you must extend a damaged cable’s life temporarily, wrap frayed sections tightly with electrical tape. Avoid duct tape, as it leaves sticky residue and does not insulate well. Do not tape near the plug head, as it can interfere with insertion. These are short-term workarounds, not solutions.
Choose High-Quality Replacement Cables
Invest in durable, certified chargers to prevent future issues. For iPhones, use MFi-certified cables. For Android devices, opt for USB-IF certified or OEM brands. For laptops, stick to manufacturer or reputable third-party adapters. Braided cables offer better strain resistance and last longer than rubber-jacketed ones. Consider using a cable with a right-angle plug to reduce stress on the port during charging.
Diagnose and Fix Port Damage
If cleaning and cable replacement fail, the charging port itself may be physically damaged and require professional attention.
Recognize Signs of Port Failure
Common symptoms include no click when inserting the cable, a plug that wobbles or falls out easily, charging that only works under pressure, and visible misalignment or bent pins. On laptops, a loose DC jack that rotates freely often means cracked solder joints on the motherboard rather than a simple debris issue.
Can You Fix a Bent Port Yourself
Minor misalignment can sometimes be addressed by using a plastic pick to gently nudge contacts back into position. Bent pins can be carefully straightened with fine tweezers and magnification, though one wrong move can cause permanent damage. This approach is not recommended for beginners. A loose port on a laptop indicates broken solder joints and requires micro-soldering, best left to professionals.
Device-Specific Fixes

Different devices have unique vulnerabilities and solutions that address their specific charging port designs.
iPhone Lightning Port Issues
iPhones are notorious for lint buildup due to their deep ports and pocket storage habits. Clean the port regularly, ideally every one to two months. Use only MFi-certified cables to avoid compatibility issues. Older models, particularly iPhone 12 and earlier, show higher wear rates after two or more years of use.
Android USB-C Port Fixes
USB-C ports are wider but still prone to debris and wear. Some Samsung and Pixel models have tight tolerances, meaning small lint clumps cause big problems. Check for software updates, as rare bugs can interfere with charging detection. Cleaning with compressed air often resolves the issue.
Laptop DC Jack Problems
Laptops with barrel-style DC jacks often suffer from solder joint cracks. Symptoms include charging only at certain angles, a wobbly plug, and intermittent power. Repair requires disassembly and re-soldering, best done by a technician. Consider upgrading to a USB-C charging laptop if this becomes a recurring issue.
Targus APA32US and Modular Chargers
Third-party laptop chargers with detachable tips, like the Targus APA32US, are prone to internal contact failure. Try a replacement tip first. If the issue persists, replace the entire unit. These designs amplify mechanical stress, leading to early failure even with careful use.
Temporary Workarounds
When you need power now but cannot repair immediately, try these user-tested hacks as temporary solutions.
Use a Clothespin to Hold the Cable
Clip a clothespin over the cable where it meets the device. This applies constant pressure, keeping the plug seated at the right angle without requiring you to hold it manually.
Wrap the Cable Around the Device
Loop the cord around your phone or tablet to create gentle tension that maintains the charging angle. This keeps the plug seated throughout the charging cycle.
Tape the Charger in Place
Use masking tape or a small adhesive pad to secure the cable in position. Never use conductive tape like aluminum or copper. Avoid covering the port completely, as airflow is needed to prevent overheating. These are temporary fixes, and prolonged use can worsen port or cable damage.
When to Seek Professional Repair
If basic fixes fail, it is time to call in expert help rather than risking further damage.
Signs You Need a Repair Shop
The port feels loose or wobbly even after cleaning. Multiple cables behave the same way regardless of quality. Cleaning made no difference to the charging behavior. You suspect internal damage from drops or moisture exposure.
Repair Options by Device
For iPhones, Apple Authorized Service Providers use genuine parts, with costs ranging from $50 to $120. Android devices can have USB-C port replacement at local shops for $60 to $150. Laptop DC jack repair ranges from $100 to $200 depending on model and motherboard access. DIY kits from iFixit are available but require precision tools and soldering skills.
Prevent Future Charging Issues
Avoid repeating the cycle with smart habits and regular maintenance to extend your device’s charging reliability.
Clean the Port Monthly
Use compressed air every 30 days to blow out lint before it compacts. Do this especially if you carry your phone in pockets. Combine with visual inspection using a flashlight to catch problems early.
Use Protective Port Covers
Silicone plugs or cases with built-in port covers reduce debris entry significantly. Remove covers before charging, and never plug in over a cover. Clean the cover regularly to avoid trapping dirt against the port.
Handle Cables Properly
Extend cable life with simple habits. Always unplug by the plug, not the cord. Avoid sharp bends near the connector. Store cables loosely coiled, never wrapped tightly around devices. Support L-shaped plugs during use to reduce strain on the port.
Invest in Surge Protection
Voltage spikes degrade internal components over time. Use surge-protected power strips and quality wall adapters with over-voltage protection. This protects not just your charger but your entire device from power-related damage.
Frequently Asked Questions About Angle-Dependent Charging
Why does my charger only work when I hold it at a specific angle?
This happens because of an unstable electrical connection caused by debris in the port, broken internal wires in the cable, or damaged port contacts. When you position the cable at the right angle, the broken connection temporarily aligns enough to allow power flow.
Can cleaning the charging port really fix this issue?
Yes, in most cases, especially for smartphones. Lint and debris accumulation is the number one cause of angle-dependent charging. Thorough cleaning with compressed air and a plastic pick resolves the majority of cases without requiring replacement parts.
How do I know if my charging cable is damaged?
Test the cable with multiple devices. If it fails to charge reliably on other devices, the cable is likely damaged. Also inspect for fraying near the plug ends, and try bending the cable gently while plugged in. If charging flickers, internal wires are broken.
Is it worth repairing a damaged charging port myself?
Minor issues like bent pins can sometimes be addressed with fine tweezers, but this carries risk of permanent damage. For most users, professional repair is safer and more cost-effective. A loose laptop port almost always requires professional micro-soldering.
How often should I clean my charging port?
Clean the port every one to two months, especially if you carry your device in pockets. Monthly compressed air blasts prevent lint from compacting and causing connection problems. This simple habit prevents most angle-dependent charging issues.
Will using a cheap charger cause this problem?
Poorly made chargers wear out faster and can damage ports through inconsistent voltage or poor connector fit. Always use certified cables from reputable brands. The small extra cost prevents premature port damage and ensures reliable charging.
Key Takeaways for Fixing Your Angle-Dependent Charger
A charger that only works at an angle is a warning sign that should not be ignored. The most common causes are debris in the charging port, damaged cables with broken internal wires, and worn or loose port connections. Start by cleaning the port thoroughly with compressed air and a plastic dental pick. If cleaning does not resolve the issue, test with known-good cables to isolate whether the fault lies in the cable or device. Replace damaged cables with certified alternatives rather than attempting DIY repairs, which rarely work permanently. For port damage, professional repair is the safest option for most users. Implement monthly cleaning, proper cable handling, and protective port covers to prevent recurrence. With proper care, you can restore reliable charging and extend your device’s lifespan by years.