
If you’re trying to power household devices from a car battery, solar system, or off-grid setup, knowing how to properly hook up a power inverter is essential. A power inverter converts DC (direct current) from a 12V, 24V, or 48V battery into usable 110–120V AC (alternating current), letting you run everything from laptops to microwaves on the go. But a poorly installed inverter can overheat, cause electrical fires, or damage sensitive electronics. This guide walks you through every critical step, from mounting and wiring to fusing, grounding, and testing, so you can install your inverter safely and reliably whether you’re working in a truck, RV, boat, or home solar system.
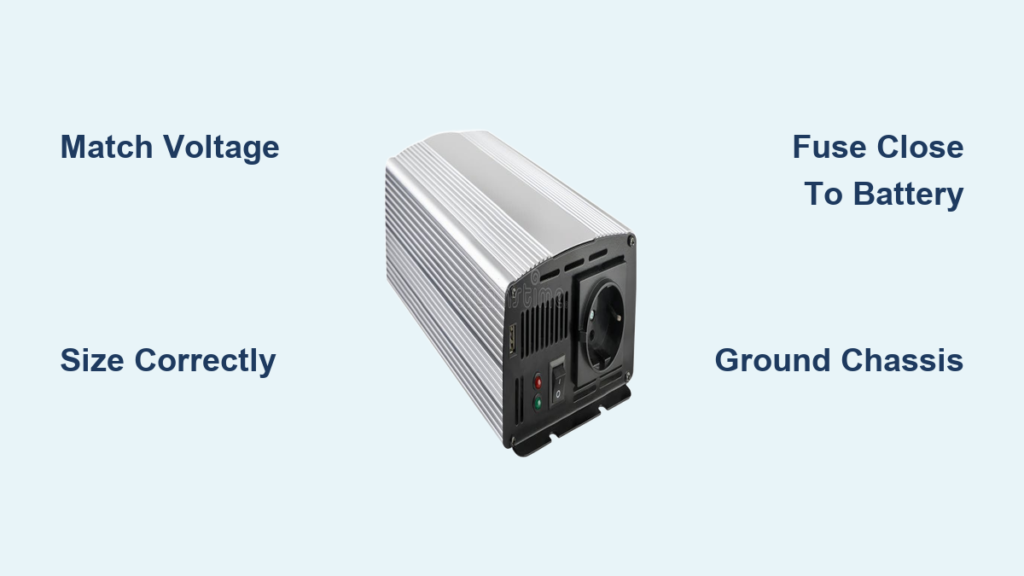
Match Inverter to Battery Voltage
Verify System Compatibility
Your inverter’s input voltage must exactly match your battery bank. A 12V inverter connects to a single 12V battery. A 24V inverter requires two 12V batteries wired in series. A 48V system uses four 12V batteries in series. Connecting mismatched voltages can destroy the inverter or create dangerous overheating. Always check the voltage rating printed on your inverter before making any connections.
Identify Your Setup
Most portable and vehicle installations use 12V systems. Larger off-grid homes and industrial setups often use 24V or 48V to reduce current draw and allow thinner cables. Check your battery configuration before purchasing an inverter. Knowing your system voltage is the foundation of a proper installation.
Calculate Power Needs and Inverter Size

Add Total Appliance Loads
List all devices you plan to run simultaneously. Add their wattage, which is found on labels or in manuals. Include startup surges, because some appliances like refrigerators or microwaves draw two times their rated power for a few seconds when they first turn on. This surge requirement is critical for choosing the right inverter size.
Size With Safety Margin
Once you have your total load, add 20–30% extra capacity. For example, if your devices total 1,800W, choose a 2,000W or 2,500W inverter. This prevents overload shutdowns and extends inverter life. Undersizing leads to constant shutoffs and potential damage from repeated overloads.
Choose Pure Sine Wave for Sensitive Devices
Opt for pure sine wave inverters if powering laptops, phones, drones, CPAP machines, audio equipment, or variable-speed tools. Modified sine wave models are cheaper but can cause buzzing, interference, or permanent damage to electronics. The extra cost of pure sine wave pays off in device protection and performance.
Mount Inverter Securely and Safely
Pick a Dry, Ventilated Location
Install the inverter in a cool, dry area with good airflow. Never place it inside enclosed compartments or near heat sources like engines. Overheating is a leading cause of inverter failure. Choose a location where air can circulate freely around the unit at all times.
Keep It Close to the Battery
Limit cable length to under 10 feet. Longer runs increase voltage drop, reducing efficiency and performance. Mount the inverter as close as possible to the battery, ideally within 3–6 feet. Short cables mean better performance and less wasted energy.
Use Proper Mounting Hardware
Secure the unit with 1-inch hex head self-tapping screws or standard bolts. Drill pilot holes to prevent cracking. Ensure the inverter is level and vibration-resistant. For heavy models over 15 lbs, use a wall rack anchored to studs for secure, stable mounting.
Select Correct Wire Gauge and Type
![]()
Use AWG Chart to Size Cables
Undersized wires overheat and pose fire risks. Use this guide for 12V systems:
• Up to 500W: #8 AWG
• 500–1,000W: #4 AWG
• 1,500–2,500W: #2 to #0 AWG
• 3,000W+: #0 or larger (2/0, 4/0)
Always follow manufacturer specifications because they override general guidelines. When in doubt, choose a thicker gauge.
Prepare Terminals Correctly
Use ring terminals crimped with a professional tool. Match terminal size to inverter and battery stud diameter. Seal every crimp with adhesive-lined heat-shrink tubing to prevent corrosion and vibration damage. Never use alligator clips for permanent setups.
Protect Cables During Routing
Install Rubber Grommets
Drill holes through floorboards or walls only when necessary. Fit rubber grommets at every pass-through point to prevent chafing and short circuits. Measure wire bundle diameter with calipers to choose the right grommet size. This simple step prevents costly damage later.
Shield and Secure Wiring
Run cables through plastic loom tubing to protect against abrasion, moisture, and rodents. Use cable ties to bundle and secure lines, avoiding loose or dangling wires. Keep cables away from sharp edges, hot components, and moving parts.
Install Inline Fuse for Safety
Why Fusing Is Non-Negotiable
A fuse or circuit breaker on the positive cable prevents catastrophic failure during a short circuit. Without one, a fault can melt wires, ignite insulation, or explode the battery. This single component is your primary protection against fire and battery damage.
Choose the Right Protection
• 1,000W (12V): 100A ANL or Mega fuse
• 2,500–3,000W: 250–300A fuse or breaker
• 3,500W+: Follow manufacturer specs
Use a circuit breaker if you frequently operate near max load because it’s resettable and safer for long-term use.
Mount Fuse Near Battery
Install the fuse holder within 18 inches (45 cm) of the battery’s positive terminal. Leave the fuse out until all connections are verified. Secure the fuse block with screws or zip ties to prevent strain on the connections.
Connect Wires in Correct Order

Connect Positive First
Contrary to some advice, connect positive first to prevent accidental short circuits. Here’s why: if you connect the negative cable first, your wrench can create a dead short by touching any metal surface while tightening the positive terminal. This causes sparks, melted tools, or battery explosion.
Step-by-Step Connection
- Attach positive (red) cable to inverter’s + terminal.
- Route to battery, but do not connect yet.
- Install fuse holder on positive line, keeping fuse removed.
- Connect negative (black) cable to inverter’s – terminal.
- Attach negative to battery’s negative post.
- Final step: connect positive to battery and insert fuse.
Ground the Inverter Chassis
Attach Green Ground Wire
If your inverter has a green grounding terminal, connect it to a clean, bare metal point on the vehicle frame or home grounding system. Use an existing 5/8″ welded ground stud if available. This connection prevents shock hazards and electrical noise.
Ensure Clean, Tight Contact
Scrape off paint or rust for metal-to-metal contact. Tighten securely and inspect periodically for corrosion. In residential systems, follow NEC and local codes for grounding compliance. Poor grounding causes erratic operation and safety hazards.
Test Before Full Operation
Run Pre-Power Checklist
Before turning on, verify all terminals are tight and secure. Check for no exposed copper or frayed wires. Confirm fuse is correct amperage and installed. Ensure grommets and loom are in place. Verify polarity is correct: red to +, black to –. Confirm ground wire is connected.
Power On and Monitor
- Flip the inverter’s power switch.
- Listen for a startup hum or fan activation.
- Check display for voltage and status.
A small spark when connecting the final cable is normal due to capacitive inrush. Large sparks mean reversed polarity or a short, so disconnect immediately.
Verify Output with Multimeter
Test AC Voltage
Use a multimeter to check output at the inverter’s outlets. Set to AC voltage. Reading should be 110–120V (or 230–240V outside North America). If voltage is low or fluctuating, check connections and cable gauge.
Plug In a Low-Load Device
Start with a phone charger or LED lamp. Confirm it powers on. Gradually test higher-wattage devices like a laptop or TV. Never plug in high-draw appliances like microwaves until the system runs stable.
Manage Loads and Battery Life
Run High-Power Devices with Engine On
Appliances like coffee makers (1,300W) or induction cooktops (1,800W+) draw over 100 amps from a 12V battery. This can drain a lead-acid battery in under 30 minutes. Only operate these with the engine running or while charging via solar.
Use Lithium Batteries for Longer Runtime
LiFePO4 (lithium iron phosphate) batteries offer 80–100% usable capacity versus 50% for AGM. They maintain stable voltage under load, preventing brownouts and improving inverter efficiency.
Integrate with Solar or Dual-Battery Systems
Add Solar Charging Support
Connect solar panels to a charge controller, not directly to the inverter. Use solar to recharge the battery and offset energy use. This setup is ideal for van life, RVs, and off-grid cabins.
Install a Dual-Battery Setup
Use a battery isolator or DC-DC charger to separate the starting battery (engine) from the house battery (inverter). This prevents accidental draining of your vehicle’s starter battery while running appliances.
Avoid Common Installation Mistakes
Never Connect to Charge Controller Load Terminals
Many users mistakenly wire the inverter to the load terminals on a solar charge controller. These are only rated for low-current devices like lights. Connecting a high-draw inverter risks overheating, melted wires, and fire. Always connect inverter directly to battery terminals or busbar.
Don’t Bypass Safety Features
No fuse, no ground, no proper wire gauge? These shortcuts lead to failures. A proper install takes longer but ensures safety and reliability. The few extra minutes spent on safety components save hours of troubleshooting later.
Don’t Use Modified Sine Wave for Electronics
While cheaper, modified sine wave inverters can damage medical devices, audio equipment, and variable-speed motors. Stick with pure sine wave for anything beyond basic tools or heaters.
Troubleshoot Common Issues
Inverter Won’t Turn On
Check battery voltage (should be >12V). Verify fuse integrity. Confirm polarity of connections. Check power switch and remote wiring if equipped. Use a multimeter to test continuity and voltage at each point.
Error Codes Appear
Low voltage means recharge the battery. Overload means unplug devices and restart. Overheating means improve ventilation and reduce load. Refer to your manual for specific code meanings.
Overheating or Buzzing
Ensure fans are running and vents are clear. If using modified sine wave, buzzing in appliances is normal. For pure sine wave units, overheating may indicate undersized cables or poor airflow.
Maintain Your System Long-Term
Inspect Terminals Quarterly
Check for looseness, corrosion, or heat damage. Clean with baking soda and water, then dry thoroughly. Re-tighten connections as needed. Regular inspection catches problems before they become dangerous.
Monitor Fuse and Cables
Replace blown fuses only with same amperage rating. Inspect cables for cracks, abrasion, or swelling, replacing if damaged. Damaged cables are a fire hazard and should be replaced immediately.
Keep Firmware Updated
Some modern inverters support firmware updates via USB or app. Check manufacturer website periodically for updates that improve performance and fix bugs.
Final Thoughts on Proper Power Inverter Hookup
Properly hooking up a power inverter isn’t just about making devices work. It’s about doing it safely, efficiently, and sustainably. Whether you’re powering a CPAP on a road trip or running a full kitchen off-grid, following these steps ensures your system delivers reliable AC power for years. Always prioritize correct wire gauge, inline fusing, proper grounding, and pure sine wave output for sensitive electronics. When in doubt, consult a certified electrician, especially for home or solar integrations.
Frequently Asked Questions About Power Inverters
Can I connect a power inverter directly to my car cigarette lighter?
No, cigarette lighters are only rated for up to 100W. For inverters over 200W, you must connect directly to the battery with proper gauge cables and fusing. Using the lighter socket for high-power inverters risks melting the socket and damaging vehicle wiring.
What’s the difference between pure sine wave and modified sine wave inverters?
Pure sine wave produces smooth, grid-like power that matches household electricity. Modified sine wave produces a stepped waveform that can cause buzzing, overheating, or damage to sensitive electronics. Pure sine wave is recommended for all modern devices.
How do I calculate what size inverter I need?
Add up the wattage of all devices you want to run simultaneously. Include startup surges by doubling the wattage for devices with motors. Add 20–30% buffer and choose an inverter rated at or above that total.
Can I use my inverter while driving?
Yes, but only for low-draw devices like phone chargers. High-power appliances like microwaves should only be used with the engine running to prevent draining your starting battery. Consider a dual-battery system for heavy inverter use.
Why does my inverter keep shutting off?
Common causes include low battery voltage, overloaded circuits, insufficient wire gauge causing voltage drop, or overheating due to poor ventilation. Check your battery charge state, reduce loads, verify wire gauge, and ensure the inverter has adequate airflow.
Do I really need a fuse between the battery and inverter?
Yes, absolutely. A fuse or circuit breaker is non-negotiable for safety. It protects against short circuits that could cause fire or battery explosion. Install a properly rated fuse within 18 inches of the battery positive terminal.


