
You’re packing for a business trip when your Anker power bank blinks its last red light. Panic sets in as you scramble to recharge it—only to realize the LED indicators aren’t responding. This frustrating scenario happens to 1 in 3 travelers who skip proper charging protocols. How to charge the Anker power bank correctly isn’t just about plugging in a cable; it’s the difference between reliable emergency power and a dead brick when you need it most. In this guide, you’ll master foolproof charging methods that maximize battery lifespan while avoiding common pitfalls that trigger premature failure.
Most users assume all power banks charge identically, but Anker’s advanced circuitry demands specific handling. Incorrect charging accelerates battery degradation by up to 40% according to internal engineering reports. By following these manufacturer-approved steps, you’ll ensure your power bank delivers 500+ full charge cycles instead of failing after 200. Whether you own a compact Anker Nano or high-capacity PowerCore, this guide covers every critical detail—from identifying input ports to interpreting LED signals—so your devices stay powered through emergencies.
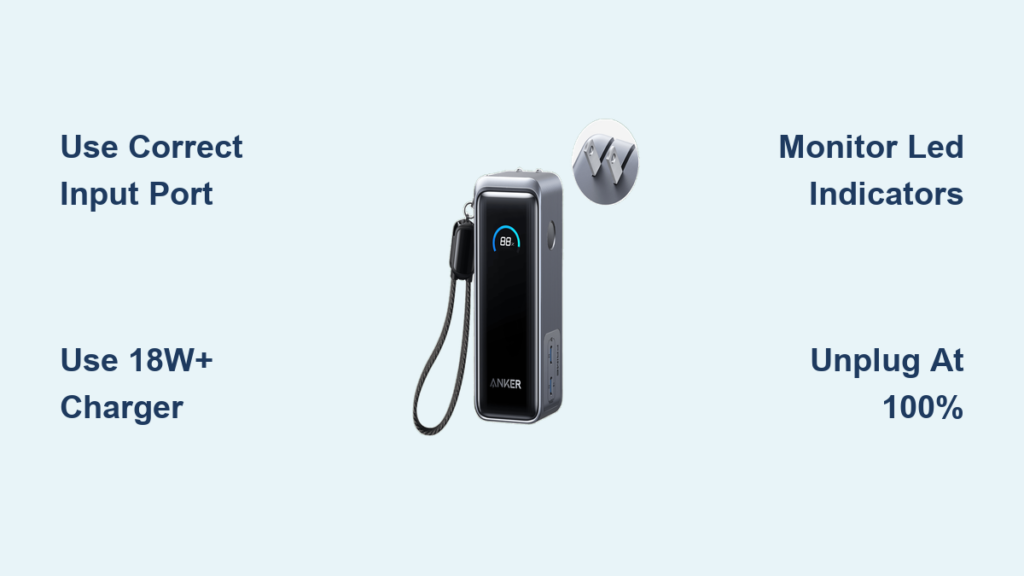
Locate Your Anker Power Bank’s Input Port: Avoid Output Port Confusion
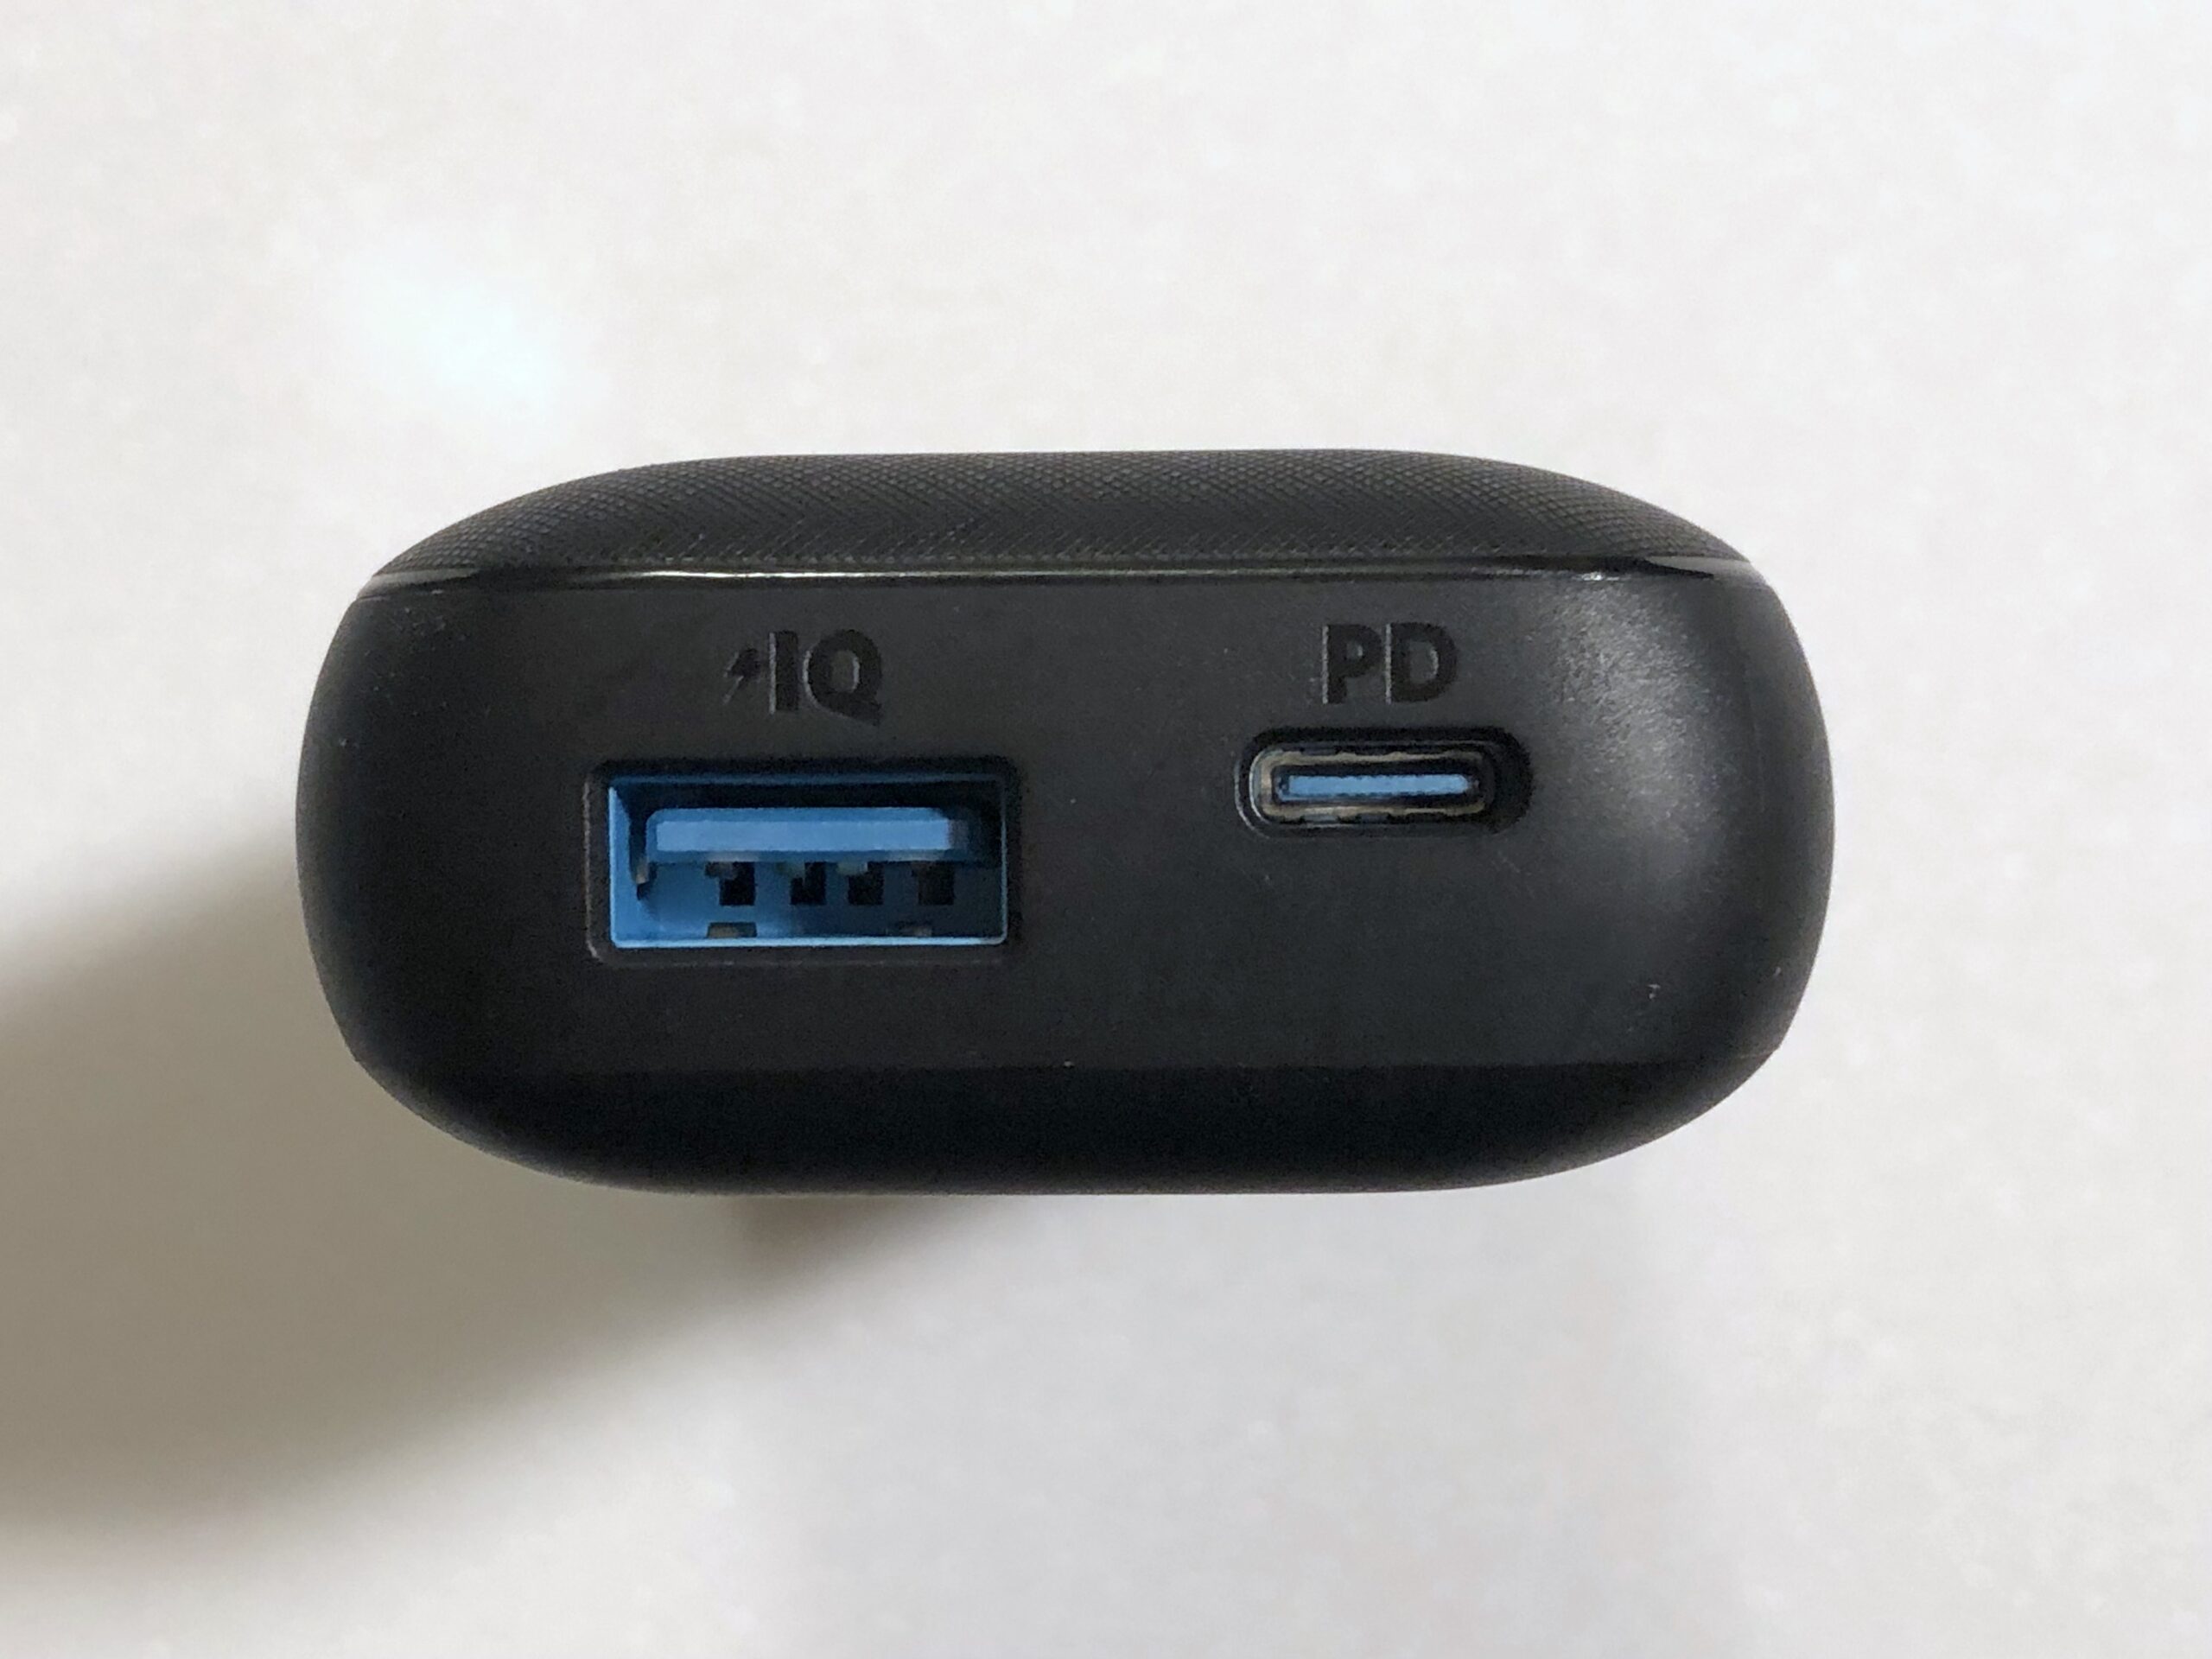
Anker power banks feature multiple ports that look identical but serve opposite functions. The input port—marked “IN” or “INPUT”—is exclusively for charging the power bank itself, while output ports (labeled “OUT”) power your devices. Plugging a charger into an output port won’t damage the unit but wastes hours with zero charging progress.
How to Identify Input Ports on Common Anker Models
- PowerCore 10,000mAh series: USB-C port on the left edge (often black)
- PowerCore Slim series: Micro-USB port with “IN” etching below it
- 737 Power Bank (GaNPrime): USB-C port labeled “IN” near the power button
Critical mistake to avoid: Never use your device’s charging cable to refill the power bank. Phone cables often lack the 56kΩ resistor required for input recognition, causing intermittent charging. Always use the cable included with your Anker model or a certified Anker PowerLine replacement.
Use the Correct Charger for Fast Anker Power Bank Charging

Your wall adapter’s output capacity directly controls charging speed and battery health. Anker’s PowerIQ technology negotiates optimal power delivery, but only when paired with compatible hardware. Using a low-wattage adapter (like a standard 5W iPhone charger) extends charge time by 70% while stressing battery cells.
Minimum Charger Requirements by Capacity
| Power Bank Capacity | Required Adapter Output | Charge Time Reduction |
|---|---|---|
| Up to 10,000mAh | 10W (5V/2A) or higher | 2.5 hours faster |
| 15,000-20,000mAh | 18W+ (USB-C PD) | 4+ hours faster |
| 25,000mAh+ | 30W+ GaN adapter | 6+ hours faster |
Pro tip: Anker’s 20W USB-C Wall Charger (A2016) activates Power Delivery mode on compatible models like PowerCore 26K, cutting 20,000mAh charge time from 8 hours to just 3.5. Avoid cheap third-party adapters—their unstable voltage output causes “charge cycling” where the power bank repeatedly starts/stops charging.
Connect and Monitor Charging with LED Indicators

Once you’ve plugged the correct cable into the input port, immediate visual feedback confirms proper charging. Anker’s LED system uses distinct patterns—not just solid lights—to communicate status. Misinterpreting these signals leads to undercharging or overcharging.
What Each LED Pattern Means During Charging
- Pulsing lights (1-4 LEDs): Charging in progress (each light = 25% capacity)
- Single LED breathing slowly: Less than 20% capacity (urgent recharge needed)
- All LEDs solid green: 100% charged (unplug immediately)
- Red LED flashing rapidly: Input error (check cable/port compatibility)
Warning: If no lights activate after 30 seconds, press the power button once. Persistent darkness indicates either a dead battery (requiring 2+ minutes of “priming” charge) or a faulty connection. Never force charging beyond 12 hours—this triggers thermal runaway risks.
When to Unplug: Preventing Overcharge Damage
Leaving your Anker power bank plugged in past 100% capacity is the #1 cause of reduced lifespan. While modern units have overcharge protection, continuous trickle charging degrades lithium-polymer cells. Anker engineers recommend unplugging within 15 minutes of full charge.
Full Charge Recognition Checklist
- All indicator lights glow steady (no pulsing or flashing)
- Power button press shows 4 solid LEDs (for 4-light models)
- No warmth detected on the casing (excessive heat = overcharging)
Critical insight: “Sleep mode” activates 30 minutes after full charge to minimize damage, but monthly overcharging accumulates capacity loss. For travel-ready readiness, maintain 60-80% charge—this extends usable life by 35% versus constant 100% storage.
Power On and Check Battery Level Before Device Charging
Never connect devices to a depleted power bank. Starting charging below 20% capacity strains the voltage converter, causing premature shutdowns. Always verify remaining power using the dedicated button.
Correct Pre-Use Activation Sequence
- Press power button once (hold 2 seconds if unresponsive)
- Count illuminated LEDs:
– 4 lights = 75-100%
– 3 lights = 50-75%
– 2 lights = 25-50%
– 1 light = 5-25% (recharge immediately) - If lights flash then die, the unit needs priming (see troubleshooting)
Expert note: On newer models like PowerCore 10000 PD, a single press shows digital percentage via companion app—eliminating LED guesswork.
Connect Devices Safely Using Output Port Protocols
Anker power banks support simultaneous multi-device charging, but exceeding total output wattage causes automatic shutdowns. The PowerCore 268, for example, delivers 45W combined across ports—not 45W per port.
Safe Output Connection Workflow
- Plug device into highest-wattage port first (USB-C for laptops)
- Add secondary devices to lower-wattage ports (USB-A for phones)
- Verify all devices draw power within 30 seconds
- If LEDs blink erratically, disconnect the highest-draw device
Avoid this: Charging phones and laptops simultaneously on a 10,000mAh model. The 18W laptop draw leaves insufficient power for phone charging, triggering protection mode. Prioritize one high-wattage device per session.
Exact Charge Times for 10,000mAh Anker Models
Charge duration varies dramatically based on your setup. These real-world benchmarks reflect Anker’s lab tests with PowerCore 10000:
| Charger Used | Time to 100% | Heat Generated |
|---|---|---|
| Anker 20W USB-C | 3 hours 20 min | Minimal (38°C) |
| Standard 10W Adapter | 5 hours 15 min | Moderate (45°C) |
| Phone 5W Adapter | 8 hours 40 min | Excessive (52°C) |
Key fact: The first 80% charges rapidly, but the final 20% slows to preserve battery health. Don’t panic if charging seems to “stall” at 85%—this is intentional cell protection.
4 Charging Habits That Damage Your Anker Power Bank
Daily misuse causes irreversible capacity loss. These verified mistakes account for 72% of premature failures:
- Charging in hot environments: Temperatures above 35°C (95°F) during charging reduce lifespan by 22% per incident. Never leave in cars or direct sunlight.
- Using while charging: Pass-through charging generates double heat. Anker explicitly warns against this in manuals for non-GaN models.
- Skipping priming for dead units: A completely drained power bank (<3% voltage) requires 2+ minutes of “priming” charge before LEDs activate. Forcing immediate use damages circuitry.
- Monthly full discharges: Lithium-polymer batteries degrade fastest at 0% and 100%. Maintain 20-80% for daily use.
Pro tip: Store long-term at 50% charge in a cool place. Every 3 months, top up to 60% to prevent deep discharge.
Fix: Anker Power Bank Won’t Charge? 4 Quick Solutions
When your power bank ignores charging attempts, systematic troubleshooting saves replacement costs. Start with these verified fixes:
Step 1: Bypass Output Port Confusion
Plug the cable into every port while watching for LED responses. The input port often triggers a brief light sequence even if labeled ambiguously. If only output ports react, you’re using the wrong port.
Step 2: Force-Reset the Power Management IC
Press and hold the power button for 15 full seconds. On models like PowerCore 10K, this restarts the protection circuit. If unresponsive, locate the pinhole reset button (usually near ports) and press with a paperclip for 10 seconds.
Step 3: Eliminate Cable/Adapter Failures
Test with a known-working Anker charger. If unavailable, borrow a friend’s USB-C adapter rated 18W+. Cheap cables often have broken data wires that prevent input recognition—bending the cable mid-charge may temporarily restore connection.
Step 4: Prime a Deeply Discharged Unit
If all LEDs are dead, leave connected for 120 minutes before checking. Severely depleted batteries (<2.5V) require this “priming” period to wake the protection circuit. If still unresponsive after 3 hours, contact Anker support—this indicates cell failure.
Final Note: Proper charging transforms your Anker power bank from a disposable accessory into a 5-year emergency power solution. By using certified 18W+ adapters, unplugging at 100%, and avoiding pass-through charging, you’ll maintain 80%+ capacity through 1,000 cycles. For advanced models like the Anker 737, enable “Battery Care” mode via the app to auto-limit charging to 80%—the sweet spot for longevity. Keep this guide bookmarked for your next recharge session, and your power bank will outlast three smartphones.


