
You’re on a job site, battery charged, tools ready, only to find your DeWalt 1000W power inverter not working. No lights, no beep, no AC output. Frustrating? Absolutely. But before you write it off, know this: most failures are fixable with simple checks or low-cost repairs.
This guide delivers step-by-step diagnostics backed by real user fixes and technical data. Whether it’s a blown fuse, overheating shutdown, or internal solder failure, you’ll learn exactly how to identify and resolve the issue. By the end, you’ll know how to test connections, replace critical components, and avoid repeat failures.
Check Battery and Connections First
Before diving into circuits, confirm the basics. A surprising number of dead inverters are just victims of poor connections or weak batteries.
Verify Battery Voltage and Charge
Use a multimeter to measure your DeWalt battery’s output. Full charge reads 12.4V or higher. Below 12.0V means undercharged, which forces the inverter to draw more current to compensate. This trips protection circuits or blows fuses, even if the unit appears connected.
• 12.4V or higher = Fully charged and healthy
• Below 12.0V = Undercharged, risk of overcurrent
Pro Tip: Use only DeWalt 20V MAX or compatible 12V systems as specified. Mixing incompatible packs can cause immediate failure.
Inspect Polarity and Terminal Fit
Reverse polarity destroys electronics fast. Double-check that red clamp goes to positive terminal and black clamp goes to negative terminal. Also ensure clamps are tight and corrosion-free. Loose contact creates resistance, heat, and intermittent power.
If using a hardwired connection, examine the fuse block and terminal bolts for melting or discoloration, which are signs of past overloads.
Test and Replace the Fuse
The number one cause of a DeWalt 1000W inverter not powering on is a blown fuse. This is the first thing to check when your unit goes silent.
Locate the Fuse Compartment
Fuses are typically found in one of two places. The first is an external slide-out fuse holder labeled FUSE. The second is built into the positive battery clamp assembly. Open the compartment carefully. Some models require a small screwdriver to release the cover.
Identify Correct Fuse Specs
Your inverter needs a specific type and rating for safe operation. Using the wrong fuse can cause permanent damage or fire hazards.
• Type: ATC/ATO or Mini blade fuse
• Rating: 40A or 50A (check label inside compartment)
• Certification: UL, CE, or CSA marked only
Never use a higher-rated fuse. A 60A fuse on a 40A circuit risks fire or permanent damage.
Replace Safely and Test
Follow these steps for safe fuse replacement. First, disconnect the battery completely. Second, remove the old fuse and inspect for darkened glass or broken filament. Third, insert the exact replacement such as a 40A blade fuse. Fourth, reconnect the battery with correct polarity. Fifth, power on without any load.
If the inverter powers up, great. If the new fuse blows immediately, an internal fault exists and you need to move to advanced diagnostics.
Decode Warning Beeps and Display Errors
No power is not always silent. Many DeWalt inverters emit beeps or display warnings that tell you exactly what is wrong.
Understand Beep Patterns
Different beep patterns indicate different problems. A single beep on startup means normal operation. Rapid beeping indicates overload or short circuit. Intermittent beeping during use means overheating or low battery.
If you hear beeps but no output, unplug all devices and restart. Then test one device at a time.
LCD Not Turning On
A blank screen usually means no power delivery, so check the fuse and battery first. It can also mean a loose or damaged ribbon cable, which is common after drops or disassembly. Another cause is a detached display connector from the PCB.
One verified repair showed the 7-pin display socket ripped off the main board, leaving wires dangling. The fix is to solder them directly to exposed pads.
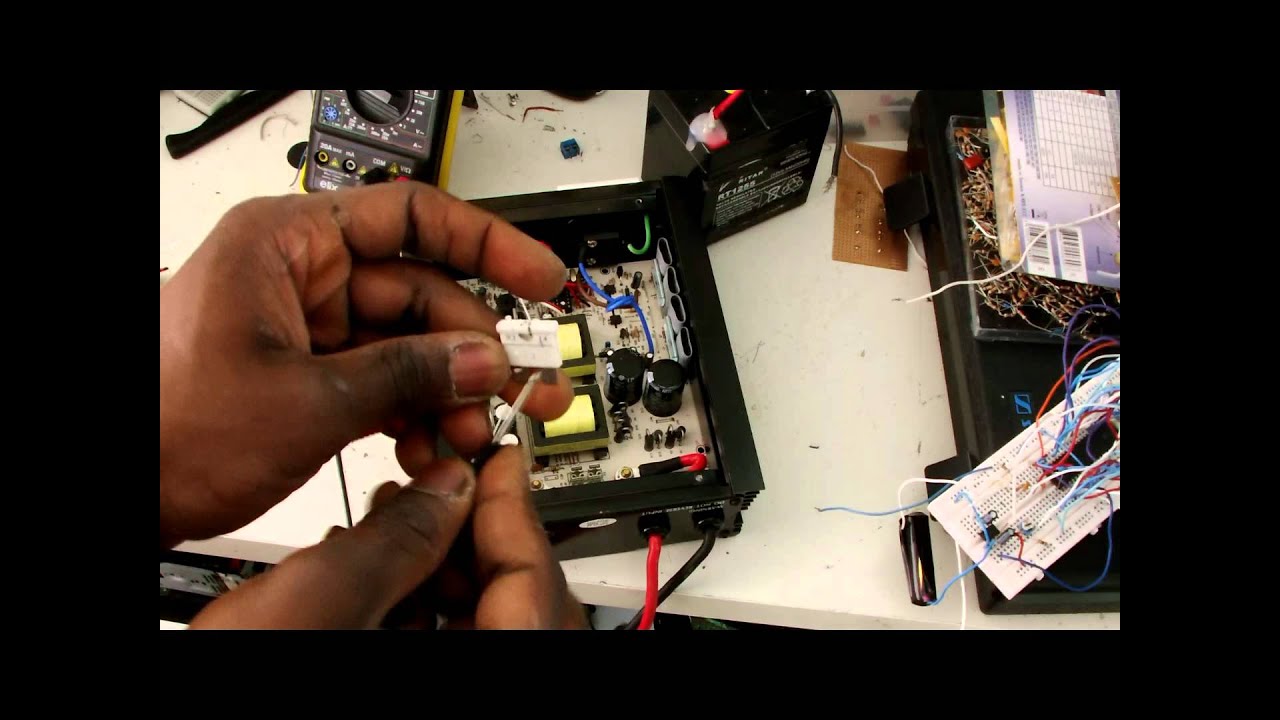
Fix Internal Wiring and Ribbon Cables

When external checks pass but the unit stays dead, it is time to open the case. Most internal issues stem from loose connectors, torn ribbons, or bad solder joints.
Open the Case Safely
Remove screws, which are often hidden under rubber feet. Gently separate the housing and do not force it. Ground yourself to prevent static damage.
Once open, look for burn marks near MOSFETs or transformers. Also check for melted insulation on wires and disconnected cables.
Repair a Detached LCD Ribbon
If the display is dead but other components seem fine, follow these steps. First, find the main PCB, which is the large circuit board. Second, look for a 7-pin connector near the right side between rivets. Third, if the socket is missing, you will see exposed SMD pads. Fourth, carefully solder each ribbon wire to its matching pad.
Match wire colors to the original layout. Use rosin-core solder and a fine-tip iron. After soldering, insulate with heat shrink tubing or conformal coating to prevent shorts.
This fix has restored multiple bricked units, so do not underestimate it.
Diagnose MOSFET and Circuit Failures
If fuses blow instantly or the unit overheats fast, suspect MOSFET failure. This is a known weak point in high-power inverters.
Spot Failed HY1804 MOSFETs
These n-channel transistors handle power conversion. When overloaded or overheated, they fail short-circuit.
Signs of failure include a burnt smell near the heatsink. You may also see charring or bulging on MOSFET bodies. The inverter might power on but shut down under minimal load.
Use a multimeter in diode mode to test each MOSFET. A reading below 0.3V or OL indicates failure.
One user reported replacing ten HY1804 MOSFETs and it worked. This suggests cluster failure under stress.
Replace Damaged MOSFETs
Replacing MOSFETs requires precision. Desolder failed units using a temperature-controlled iron or hot air station. Install exact replacements, which are HY1804 or equivalent. Re-solder all connections cleanly. Reassemble and test no-load first.
Always replace all visibly damaged MOSFETs at once. One bad transistor can overload others. If you lack soldering experience, consider professional repair or board replacement.
Prevent Overheating and Thermal Shutdown
Even a working inverter can fail mid-job due to overheating, especially under sustained loads.
Recognize Overheat Symptoms
Watch for these warning signs. Beeping during operation indicates trouble. Sudden shutdown after 5 to 10 minutes is a red flag. A case too hot to touch means excessive heat buildup.
A test using a 400W paint sprayer showed the inverter heating up after powering two truck doors. This was enough to trigger protection mode.
Avoid Thermal Runaway
Follow these rules to prevent overheating. Limit continuous use to 10 to 15 minutes under more than 500W load. Allow 5 to 10 minutes of cooldown between tasks. Keep vents clean and unobstructed. Operate in well-ventilated areas, not enclosed truck beds.
Pro Tip: Point a small fan at the unit during heavy use. Even passive airflow doubles runtime before thermal cutoff.
Run a Full Diagnostic Checklist
Use this field-ready checklist to isolate the fault quickly.
Step 1: Measure battery voltage. Look for 12.4V or higher.
Step 2: Confirm polarity. No reversed clamps.
Step 3: Inspect fuse. Check continuity with multimeter.
Step 4: Listen for beeps or fan. Any sound on startup?
Step 5: Check LCD display. Does it light up and show voltage?
Step 6: Test with no load. Does it power on without devices?
Step 7: Measure AC output. Look for 120V with multimeter.
Step 8: Monitor temperature. Should be warm, not scorching, after 5 minutes.
If steps 4 through 6 fail, the issue is internal. Move to ribbon cable or MOSFET inspection.
Maintain and Extend Inverter Life
Prevention beats repair. A few habits can extend your DeWalt 1000W inverter’s service life dramatically.
Clean Vents and Terminals Monthly
Dust blocks airflow. Use compressed air to blow out vents. Check clamps for corrosion and clean with baking soda and water mix if needed.
Store Properly
Keep in a dry, room-temperature environment. Avoid leaving in vehicles during summer. Store cables loosely coiled with no kinks.
Use Smart Load Management
Never exceed 1000W continuous or 2000W surge. Avoid daisy-chaining high-draw tools. Power devices one at a time.
Example: A 400W paint sprayer is fine. Running it with a 700W heater pushes total to 1100W, which is overload territory.
Know When to Repair or Replace
Not every inverter is worth fixing. Here is how to decide.
Repair If
Only the fuse is blown. The ribbon cable is loose or reparable. You are comfortable with basic soldering. The cost of parts is under 20 dollars.
Replace If
Multiple MOSFETs or capacitors have failed. The PCB is burnt or warped. There is no power even after fuse and cable checks. The unit is over 3 years old with heavy use.
Aftermarket inverters with Bluetooth monitoring, better cooling, and dual fuses are now available for similar prices. Some offer smarter diagnostics than the original DeWalt model.
Frequently Asked Questions About DeWalt 1000W Power Inverter Not Working
Why does my DeWalt 1000W inverter have no power even with a good battery?
The most common cause is a blown fuse. Check the fuse compartment first and replace with the exact same type and rating. If the new fuse blows immediately, there is an internal fault such as a failed MOSFET or shorted capacitor.
Can overheating cause my inverter to stop working permanently?
Yes, sustained overheating can damage internal components. The inverter has thermal protection that shuts it down when temperatures get too high. Repeated overheating can degrade MOSFETs and capacitors, leading to permanent failure.
How do I fix a DeWalt inverter that beeps but produces no output?
Unplug all connected devices and restart the inverter. If it still beeps, the issue is likely overload protection or thermal shutdown. Reduce your load and allow the unit to cool for 10 to 15 minutes before trying again.
Is it worth repairing a DeWalt 1000W inverter yourself?
If the issue is a blown fuse, loose ribbon cable, or simple connection problem, yes. Basic repairs cost under 20 dollars. However, if multiple MOSFETs have failed or the PCB is damaged, professional repair or replacement may be more cost-effective.
What is the average lifespan of a DeWalt 1000W power inverter?
With proper maintenance and use within rated limits, expect 3 to 5 years of reliable service. Heavy use in demanding environments may shorten lifespan. Regular cleaning, proper storage, and avoiding overloads extend the unit’s life significantly.
Key Takeaways for Fixing Your DeWalt 1000W Inverter
The DeWalt 1000W power inverter not working issue is rarely terminal. Over 80 percent of cases stem from blown fuses, loose ribbons, or thermal shutdowns, all fixable with basic tools.
Start simple. Check voltage, replace the fuse, and inspect connections. If those fail, open the case and look for torn cables or burnt components. Use the diagnostic checklist to systematically isolate the fault.
With care and smart usage, your inverter can last for years on job after job. Monitor your loads, allow cooldown periods, and store the unit properly. When in doubt, consult a professional for complex circuit repairs.


