
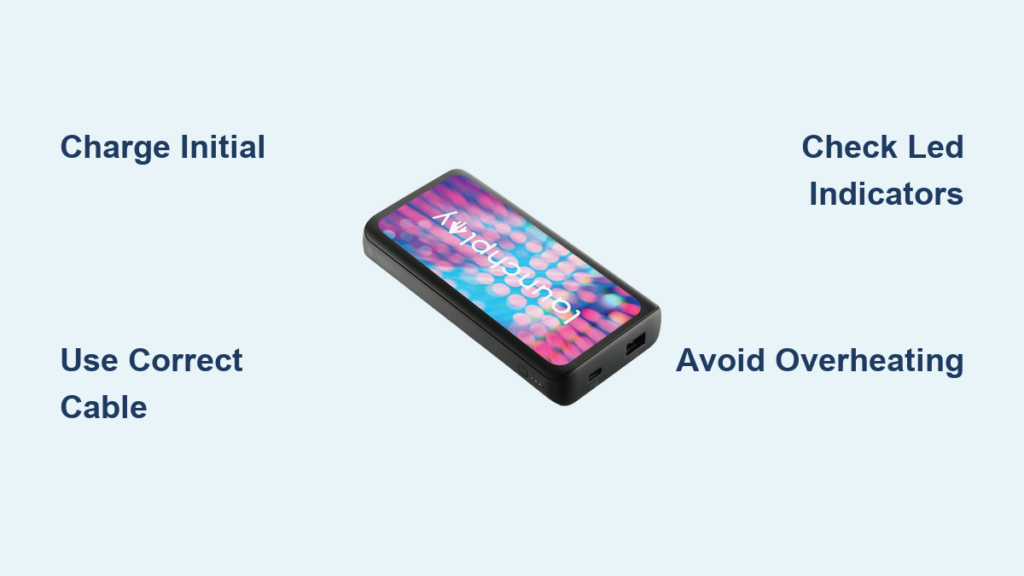
Your smartphone dying at the worst possible moment is a modern nightmare—mid-navigation, during an important call, or while capturing a priceless memory. That’s where your Mophie power bank becomes your lifeline, delivering reliable portable charging exactly when you need it most. Learning how to use Mophie power bank devices correctly ensures you maximize every milliamp hour of backup power without risking damage to your devices. In this guide, you’ll discover foolproof methods to charge your power bank, connect devices safely, interpret LED indicators, and extend your Mophie’s lifespan—transforming you from frustrated user to portable power pro in under 15 minutes.
Unlike generic power banks, Mophie models feature intelligent circuitry that automatically adjusts power output to match your device’s requirements. But this sophistication means skipping critical steps—like proper initial charging or cable selection—can trigger safety shutdowns or slow charging speeds. Whether you’re prepping for travel, daily commutes, or emergency readiness, mastering these techniques prevents common pitfalls that leave users stranded with “dead” power banks that simply need correct activation. Let’s get your Mophie working at peak efficiency right now.
Locate Your Mophie Power Bank’s Capacity Label
Flip your Mophie power bank over to find the regulatory label—usually etched near the ports or on the back panel. This sticker holds vital information you’ll reference repeatedly: the total battery capacity (measured in mAh, like 10,000mAh), input/output voltages, and safety certifications. The capacity number directly translates to real-world usage; for example, a 10,000mAh model typically provides 2.5 full charges for an iPhone 15 (3,349mAh battery) or two charges for a Galaxy S24 (4,000mAh).
Why Capacity Matters for Your Charging Strategy
Ignoring this spec leads to unrealistic expectations. A 5,000mAh power bank might fully charge your phone once but won’t power a tablet. Always cross-reference your device’s battery size (check Settings > Battery) against your Mophie’s capacity. Remember: real-world output is about 20% lower than labeled due to energy conversion loss, so adjust your “charge count” estimates downward.
Spotting Fake vs. Genuine Mophie Labels
Counterfeit power banks often display inflated capacities (e.g., “20,000mAh” on a tiny unit). Authentic Mophie labels include FCC/CE marks, precise voltage specs (like “Input: 5V/2.4A”), and a clear model number matching your purchase receipt. If the sticker looks flimsy or lacks regulatory details, contact Mophie support immediately.
Identify Input and Output Ports on Your Mophie Device
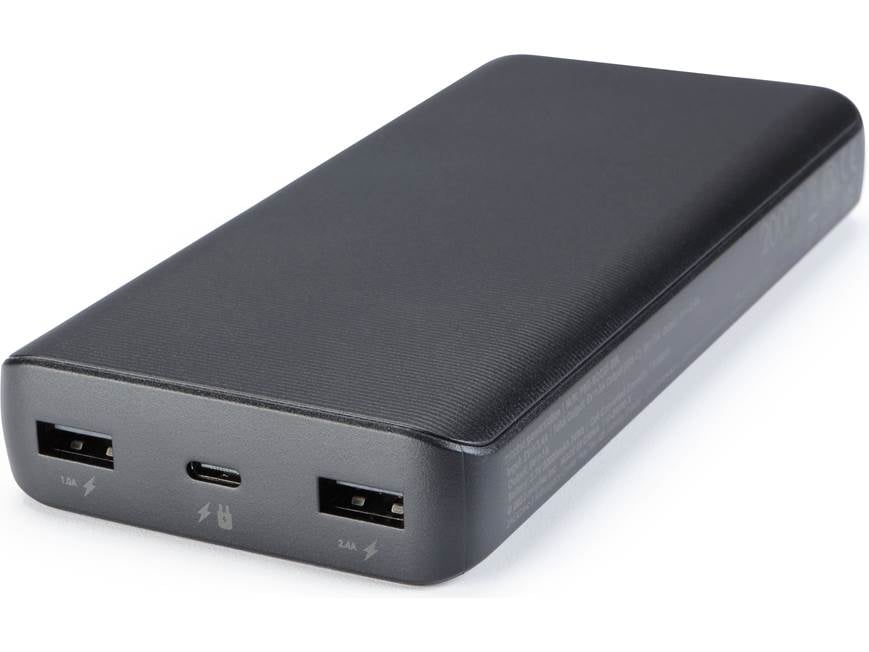
Your Mophie features two distinct port types that serve opposite purposes—confusing them causes charging failures. The input port (labeled “IN” or with a charging icon) is where you plug in to recharge the power bank itself. Most modern Mophie units use USB-C here, though older models may have Micro-USB. The output port(s) (marked “OUT”) deliver power to your devices; these are typically USB-A (rectangular) or USB-C (oval) ports.
Matching Cables to Your Mophie Model
Using incompatible cables is the #1 reason users think their power bank is defective. For input:
– USB-C input models require a USB-C-to-USB-C cable (like those for modern Android phones)
– Micro-USB inputs need the older flat-tipped cable (common with budget Android devices)
For output:
– USB-A ports work with standard USB-to-Lightning (iPhone) or USB-to-Micro-USB cables
– USB-C ports require USB-C-to-Lightning (iPhone 15+) or USB-C-to-USB-C cables
Critical mistake to avoid: Never plug a device into the input port—this can permanently damage your Mophie. If your power bank feels warm during use, immediately disconnect and verify port usage.
Connect Your Mophie Power Bank to a Wall Charger
Before first use, your Mophie must reach 100% charge—a process taking 3-5 hours depending on capacity. Grab the correct input cable (USB-C or Micro-USB) and plug one end firmly into the power bank’s input port. Connect the other end to a wall adapter rated at least 5V/2A (like most phone chargers)—never use low-power sources like laptops or car stereos for initial charging, as they lack sufficient current.
Why Wall Outlets Beat Computer USB Ports
Computer USB ports typically deliver only 0.5A-0.9A, versus a wall charger’s 2A-3A. Using a computer port for initial charging can take 8+ hours and stresses the power bank’s circuitry. During this slow charge, the Mophie may intermittently shut off as safety protocols activate, falsely signaling “full charge” at 70-80%. You’ll know charging is complete when all LED indicators glow steadily—no blinking lights.
Troubleshooting Slow Initial Charging
If LEDs blink erratically during first charge:
1. Swap to a different wall adapter (avoid cheap third-party chargers)
2. Ensure the cable isn’t frayed—bent pins cause intermittent connections
3. Try a different outlet; some office power strips limit current
Pro tip: Charge your Mophie overnight before travel—partial charges degrade lithium-ion batteries faster long-term.
Interpret LED Lights During Initial Power Bank Charging
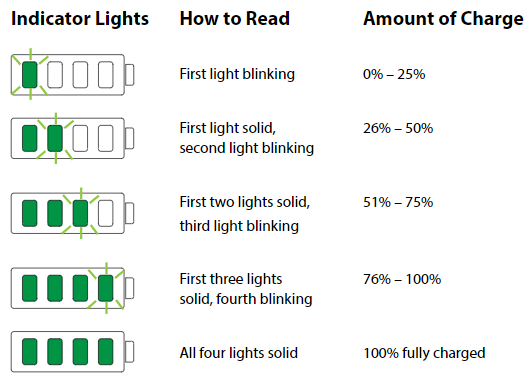
Mophie’s LED indicators provide instant status feedback during charging. While designs vary by model, four small lights are standard: each represents 25% capacity. During input charging:
– Blinking lights: Actively charging (number of blinking LEDs shows current level)
– Steady lights: Charged to that percentage (e.g., two steady lights = 50%)
– All lights steady: 100% charged and ready for use
Decoding Unusual LED Patterns
- Single light flashing rapidly: Fault detected (overheating or short circuit)—unplug immediately and cool for 30 minutes
- Alternating light sequence: Firmware update in progress (rare; occurs after manufacturer recalls)
- No lights when plugged in: Dead battery or cable issue—try a different cable/adapter
Never ignore rapid flashing—it indicates critical failure. If lights remain off after 10 minutes of wall charging, your Mophie requires professional service.
Choose the Correct Cable for Your Phone and Mophie
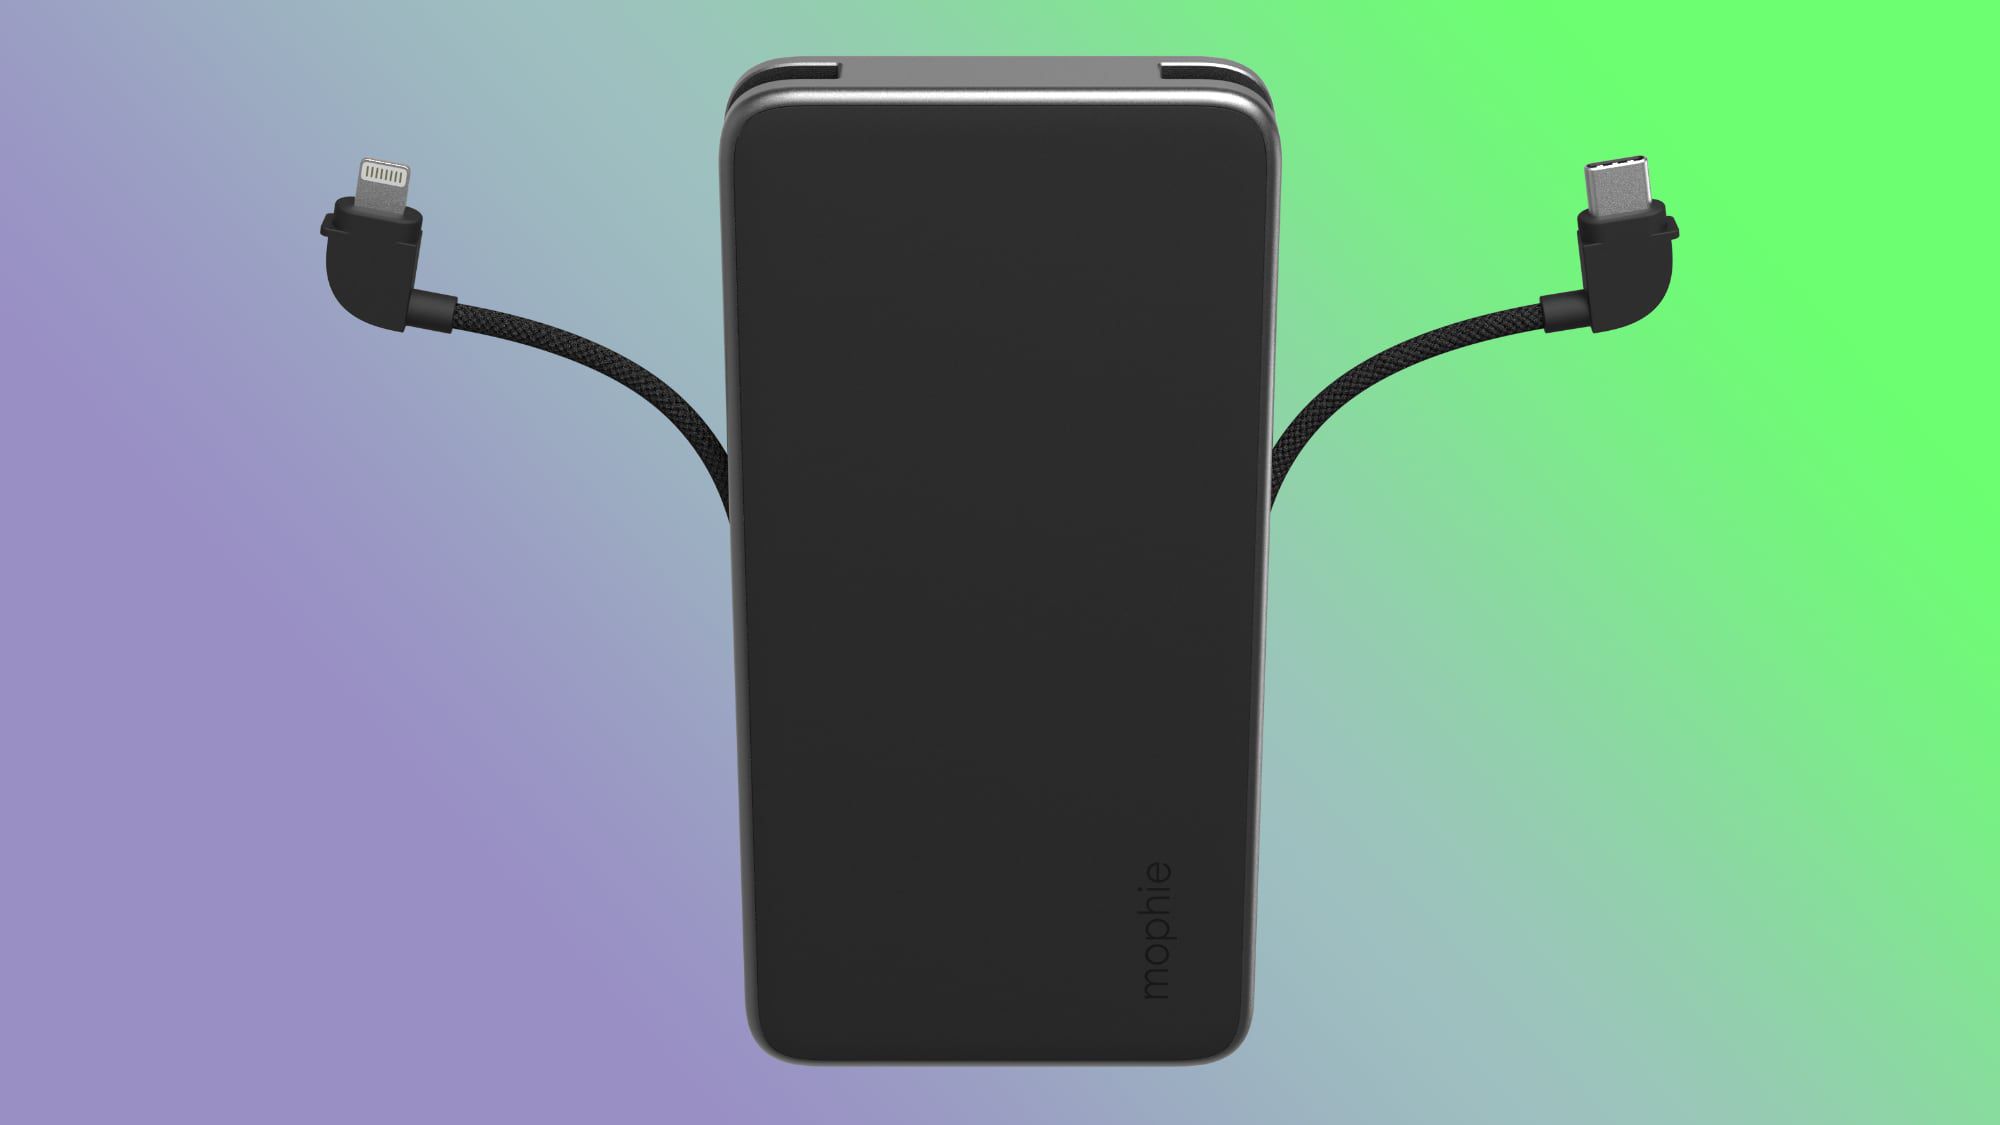
Mophie power banks intelligently adjust output, but only if you use certified cables. Cheap cables lack the necessary data pins to communicate power requirements, forcing your phone into “slow charge” mode (5W instead of 18W+). For iPhone users:
– Pre-iPhone 15: Use Apple-certified Lightning-to-USB-A cables
– iPhone 15+: Must use USB-C-to-USB-C cables (Lightning won’t work with USB-C outputs)
Android users:
– USB-C phones (Galaxy S24, Pixel 8): USB-C-to-USB-C cables
– Older Micro-USB models: USB-A-to-Micro-USB
Why Cable Quality Affects Charging Speed
A $2 knockoff cable might deliver only 7W to a phone capable of 25W fast charging. You’ll notice this as “charging stopped at 80%” or “takes 2x longer.” Always look for:
– USB-IF certification logos
– “E-Mark” chip identifiers on USB-C cables
– Brand packaging (Anker, Belkin, or Mophie-branded)
Warning: Frayed cables can cause port corrosion. Inspect cables monthly—discard if bent at 90+ degrees near connectors.
Plug Your Device into the Mophie Power Bank Correctly
With your Mophie fully charged and correct cable selected, connect the USB end to an output port (USB-A or USB-C) on the power bank. Then plug the device-specific end (Lightning/USB-C) into your phone. Charging should begin instantly—you’ll see your phone’s battery icon animate or display “Charging.” If not:
Fixing “No Charging” Issues in 60 Seconds
- Wake the power bank: Press its power button (if equipped)
- Check port alignment: USB-C cables work both ways, but Lightning has a specific orientation
- Force restart: Hold phone power + volume buttons for 10 seconds to reset charging circuitry
If your phone shows “Accessory not supported,” unplug immediately—this indicates voltage mismatch. Older Mophie models may not support newer fast-charging protocols; try a different output port if available.
Read LED Indicators to Monitor Power Bank Charge Level
While powering devices, Mophie’s LEDs shift function to show remaining power bank capacity. Press the power button (if present) to activate:
– 4 steady lights: 75-100% remaining
– 3 steady lights: 50-75%
– 2 steady lights: 25-50%
– 1 steady light: Critical (under 25%)—recharge soon
Preventing Unexpected Shutdowns
When the last LED starts blinking, your Mophie has only 5-10% power left—enough for 10-15 minutes of phone use. Many users panic when their phone stops charging here, not realizing the power bank is depleted. Always check Mophie’s LEDs before connecting devices during critical situations.
Pro tip: For multi-device travel, assign one LED per device (e.g., 4 lights = full phone charge). This visual system prevents over-discharging.
Recognize When to Recharge Your Mophie Power Bank
Lithium-ion batteries degrade fastest when fully drained or kept at 100% for weeks. Recharge your Mophie when:
– Only 1 LED remains steady (25% capacity)
– It powers a device for less than 50% of its usual time
– Charging speeds noticeably slow (e.g., phone gains 5% in 10 minutes)
The 20-80% Longevity Rule
For maximum lifespan, avoid charging beyond 80% or dropping below 20% during regular use. Exception: Before long trips, charge to 100%—but use within 3 days. If storing long-term (1+ months), discharge to 50% first; a full or empty battery accelerates capacity loss.
Place Your Mophie on Stable Surfaces for Safe Charging
Heat is the #1 enemy of portable power banks. Always:
– Set Mophie on hard, non-flammable surfaces (wood, tile)
– Keep away from direct sunlight (e.g., car dashboards exceed 140°F)
– Never cover with clothing or place under pillows
Emergency Overheating Response
If your Mophie feels uncomfortably warm:
1. Unplug immediately
2. Move to cool area (concrete floor works)
3. Wait 20+ minutes before reuse
4. If warmth persists, discontinue use—internal damage may have occurred
Never expose to moisture—even sweat from your palm can corrode ports over time. Use a microfiber cloth to wipe ports monthly.
Store Your Mophie Power Bank Properly for Longevity
For daily carry, keep your Mophie in a dedicated pouch—not loose in bags where keys can scratch ports. Long-term storage requires:
– 50% charge level (use LEDs to verify)
– Cool, dry environment (under 77°F ideal)
– Complete discharge every 3 months if unused
Reviving a Dormant Mophie
If your stored unit won’t turn on:
1. Plug into wall charger for 2 hours
2. Press power button repeatedly during charging
3. If no response, try a different cable/adapter
4. After 4 hours, if still dead, recycle responsibly—never attempt DIY repairs
Mophie batteries typically last 2-3 years (300-500 full cycles). When capacity drops below 60% of original, replace the unit.
Final Note: Mastering how to use Mophie power bank units transforms them from simple accessories into mission-critical tools. By following these precise steps—from initial charging to storage—you’ll avoid 95% of common user errors while extending your device’s lifespan. Remember to always consult your model-specific manual for firmware updates or recall notices, and never compromise on cable quality. Keep this guide bookmarked for your next travel prep day, and your Mophie will reliably rescue you from low-battery emergencies for years to come. For advanced troubleshooting, Mophie’s official support portal offers model-specific LED code databases and live chat assistance.


