
You plug in your power bank before a critical trip, but the charging lights stay dark. No percentage increase. No reassuring hum. Just silence. A power bank charger not charging transforms your lifeline into a useless brick—especially dangerous when your phone’s at 1% during an emergency. This isn’t just inconvenient; it’s a modern vulnerability millions face yearly. The good news? 80% of “dead” power banks aren’t actually broken. In this guide, you’ll discover exactly why your Anker, Xiaomi, or RavPower unit refuses to charge and the proven fixes—from swapping cables in 10 seconds to reviving a deep-discharged battery—so you never get stranded powerless again.
Diagnose Your Faulty Charger or Cable First (Most Common Fix)
Before assuming your power bank is dead, isolate whether the problem lies in your charging accessories. This step solves most “power bank charger not charging” cases instantly.
Test Your Wall Adapter with a Phone or Tablet
Your power bank might need more wattage than your current charger provides. Modern high-capacity units (20,000mAh+) often require 18W+ PD chargers.
Action Steps:
1. Unplug your power bank and connect the same charger and cable to your smartphone.
2. If your phone charges slowly or not at all, the adapter is underpowered or faulty.
3. Critical workaround: Use your phone’s fast charger (e.g., Samsung 25W, iPhone 20W) instead of a basic 5W adapter. Many power banks won’t activate charging with low-wattage sources.
Swap Cables to Rule Out Physical Damage
A single frayed wire inside your USB-C cable can block all power flow. Cheap cables often fail internally while appearing intact.
What to Look For:
– Visible kinks or bends near the connectors (a sure sign of internal breakage)
– Intermittent charging where wiggling the cable briefly triggers lights
– No data transfer when connected to a computer (indicates broken data wires)
Proven Fix: Test with a certified USB-IF cable rated for your power bank’s input (e.g., 30W for Anker 737). Avoid dollar-store cables—they frequently lack the necessary power-handling capacity.
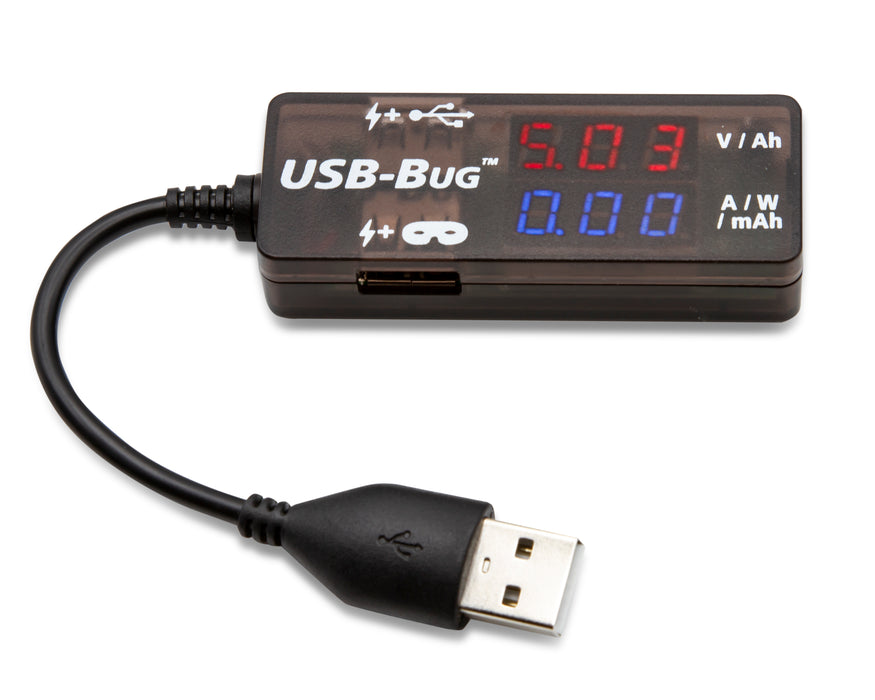
Verify Your Power Source with a USB Power Meter
Don’t guess whether power is flowing. A $10 USB power meter gives definitive answers.
How to Test:
1. Plug the meter into your wall adapter.
2. Connect your power bank’s charging cable to the meter.
3. Normal reading: 5V/2A (10W) or higher for most units.
4. Problem signs:
– 0.00W = Dead cable/adapter
– Below 5W = Underpowered source (common with older phone chargers)
– Fluctuating values = Loose connection in port
Clean Your Power Bank’s Charging Port Properly (Avoid Permanent Damage)
Dust and pocket lint clog ports, creating a physical barrier between connector and pins. This causes “power bank charger not charging” symptoms even with perfect accessories.
Identify Debris Blockage Without Tools
Shine your phone flashlight at a 45-degree angle into the USB-C port. Look for:
– Grayish lint packed deep inside
– Shiny metal pins coated in grime
– Asymmetrical darkness indicating partial blockage
Never skip this: A single fiber can prevent full connector insertion, breaking the circuit.
Safely Remove Debris in 60 Seconds
Tools you actually need:
– Compressed air (from office supply store)
– Plastic toothpick or spudger (metal risks short-circuiting)
– Magnifying glass (phone camera zoom works)
Step-by-Step Cleaning:
1. Power off the bank completely (hold power button 10 sec)
2. Blast air straight into port from 2 inches away—never at an angle
3. If debris remains, gently scrape (don’t poke!) with plastic tool along port edges
4. Re-test charging before reassembling
Critical warning: If you see corrosion (green/white crust), stop immediately. Moisture damage requires professional repair—don’t risk internal shorts.
Reset a Frozen Battery Management System (BMS)

When your power bank charger not charging but shows lights, the Battery Management System likely froze due to voltage fluctuations or deep discharge.
Force a BMS Reset in 30 Seconds
This wakes up the “brain” controlling charging circuits—works 70% of the time for Anker, RAVPower, and Baseus models.
Exact Procedure:
1. Unplug all cables
2. Press and hold the power button for 15 full seconds (don’t release early)
3. While still holding the button, plug in a known-good 18W+ charger
4. Continue holding for 10 more seconds after plugging in
5. Release button and check for charging lights
Why this works: Drains residual voltage in capacitors, forcing the BMS to reboot its safety protocols. If lights flash during reset, success is likely.
Revive a Deep-Discharged Battery (Below 3.0V)
If your power bank sat unused for 6+ months, lithium cells may have dipped below the BMS safety threshold (3.0V), triggering permanent lockout.
Safe “Kickstart” Method (No Special Tools):
1. Use a low-power source: Plug into a computer’s USB port (not wall adapter)
2. Hold power button continuously for 60 seconds while connected
3. Check for any indicator flicker—this means the BMS is responding
4. Once lights appear, switch to a wall charger
Do NOT attempt: Jump-starting with 9V/12V sources. This risks thermal runaway—fire hazard—unless you’re a certified technician with voltage-controlled lab equipment.
Identify Internal Hardware Failures (When DIY Fixes Fail)

If cleaning and resets don’t work, internal components have likely failed. Stop troubleshooting if you see these danger signs:
– Swollen case (creates fire hazard—discontinue use immediately)
– Burnt plastic smell during charging attempts
– Visible corrosion inside disassembled unit
Locate the Blown Input Fuse Yourself
Only attempt if: Your unit is out of warranty and you’re comfortable with basic electronics.
Steps:
1. Open casing with plastic prying tools (no metal!)
2. Locate the rectangular fuse near the USB-C port (marked “F1” or “F2”)
3. Test with multimeter on continuity mode:
– Beeping sound = Good fuse
– Silence = Blown fuse (requires SMD replacement)
Reality check: Replacing surface-mount fuses needs soldering skills. If you lack tools, replacement is safer than risking a short circuit.
Recognize Charging IC Failure Symptoms
The charging IC (integrated circuit) manages power flow. When it fails:
– Power bank discharges normally to devices
– But shows zero response when plugged in
– Input port may feel warm during failed charging attempts
Professional insight: These microscopic chips (e.g., IP2312, BQ25895) cost pennies but require $200+ microsoldering equipment to replace. Not cost-effective for units under $40.
When to Replace Your Power Bank (Critical Safety Guide)
Replace immediately if:
– Battery has any visible swelling (even slight bulging)
– Liquid exposure occurred (coffee spills, rain)
– Unit emits smoke or overheats during reset attempts
Recycle swollen batteries correctly:
1. Place in non-flammable container (metal bucket)
2. Store outdoors away from structures
3. Transport to Best Buy, Staples, or municipal e-waste center—never in regular trash
Choose a Replacement That Won’t Fail Early
Prioritize these features in your new power bank:
– Brand reliability: Anker (PowerCore series), INIU, or RAVPower (avoid no-name brands)
– Warranty: Minimum 18 months (Anker offers 24-36 months)
– Safety certifications: UL 2056, CE, FCC printed on casing
Pro tip: Pay $5 more for models with dual input ports (USB-C + Micro-USB). If one port fails, you have a backup charging option.
Prevent Future Charging Failures (Proven Maintenance)
Use the Right Charger for Your Power Bank
| Power Bank Capacity | Minimum Charger Wattage | Required Cable Type |
|---|---|---|
| Under 10,000mAh | 10W (5V/2A) | USB-A to USB-C |
| 10,000-20,000mAh | 18W PD | E-Marked USB-C |
| 20,000mAh+ | 30W+ PD | 100W E-Marked USB-C |
Never use a charger rated below your power bank’s input specs—it stresses components and causes premature failure.
Store Power Banks at 50% Charge
Lithium-ion cells degrade fastest at 0% or 100% charge. For long-term storage:
1. Charge to exactly 50%
2. Power off completely
3. Store in cool, dry place (under 25°C/77°F)
4. Recharge to 50% every 3 months
This extends lifespan by 2+ years compared to storing fully drained.
Avoid These 3 Deadly Habits
- Leaving it plugged in overnight – Causes chronic overcharging stress
- Using in hot cars – Temperatures above 60°C (140°F) permanently damage cells
- Dropping on hard surfaces – Micro-fractures in cells lead to sudden failure
Final Reality Check: If your power bank charger not charging after trying every step here, internal hardware failure is confirmed. For units under $30, replacement is always smarter than repair—modern power banks cost less than labor for component-level fixes. Invest in a reputable brand with a long warranty, follow the storage tips above, and you’ll avoid 95% of charging failures. Remember: A swollen battery isn’t just “broken”—it’s a ticking fire hazard. Recycle it responsibly today, and keep your next power bank alive with these proven maintenance steps.


