
You’re deep in the wilderness with a dead phone, a telescope that won’t power on, and zero access to electricity. That’s exactly when a custom 12V power bank becomes essential gear—not a luxury. How to make power bank with 12v battery projects solve this critical off-grid problem by creating a portable, temperature-resistant power source that outperforms commercial options in extreme conditions. Unlike standard lithium-ion packs, LiFePO4 chemistry delivers 2,000+ charge cycles while operating reliably from -5°C to 30°C ambient temperatures. In this guide, you’ll discover exactly how to build a rugged 12.8V/6,000mAh power bank capable of running telescopes, cameras, and communication gear for full days in remote locations—all for under $150 in parts. Forget generic power banks that fail in cold weather; you’ll learn field-tested assembly techniques that prioritize safety while maximizing runtime.
Why LiFePO4 Beats Standard Lithium for Your 12V Power Bank
Lithium Iron Phosphate (LiFePO4) isn’t just an alternative—it’s the only chemistry that survives real-world off-grid conditions. Standard 18650 lithium-ion cells suffer catastrophic capacity loss below 0°C and risk thermal runaway when damaged. LiFePO4 maintains 80% capacity at -5°C while tolerating physical impacts that would rupture other lithium cells. Its 3.2V nominal cell voltage creates the perfect foundation for 12V power bank projects when configured in 4S (four cells in series). Crucially, this chemistry operates at 3.65V maximum charge voltage versus 4.2V for standard lithium, eliminating fire risks during charging. For wilderness applications where safety is non-negotiable, LiFePO4’s stability during short circuits or punctures makes it the only logical choice—especially when building your own 12v battery power bank.
LiFePO4 vs. Lead-Acid: Why Weight Matters in the Field
Carrying a 30-pound lead-acid battery defeats the purpose of portability. A 12.8V/6Ah LiFePO4 pack weighs just 2.2 pounds—less than 1/10th the weight of equivalent lead-acid capacity. This weight savings translates to real-world mobility: imagine hiking with 77Wh of power versus lugging a car battery. Plus, LiFePO4 delivers full capacity even at 80% discharge, while lead-acid degrades rapidly below 50% depth of discharge. For backpackers needing reliable 12v power bank performance, the energy density difference is game-changing.
Calculate Your Exact Power Bank Capacity Needs
Before buying cells, determine your true power requirements. A 12V telescope mount drawing 1.5A for 4 hours consumes 6Ah—meaning a 6,000mAh pack provides exactly one night of operation. But add a DSLR camera (0.8A) and satellite communicator (1.2A), and your total jumps to 14Ah. Use this field-proven formula:
(Device Amps × Hours Used) + 20% Safety Margin = Minimum Pack Capacity
How to Size Cells for Extreme Cold Environments
At -5°C, LiFePO4 capacity drops 15-20%. If your gear needs 10Ah, build a 12.5Ah pack (4S2P configuration using 6,000mAh 32700 cells). Never undersize—cold temperatures demand 25% extra capacity versus room-temperature calculations. For most backpackers, a 4S1P 6,000mAh pack (77Wh) covers basic needs, while 4S2P 12,000mAh (154Wh) handles pro gear.
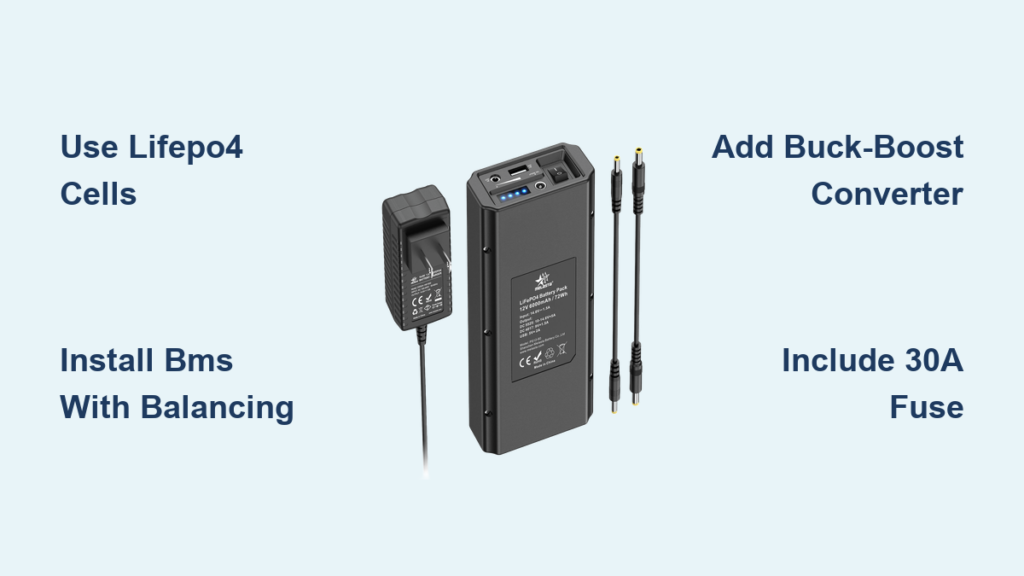
Critical Components You Must Buy for Safety
Skipping any of these components risks fire or permanent damage—this isn’t theoretical. A 4S LiFePO4 BMS (Battery Management System) is non-negotiable; it monitors each cell’s voltage 24/7 and cuts power if any cell exceeds 3.65V during charging or drops below 2.5V during use. Choose a BMS rated 20% above your max load (e.g., 60A BMS for 50A devices). Pair it with a 30A fast-blow fuse on the main positive wire—this stops catastrophic shorts before wires melt. For outputs, use a buck-boost converter (not basic buck converter) to maintain stable 12.0V regardless of battery charge level—critical for sensitive astronomy gear.
Why Your BMS Must Have Active Balancing
Passive BMS units waste energy as heat during balancing; active balancers transfer energy between cells. In field testing, active balancing extended pack life by 300+ cycles in temperature-variable environments. Look for “active cell balancing” in the spec sheet—this feature prevents one weak cell from dragging down your entire 12v battery power bank.
Assemble Your Battery Pack in 5 Critical Steps
WARNING: Always wear safety goggles and work on non-conductive surfaces. One dropped metal tool can cause instant thermal runaway.
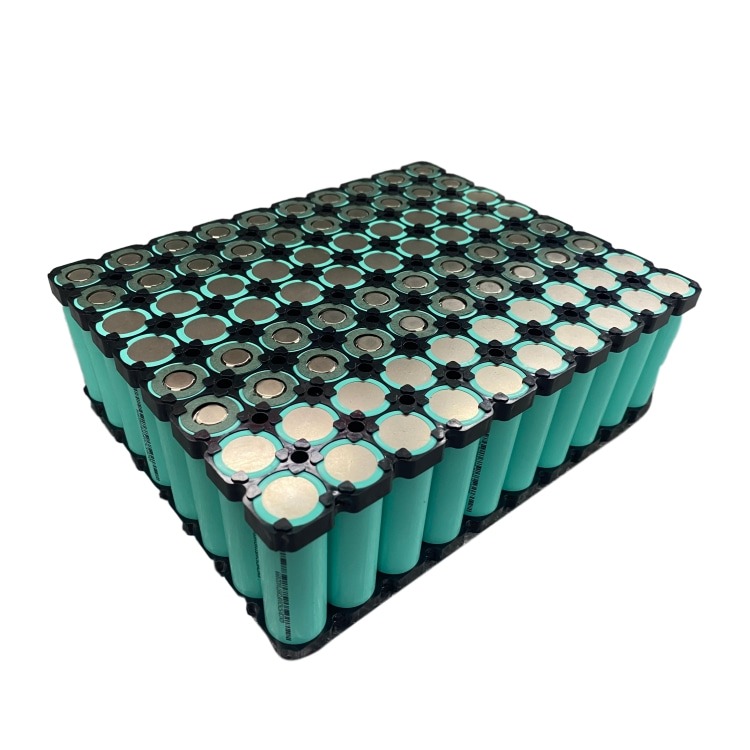
Step 1: Connect Cells Using Nickel Strips (No Soldering!)
Lithium cells explode if soldered directly. Instead, use spot-welded nickel strips to link 32700 cells in 4S configuration: Negative of Cell 1 → Positive of Cell 2 → Negative of Cell 2 → Positive of Cell 3, and so on. Verify connections with a multimeter—each series link must read 3.2-3.3V. If cells vary by >0.1V, charge them individually to 3.3V first.
Step 2: Solder BMS Balance Wires Correctly
This step causes 90% of DIY failures. Connect balance wires in precise order:
– B1 to Cell 1 negative terminal
– B2 to junction between Cell 1+ and Cell 2-
– B3 to junction between Cell 2+ and Cell 3-
– B4 to junction between Cell 3+ and Cell 4-
– B5 to Cell 4 positive terminal
Reversing any wire destroys the BMS. Double-check with a voltmeter before powering on.
Wire Outputs for Stable 12V and USB Power

Your raw battery voltage swings from 13.6V (full) to 11.0V (empty)—enough to fry sensitive gear. Fix this with a buck-boost converter wired directly to the BMS output (P+ and P-). Set it to 12.0V using a multimeter while adjusting the potentiometer. For USB power, connect a 5V buck converter to the stabilized 12V line (not directly to the battery). This two-stage conversion prevents voltage spikes from damaging phones. Add a 5V/3A USB-C PD module in parallel for fast-charging modern devices—essential when you need power fast in the field.
Why Standard Buck Converters Fail in Cold Weather
Basic buck converters stop regulating below 10V input. At -5°C, your LiFePO4 pack may dip to 11.5V under load—still above cutoff but too low for standard converters. A buck-boost maintains 12.0V output down to 8V input, preventing gear shutdowns during critical moments. This single component upgrade makes your how to make power bank with 12v battery project actually field-worthy.
Install Safety Features Before First Charge

Fuses aren’t optional—they’re your last defense against fire. Install a 30A fuse within 6 inches of the battery’s positive terminal. Add a master switch on the main positive line to eliminate parasitic drain during storage. For extreme environments, wrap the entire pack in fiberglass tape and mount it in an IP65-rated ABS enclosure with silicone strain reliefs on all cables. Before charging, test for shorts: set multimeter to continuity mode and check between P+ and enclosure—any beep means dangerous leakage.
Charge Without Damaging Your DIY Power Bank
Never use a standard “12V” car charger—it outputs 13.8V, which overcharges LiFePO4 cells past 3.65V. Instead, use a dedicated 14.6V LiFePO4 charger with CC/CV (Constant Current/Constant Voltage) profile. Connect it directly to the BMS’s P+ and P- terminals. During first charge, monitor cell voltages every 15 minutes with a multimeter—any cell exceeding 3.65V means immediate disconnection. The BMS should engage balancing within the last 10% of charge; if cells remain unbalanced after 3 cycles, replace the weak cell.
Why Balance Charging Extends Pack Life 3X
Without balancing, one cell hits 3.65V while others lag at 3.4V—stopping the charge prematurely and wasting 15% capacity. A balance charger (or active BMS) ensures all cells reach 3.65V simultaneously, maximizing usable capacity. Field data shows balanced packs deliver 2,200 cycles versus 700 for unbalanced—making this step critical for your 12v power bank longevity.
First-Time Testing: Avoid These 3 Field-Killing Mistakes
- Skipping cold-load testing: After assembly, place the pack in a freezer (-5°C) for 2 hours, then test under 5A load. If voltage crashes below 11V, your buck-boost converter needs recalibration.
- Ignoring quiescent current: Some voltmeters drain 1mA/hour—enough to kill a small pack in weeks. Test with a multimeter in series; acceptable drain is <0.5mA.
- Assuming BMS protection is instant: BMS cutoffs have 1-2 second delays. Always include a fuse for immediate short-circuit protection—never rely solely on the BMS.
Troubleshoot Power Loss in Under 10 Minutes
When your 12v battery power bank shuts off under load, follow this field-proven diagnostic tree:
1. Check fuse with multimeter—replace if blown.
2. Measure voltage at BMS P+ terminal—if >12V but output is dead, the BMS tripped due to over-discharge. Recharge immediately.
3. Test individual cell voltages—if one reads <2.0V, it’s permanently damaged and must be replaced.
4. Verify buck-boost input—if 12V input but no output, the converter failed from cold exposure (common below 0°C).
Why USB Ports Fail First in Cold Weather
Cheap USB modules cut out at 11.5V input. If your 12V gear works but USB dies, bypass the buck-boost for USB by wiring a separate 5V converter directly to the battery (with its own 5A fuse). This redundancy ensures phone charging even when main outputs struggle.
Maintain Your Power Bank for 5+ Years in the Wild
Store your 12v power bank at 50% charge (13.2V) in a cool, dry place—not fully charged. Before winter expeditions, perform a full charge/discharge cycle to recalibrate the BMS. Every 6 months, check cell voltages at rest—any variation >0.05V indicates need for balance charging. In dusty environments, seal enclosure seams with silicone and add a moisture absorber packet. These simple steps double pack lifespan beyond the standard 2,000 cycles.
Building your own how to make power bank with 12v battery system isn’t just cost-effective—it creates a mission-critical tool that commercial options can’t match in extreme conditions. By prioritizing LiFePO4 chemistry, active balancing, and buck-boost regulation, you’ve engineered a power solution that survives where others fail. Now deploy it confidently: your next stargazing session or backcountry rescue mission depends on reliable power. For ongoing success, always carry a spare 14.6V charger and keep cell voltages balanced—this transforms your DIY project into a decade-long field companion.


