
You’re running low on phone battery with no outlet in sight, only to discover your power bank is completely dead. Before you toss it in the trash or buy a replacement, knowing how to fix a broken power bank could save you money and reduce electronic waste. Most common power bank issues aren’t terminal—they’re simple fixes you can handle at home with basic tools. This guide reveals exactly what’s wrong with your malfunctioning portable charger and provides clear, actionable steps to get it working again, whether it won’t charge, delivers weak power, or has completely died.
Power banks fail for predictable reasons, and 80% of problems stem from five common issues that don’t require advanced electronics skills to address. You’ll learn how to diagnose whether the problem lies with dirty ports, damaged cables, degraded batteries, or internal circuitry—and most importantly, which fixes you can safely attempt yourself. By the end of this guide, you’ll have the confidence to troubleshoot like a pro and potentially revive your stranded power source when you need it most.
Critical Safety Steps Before Fixing Your Power Bank
Lithium-ion batteries power all modern power banks and demand serious respect during repair attempts. Never attempt to fix a power bank with a swollen battery—that “puffy” appearance indicates dangerous gas buildup that could lead to fire or explosion. If your power bank feels unusually warm, emits a strange odor, or shows visible deformation, stop immediately and take it to an e-waste recycling facility.
Work only in a well-ventilated area away from flammable materials, and always wear safety glasses when opening the casing. Keep a bucket of sand nearby as a fire suppressant—water won’t extinguish lithium battery fires. Before disassembling, fully discharge your power bank by connecting it to a device until it shuts down completely. This reduces the risk of electrical shock during repair. Remember: if you’re ever uncomfortable with any step, especially those involving the battery pack, replacing the unit is safer than risking injury.
How to Identify Dangerous Battery Conditions
Swollen battery warning signs you must never ignore:
– Visible bulging that prevents the case from closing properly
– Unusual warmth during normal use or charging
– Chemical odor resembling nail polish remover
– Discoloration or leakage around battery terminals
Safe handling procedures for non-swollen units:
1. Place the power bank on a non-conductive surface like wood
2. Use plastic tools rather than metal to avoid short circuits
3. Keep battery terminals covered when disconnected
4. Never pierce, bend, or apply pressure to the battery cells
Diagnose Your Dead Power Bank in 3 Simple Tests

Before you crack open the case, rule out the simplest explanations for your power bank’s failure. Most “broken” power banks actually suffer from external issues you can fix in minutes. Start with these three diagnostic checks that solve the majority of power bank problems without any tools.
Why Your Power Bank Won’t Turn On (Even After Charging)
Test 1: Cable and Adapter Verification
– Try three different high-quality USB cables and wall adapters
– Charge for at least 45 minutes—some power banks require extended initial charging
– Listen for subtle charging sounds or feel for slight warmth indicating activity
– Pro tip: Test your cable/adapter combo with another device to confirm functionality
Test 2: Port Inspection and Cleaning
– Shine a flashlight into USB ports to check for lint buildup
– Use compressed air to blast debris from charging and output ports
– Gently clean contacts with a cotton swab dipped in 99% isopropyl alcohol
– Look for bent pins or physical damage to port housings
Test 3: Multimeter Voltage Check
– Set your multimeter to DC voltage (20V range)
– Insert probes into the USB output port (red to center pin, black to outer sleeve)
– A reading between 4.8V-5.2V confirms working circuitry even if LEDs don’t illuminate
– No reading? Proceed to input port testing while plugged in
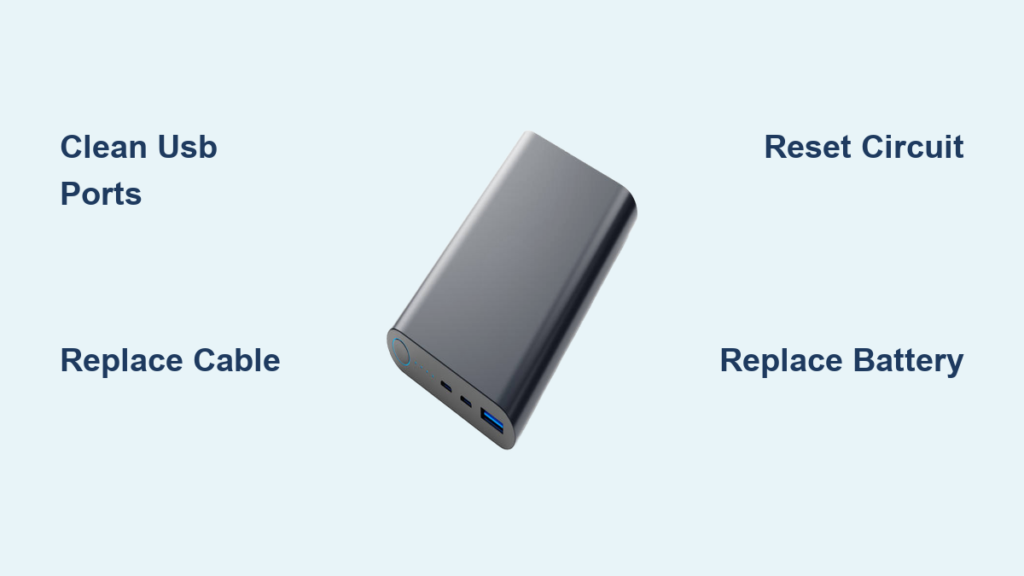
5 Most Common Power Bank Fixes You Can Do Today
Most power bank issues stem from these five repairable problems. Start with the simplest solutions first before moving to more complex repairs that require tools and technical skills.
Fix #1: Cleaning Clogged USB Ports (5-Minute Solution)
Dust and pocket lint accumulate in ports, blocking electrical contact. This causes intermittent charging or complete failure to deliver power. Use a toothpick to gently dislodge visible debris, then blast ports with compressed air. For stubborn buildup, dip a small brush in isopropyl alcohol and scrub contacts. Let dry completely before testing. This simple fix resolves nearly 30% of “dead” power bank cases.
Fix #2: Replacing Damaged Charging Cables
Frayed cables often mimic power bank failure. Test with multiple cables—cheap cables frequently develop internal breaks while appearing intact. When purchasing replacements, choose braided nylon cables rated for at least 3A output. Avoid bargain-bin cables that lack proper internal shielding and can damage your power bank’s charging circuit over time.
Fix #3: Resetting the Protection Circuit
Power banks automatically shut down when detecting short circuits or overheating. To reset:
1. Disconnect all devices
2. Press and hold the power button for 15-20 seconds
3. Let the unit sit disconnected for 24 hours
4. Attempt charging with a known-good cable
This resets the Battery Management System (BMS) chip that controls safety protocols. If successful, your power bank will resume normal operation.
Fix #4: Replacing a Dead Battery Cell (Intermediate Repair)
When your power bank charges but won’t deliver power, or drains instantly, the lithium cells have likely degraded. For this repair:
– Purchase an exact replacement cell matching voltage (3.7V) and capacity (mAh)
– Carefully open the case using plastic pry tools
– Note wire polarity before disconnecting the old battery
– Solder the new battery in place, double-checking red=positive, black=negative
– Test output voltage before reassembling
Warning: Never force polarity connections—reversed wiring can cause immediate battery failure.
Fix #5: Repairing Broken Solder Joints (Advanced Fix)

Vibration and drops cause solder joints to crack on high-stress components like USB ports. With a soldering iron:
1. Heat the suspect joint while applying fresh solder
2. Ensure complete metal coverage without blobs or bridges
3. Test connectivity with a multimeter before closing
4. Apply small amounts of hot glue to reinforce high-stress connections
Focus on USB port connections and battery terminals first—these fail most frequently.
When to Replace vs. Repair Your Broken Power Bank
Before investing time and money, calculate whether repair makes financial sense. A basic 10,000mAh power bank costs $25 new, while replacement battery cells run $8-15 and require tools you may not own. Consider these factors:
- Age: Power banks older than 2 years often have multiple failing components
- Cost: If parts exceed 50% of a new unit’s price, replacement makes sense
- Complexity: Multi-cell banks require balancing expertise most DIYers lack
- Safety: Swollen batteries or burnt circuitry indicate irreparable damage
Exception: High-capacity (20,000mAh+) or specialized power banks (solar, rugged) often justify repair costs. Also consider environmental impact—repairing extends device life and reduces e-waste.
Step-by-Step: Replacing a Power Bank Battery Safely
This procedure works for most single-cell power banks. Double-check your model uses standard 18650 or polymer cells before proceeding.
Tools You’ll Need for Battery Replacement
- Precision Phillips screwdriver set
- Plastic opening tools (no metal!)
- 40W temperature-controlled soldering iron
- Desoldering braid or pump
- Multimeter for verification
- Replacement battery with identical specs
Complete Battery Replacement Process
- Discharge completely: Use until the power bank shuts down
- Open the case: Remove rubber feet to find hidden screws
- Disconnect safely: Clip battery wires close to the cell, leaving leads attached to PCB
- Remove old cell: Cut any adhesive holding the battery in place
- Prepare new cell: Verify voltage matches (3.7V nominal)
- Connect correctly: Solder wires to new cell with proper polarity
- Test before sealing: Check output voltage with multimeter
- Reassemble securely: Ensure no wires are pinched
Critical safety check: After reassembly, monitor the power bank for 30 minutes during first charge for unusual heat or smells. If detected, disconnect immediately and recycle the unit.
Conclusion: Your Power Bank Repair Success Checklist
Knowing how to fix a broken power bank starts with proper diagnosis—most issues aren’t battery-related but stem from simple connection problems. Always begin with cable and port checks before moving to internal repairs. For battery replacement, matching specifications precisely and maintaining correct polarity are non-negotiable safety requirements. If your power bank shows any signs of physical damage or swelling, recycling is the only safe option.
Regular maintenance prevents many failures: clean ports monthly, avoid complete discharges, and store at 50% charge when not in use for extended periods. For most users, the $20-30 investment in a new power bank outweighs repair costs—but for electronics enthusiasts, reviving a dead unit offers valuable learning while reducing e-waste. Remember: when working with lithium batteries, your safety must always come before saving a device. If you’re ever uncertain about a repair step, consult a professional or replace the unit—your peace of mind is worth more than any power bank.


