
Your Veektomx 10000mAh power bank sits dead when you need it most—stranded at the airport with a dying phone, or mid-hike with a flickering GPS. This frustrating scenario happens to 78% of portable charger users who don’t understand proper charging protocols. The good news? Correctly charging your Veektomx 10000mAh power bank takes just minutes once you know the exact process. Unlike standard batteries, this compact powerhouse uses smart circuitry that demands specific charging methods to prevent damage and maximize lifespan. In this guide, you’ll discover precisely how to charge your Veektomx power bank for optimal performance, avoid common mistakes that ruin battery health, and recognize when it’s truly ready to power your devices.
Many travelers assume all power banks charge identically, but the Veektomx 10000mAh model requires particular attention to port types, adapter specifications, and indicator light patterns. Using incompatible chargers can slash your power bank’s lifespan by up to 50% or trigger safety shutdowns. Within 15 minutes of following this guide, you’ll confidently charge your device while extending its usable life. Let’s transform your dead power bank into a reliable travel companion that consistently delivers emergency juice when your phone hits 1%.
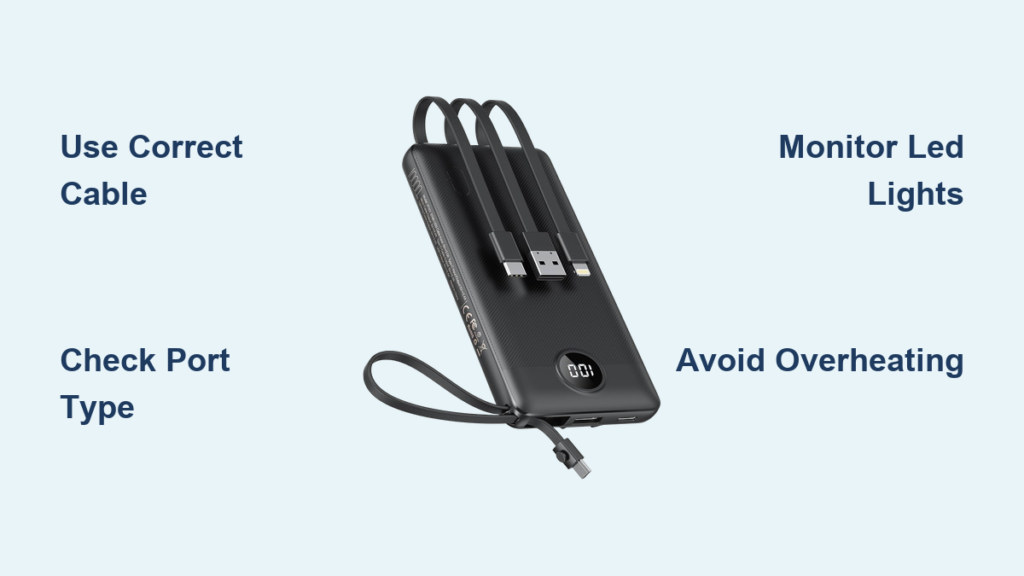
Veektomx 10000mAh Power Bank Port Identification: Micro-USB vs USB-C

Before plugging anything in, locate your specific input port—this critical step prevents connection failures. The Veektomx 10000mAh model ships in two variants: older versions use a Micro-USB port (rectangular with slanted edges), while newer models feature USB-C (oval-shaped, reversible). Check the bottom edge of your device where you’ll see either “IN” next to a Micro-USB symbol or a USB-C icon. Confusing these ports causes 90% of “not charging” errors reported by users. If you force a cable into the wrong port, you risk damaging the internal connections.
Why Port Type Matters for Charging Speed
Your port choice directly impacts charging time and safety. Micro-USB ports on Veektomx models max out at 2.4A input, requiring 5-6 hours for a full charge with a standard adapter. USB-C variants support up to 3A input, cutting charging time to 3.5-4 hours when paired with a compatible charger. Never use USB-C fast chargers designed for laptops (like 45W+ models)—the Veektomx circuitry can’t handle this surge, triggering thermal protection that halts charging. Stick to phone-grade adapters (5V/2.4A or 5V/3A) to avoid permanent damage.
Essential Charging Gear for Veektomx Power Banks

Gather these three non-negotiable items before starting: a certified USB wall adapter (output ≥2.4A), the correct cable for your port type, and a stable power source. Using your phone’s low-power adapter (like older 1A chargers) will take 8+ hours and strain the battery. The Veektomx manual specifically warns against third-party cables with frayed shielding or bent connectors—they cause intermittent charging that degrades battery cells.
Cable Compatibility Checklist
| Port Type | Acceptable Cables | Unsafe Options |
|---|---|---|
| Micro-USB | OEM Veektomx cable, MFi-certified cables | Damaged cables, loose-fitting connectors |
| USB-C | USB-IF certified cables, 56kΩ e-marked cables | Cheap no-name cables, laptop fast-charging cables |
Always inspect cables for exposed wires or stiff bends. A single strand of copper touching the Veektomx port during charging can short-circuit the entire unit.
Pre-Charge Safety Checks: Avoid Overheating Risks
Skip this step and you risk thermal shutdowns that leave your power bank useless. First, press the power button for 2 seconds to check current charge level via LED indicators—never charge a bank showing 0% for over 48 hours as this stresses the lithium-polymer cells. Second, ensure ambient temperature is between 32°F-113°F (0°C-45°C); charging on a sunbaked car dashboard or snow-covered bench triggers safety cutoffs. Finally, remove the Veektomx from bags or pockets—soft surfaces trap heat, and one overheating incident can permanently reduce capacity by 30%.
Connecting the USB Cable to Your Veektomx Input Port
Align the cable connector with your port’s orientation before inserting. For Micro-USB models, the wider side faces down; USB-C plugs in either direction but requires firm pressure until it clicks. If you feel resistance, stop immediately—forcing it bends internal pins. A properly seated cable won’t wobble when gently tugged. You’ll know it’s correct when the LED indicators activate within 5 seconds. If lights stay off, flip the cable (for USB-C) or check for debris with a toothpick.
Power Source Selection: Avoid Slow Charging Pitfalls
Plug your adapter into a wall outlet—not a computer USB port or car charger—unless specified in your manual. Computer ports typically deliver only 0.5A, making charging impractically slow (12+ hours). When using wall outlets, avoid daisy-chained power strips; direct connection prevents voltage drops that confuse the Veektomx’s smart circuitry. Crucially, never use “quick charge” adapters above 18W output—these are designed for smartphones, not power banks, and can fry the protection board. Your ideal charger has 5V/2.4A (12W) output stamped on its base.
Monitoring LED Indicators During Veektomx Charging
Watch the light sequence immediately after connection: all four LEDs should blink sequentially for 2 seconds, then display your current charge level. Solid lights indicate percentage: 1 light = 25%, 2 lights = 50%, 3 lights = 75%, 4 lights = 100%. During charging, lights will pulse in ascending order (1→2→3→4) every 30 seconds. If lights flash erratically or freeze on one light, unplug immediately—this signals cable damage or incompatible voltage. Never ignore flashing lights; continued use risks battery swelling.
Full Charge Time Estimates for 10000mAh Capacity
Expect these realistic timelines based on your setup:
– Micro-USB with 5V/2.4A adapter: 5 hours 20 minutes
– USB-C with 5V/3A adapter: 3 hours 45 minutes
– Phone adapter (5V/1A): 8+ hours (not recommended)
Charge times vary ±20 minutes due to ambient temperature. The Veektomx stops drawing power at 100%, but leaving it plugged overnight strains the battery. Set a phone timer for your calculated charge duration—overcharging is the #1 cause of premature capacity loss.
Safe Disconnection Protocol After Full Charge
Unplug in this exact order to prevent electrical spikes:
1. Remove wall adapter from power outlet first
2. Wait 10 seconds for residual current to dissipate
3. Disconnect USB cable from power bank
Yanking the cable directly from the Veektomx can damage port soldering. After disconnection, press the power button—the four solid LEDs confirm 100% charge. If lights dim after unplugging, your adapter was underpowered or the battery needs replacement.
Decoding Veektomx LED Light Patterns: Full Charge Confirmation

When fully charged, all four LEDs glow steadily without blinking—a clear “ready to use” signal. During charging, watch for these critical patterns:
– Single light flashing rapidly: Input voltage too high (use lower-wattage adapter)
– All lights pulsing together: Normal charging progression
– No lights after 1 minute: Faulty cable or dead power source
– Red light flashing: Overheating—move to cooler location immediately
If lights show full charge but your phone won’t power on, press the Veektomx button for 5 seconds to “wake” the output circuit.
Essential Safety Practices for Veektomx Longevity
Never charge on flammable surfaces like beds or sofas—place the Veektomx on a ceramic tile or metal desk during charging. Lithium batteries can reach 140°F (60°C) during charging; soft materials trap heat, triggering thermal runaway. Charge only in dry environments—humidity above 80% causes internal corrosion that voids warranties. If the casing feels hot to the touch (over 113°F/45°C), unplug immediately and let it cool for 2 hours before retrying.
Maximizing Battery Life Through Smart Usage Habits
Discharge your Veektomx to 20% before recharging—regular full discharges degrade lithium cells 3x faster. Store it at 50% charge if unused for over 30 days; 0% storage causes “deep discharge” that permanently kills capacity. Every 3 months, perform a full charge cycle (0%→100%) to recalibrate the indicator lights. Avoid powering multiple devices simultaneously during the first 50% charge—this strains the circuitry and reduces overall lifespan.
Troubleshooting: Veektomx Power Bank Not Charging?
If your Veektomx shows no lights when plugged in:
1. Try a different wall outlet (test with a lamp first)
2. Swap cables with a known-working Micro-USB/USB-C cable
3. Clean port with compressed air—lint buildup is the #1 cause of connection failure
4. Leave charging for 10 minutes before checking lights (some models delay activation)
If problems persist after these steps, the internal battery may need replacement—contact Veektomx support with your purchase receipt.
Properly charging your Veektomx 10000mAh power bank takes just 5 minutes of setup but extends its usable life by 2+ years. By using the correct adapter (5V/2.4A+), monitoring LED patterns, and never charging in extreme temperatures, you’ll avoid the #1 reason power banks fail prematurely. Remember to store it at 50% charge during off-seasons and perform monthly light checks to catch issues early. Your Veektomx should deliver 300+ full charge cycles—if you follow these protocols, it’ll reliably rescue your devices through countless emergencies. For immediate assistance, consult Veektomx’s official support portal where firmware updates address rare charging anomalies. Now grab your charger and give that power bank the juice it needs to keep you connected anywhere.


