
A dead car battery after weeks of inactivity is more than an inconvenience. It can mean costly replacements and avoidable downtime. The solution is a solar car battery charger. These compact systems use sunlight to deliver a steady trickle charge, preventing sulfation and offsetting parasitic drain from alarms, ECUs, and other onboard electronics. Whether you’re storing a classic car, prepping an RV for winter, or leaving your vehicle at the airport for weeks, knowing how to use a solar car battery charger correctly ensures your engine starts when you need it most.
This guide walks you through every step, from choosing the right components to safe installation and long-term monitoring. You’ll learn which panel wattage suits your needs, why a charge controller is essential, how to connect properly, and what to monitor so your battery stays healthy. Let’s get started.
Choose the Right Solar Panel
:max_bytes(150000):strip_icc()/types-of-solar-panels-pros-and-cons-5181546_finalcopy-93f1db65349840bdba2822f75fa592f9.jpg)
Selecting a solar panel that matches your vehicle’s needs is the first critical step. Most automotive applications require 5W to 20W panels for maintenance, while larger 50W to 100W systems suit recharging or permanent installations.
Match Wattage to Your Use Case
The panel wattage you choose determines what the charger can actually accomplish.
• 1.5 to 5W panels are ideal for short-term storage up to 6 weeks or low-drain vehicles like motorcycles. These provide just enough current to offset parasitic loads but won’t recharge deeply discharged batteries.
• 10 to 20W panels work best for seasonal vehicles such as boats, ATVs, and classic cars. They maintain charge and can slowly condition a weak battery.
• 50 to 100W panels are used in van builds or RVs with auxiliary power systems. These require an MPPT controller and can fully recharge a dead 12V battery in 4 to 8 hours of full sun.
In cloudy regions like the Pacific Northwest, go one size up. A 50W panel may struggle under tree cover where a 100W system compensates.
Select the Right Panel Type
Panel technology affects performance and longevity.
Monocrystalline panels offer the highest efficiency at 18 to 22 percent. They perform well in low light and last longer, making them best for long-term reliability.
Amorphous silicon panels are flexible and affordable but degrade faster. Output can drop by 50 percent after a few years.
Avoid panels with open-circuit voltage over 18V unless paired with a charge controller. A 30V panel connected directly to a 12V battery risks overcharging and permanent damage.
Install a Charge Controller

Never connect a solar panel directly to your car battery without a charge controller. This component is essential for safe, long-term use. It regulates voltage and current to prevent overcharging, electrolyte boiling, and plate damage.
Use PWM for Small Systems
For 5 to 50W panels, a PWM (Pulse Width Modulation) controller is cost-effective and sufficient. It matches the panel’s output to the battery’s voltage, delivering steady trickle charging.
PWM controllers offer approximately 70 to 80 percent efficiency and cost between $10 and $30. They work best for long-term storage and seasonal vehicles. The limitation is that they can’t harvest excess voltage from high-Voc panels.
A 30V panel through PWM delivers only about 37W into a 12V system. Always check compatibility before connecting.
Upgrade to MPPT for High Power
If using a 50W or larger panel, especially with mismatched voltages, use an MPPT (Maximum Power Point Tracking) controller.
MPPT controllers deliver 90 to 95 percent efficiency and cost $50 to $150. They extract maximum power regardless of voltage differences. These are ideal for permanent roof mounts, van conversions, and future expansion.
One van owner installed a 30A MPPT controller even with a 100W panel to allow for adding more panels later.
Connect to Battery Correctly
How you connect your solar charger determines reliability. Two primary methods exist: alligator clips and cigarette lighter adapters. One works almost every time. The other often fails.
Use Alligator Clips for Reliability
Alligator clips connect directly to battery terminals, bypassing the vehicle’s electrical system. This ensures charging continues regardless of ignition status.
Place the panel on your windshield or dashboard facing the sun. Attach the red clip to the positive terminal and the black clip to the negative terminal. Ensure the clips are tight and not touching metal surfaces.
This method works because there’s no reliance on fuses or switched circuits. It works even if the car is locked or parked for months.
Always install an in-line fuse on the positive wire within 18 inches of the battery to prevent short-circuit fires.
Avoid Cigarette Lighter Plugs
Most vehicles disable the 12V socket 10 to 30 minutes after ignition-off. This cuts power to the solar charger, defeating its purpose.
Test before you trust your socket. Plug in a multimeter or phone charger, turn off the car, wait 30 or more minutes, then check if voltage remains above 12V.
Honda, Toyota, and some Fords disable the socket unless in ACC mode. Some luxury models keep the socket live. Always confirm with testing.
Only use a cigarette lighter adapter if you’ve verified it stays powered when parked.
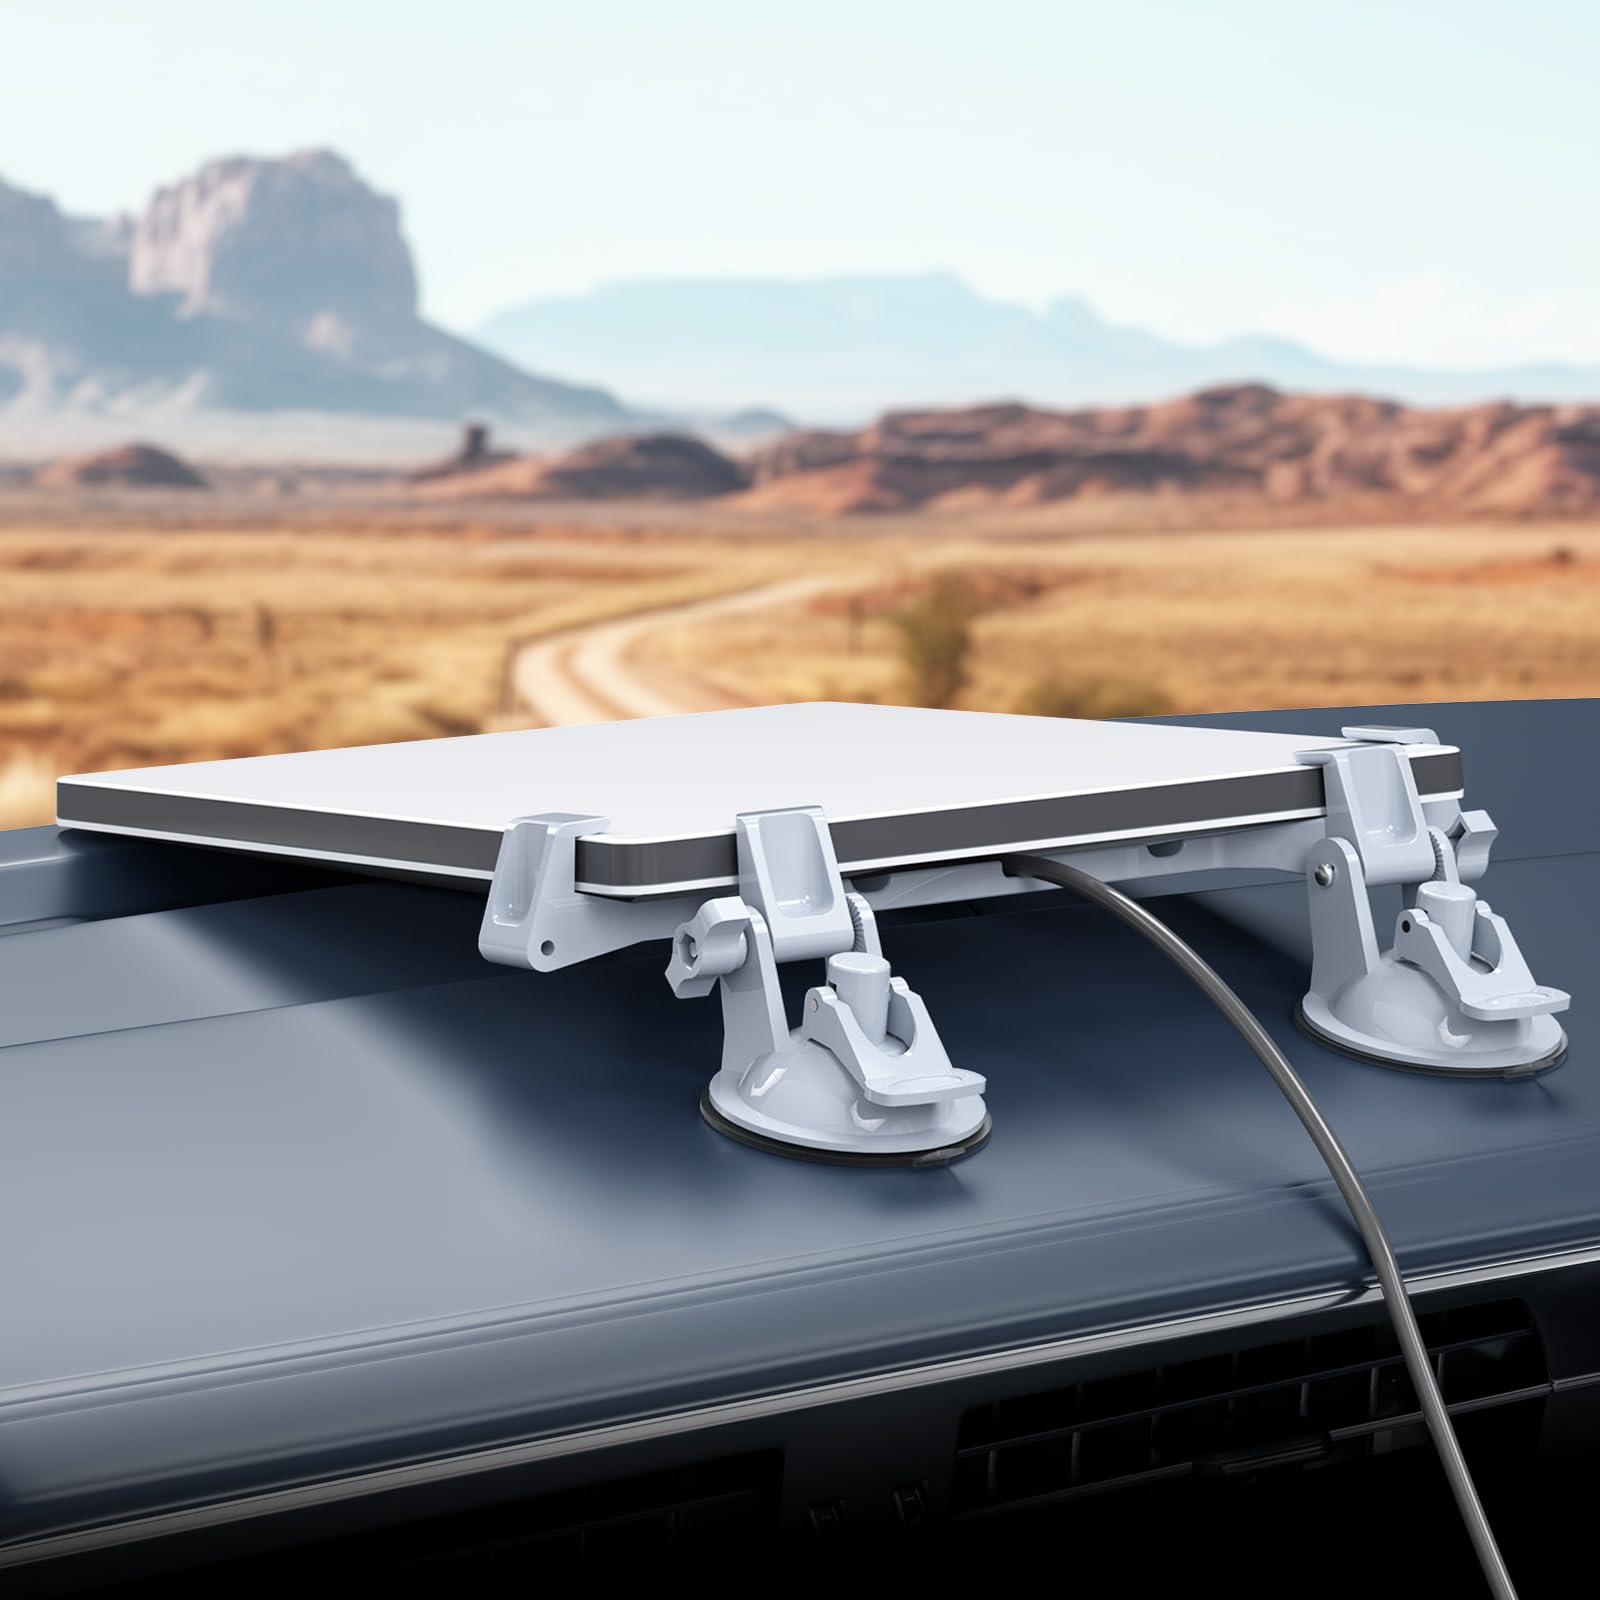
Mount and Position the Panel
Where you place the solar panel impacts performance more than you think. Even a 20W panel can underperform in shade or poor orientation.
Optimize Sun Exposure
Dashboard placement works best for portable use. Angle the panel toward the sun and avoid shadows from rearview mirrors or roof pillars.
Windshield mounting uses suction cups or a non-slip pad. Ensure the entire panel receives direct light.
Permanent roof mounts are ideal for RVs, vans, and trailers. Secure with adhesive brackets or route through grommets.
A 7W panel in partial winter sun produced only 2.2W. That’s enough for maintenance but not recovery.
Route Wires Safely
Run cables through existing grommets under the rear window to avoid drilling. Use conduit or wire loom to prevent chafing. Keep connections dry and insulated.
One user tapped into an existing inverter line with a fuse instead of running new wires, saving time and maintaining clean routing.
Monitor Battery Health
A solar charger only works if your battery is healthy. Regular monitoring prevents surprises and extends battery life.
Check Voltage Monthly
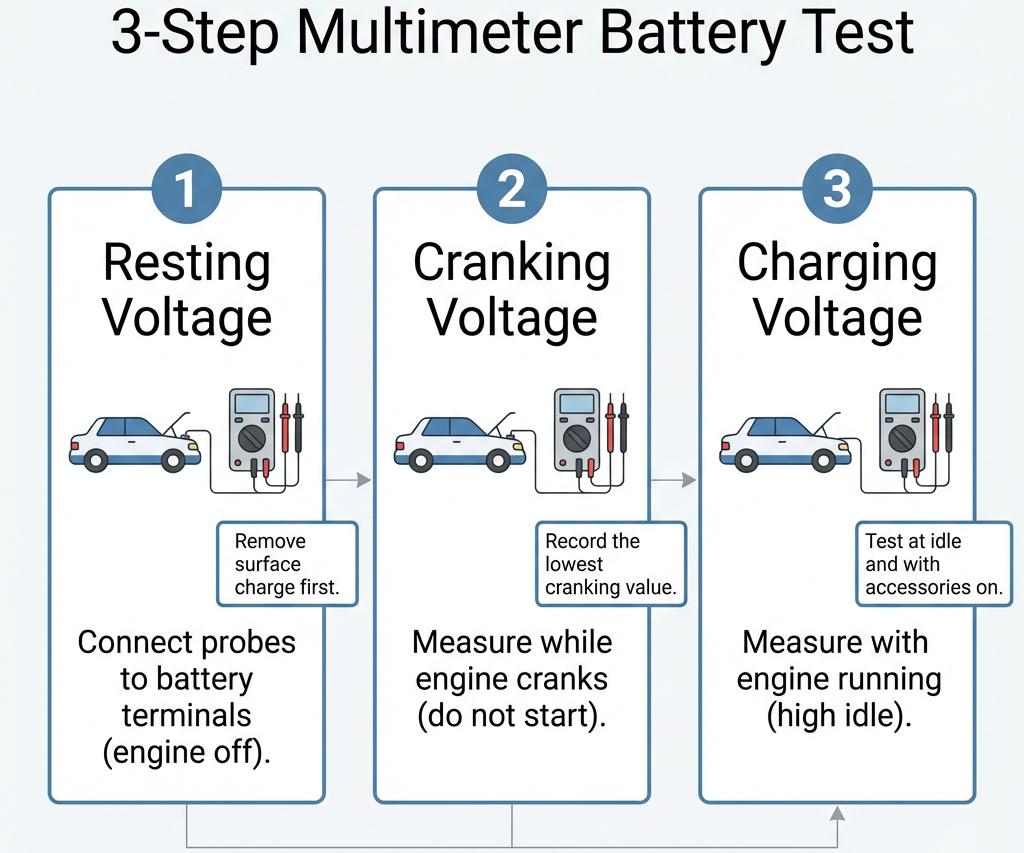
Use a digital multimeter to measure resting voltage after 12 or more hours without charging or load.
A reading of 12.6 to 12.8V indicates 100 percent charge. At 12.4V, the battery is at 75 percent, which is acceptable. At 12.2V, it’s at 50 percent and needs recharge. At 12.0V or lower, the battery is at 25 percent or less with risk of sulfation.
A solar maintainer should keep voltage above 12.4V during storage.
Prevent Sulfation
Sulfation, crystal buildup on plates, starts when a battery sits below 12.4V for weeks. It reduces capacity and can kill the battery. A solar charger prevents this by maintaining a float charge of 13.2 to 13.8V.
Single-stage trickle chargers without float regulation can overcharge and boil the electrolyte. Always use a multi-stage controller.
Prevent Overcharging and Damage
Even small solar panels can damage a battery without proper regulation. Voltage control is non-negotiable.
Limit Voltage to 14.5V
Float charge should be 13.2 to 13.8V. Absorption charge is 14.2 to 14.8V temporarily. The danger zone is anything above 14.5V continuously, which risks plate warping, water loss, and reduced lifespan.
Harbor Freight’s 1.5W manual explicitly warns to use a voltage regulator between the solar battery charger and battery to prevent overcharging.
Use Built-In Protection
Quality solar maintainers include blocking diodes to prevent reverse discharge at night, multi-stage charging for bulk, absorb, and float phases, and overcharge and overheat protection.
Avoid cheap, unbranded kits without regulation. They may act as battery killers over time.
Maintain the System Long-Term
A solar battery charger is not install and forget. Regular checks ensure ongoing performance.
Monthly Inspection Checklist
Check clips and terminals for corrosion or loose connections. Clean the panel surface with a damp cloth. Dust can reduce output by up to 30 percent. Verify controller function by looking for indicator LEDs. Inspect wires for chafing or heat damage.
Car interiors can exceed 140°F. Most PWM controllers handle up to 60°C, but avoid enclosing them in insulated spaces.
Replace Aging Panels
Amorphous silicon panels degrade over time. After 3 to 5 years, output may drop to 50 to 70mA, which is insufficient for reliable maintenance.
Switch to a monocrystalline panel for longer life and better low-light performance.
Troubleshoot Common Problems
Even well-installed systems can fail. Use this guide to diagnose issues quickly.
Battery Still Dies
Insufficient solar input from a too-small panel or heavy shading can cause this. High parasitic drain from an aftermarket alarm is another cause. A degraded battery may also be the problem.
Upgrade to a 10 to 20W panel with MPPT. Test parasitic draw with a multimeter. Replace the battery if voltage won’t hold above 12.2V.
No Charging in Sunlight
Check the panel output using a multimeter to measure Voc. It should match the specification. Ensure connections are tight and wires are intact. Look for LED indicators on the controller and test output voltage.
Quick test: disconnect the controller and measure panel Voc. It should be 15 to 18V for 12V systems.
Controller Gets Hot
Poor ventilation, an oversized load, or an undersized unit causes this. Relocate to a cooler area and ensure airflow around the unit. Verify it’s rated for your panel’s wattage.
Choose a Pre-Built Kit
For most users, a plug-and-play solar maintainer is safer and more reliable than DIY.
Top Recommended Kits
The Battery Tender 021-162 Solar Charger Kit includes a 5W monocrystalline panel with built-in controller and alligator clips. It’s proven in real-world use for 4 or more years and costs about $24.
The BatteryMINDer SCC1224-20 features a 20W panel with dual-voltage 12V/24V controller. It supports lead-acid and lithium with adjustable settings and provides multi-stage charging for optimal battery health.
Buying pre-built eliminates wiring errors, ensures proper regulation, and includes safety features missing in generic kits.
Follow Best Practices for Safety
Maximize safety and effectiveness with these proven rules.
Do use alligator clips for uninterrupted charging. Install a fuse on the positive line near the battery. Choose monocrystalline panels for durability. Use PWM or MPPT with any panel over 5W. Test cigarette lighter sockets before relying on them. Monitor battery voltage every 1 to 2 months.
Avoid connecting panels without a controller. Don’t use degraded amorphous panels with low output. Never assume all 12V sockets stay live. Don’t ignore manufacturer warnings about voltage regulators. Avoid installing controllers in enclosed, hot spaces.
Frequently Asked Questions About Solar Car Battery Chargers
Can a solar charger work without direct sunlight?
Yes, but at only 10 to 30 percent of rated output. Cloudy days still provide some charging, though significantly reduced.
How long does it take to charge a car battery with solar?
A 5 to 10W panel maintains only and cannot fully recharge a dead battery. A 50 to 100W panel with MPPT can recharge a depleted 12V battery in 4 to 8 hours of full sun.
Do I need a charge controller?
Yes, always. Even small panels should use a regulator to prevent overcharging and battery damage.
Are solar chargers safe indoors or through windows?
Yes, if the panel is exposed to natural light through a window. Output will be lower than direct sunlight but still effective for maintenance.
Can I use my car’s factory solar panel to charge the battery?
No. Factory panels like those on Priuses power only ventilation fans. To charge the battery, you would need to tap into the wiring, add a charge controller, and route to the 12V battery.
What happens if I connect a solar panel without a controller?
Without regulation, high-voltage panels can overcharge the battery, causing electrolyte boiling, plate damage, and significantly reduced battery life.
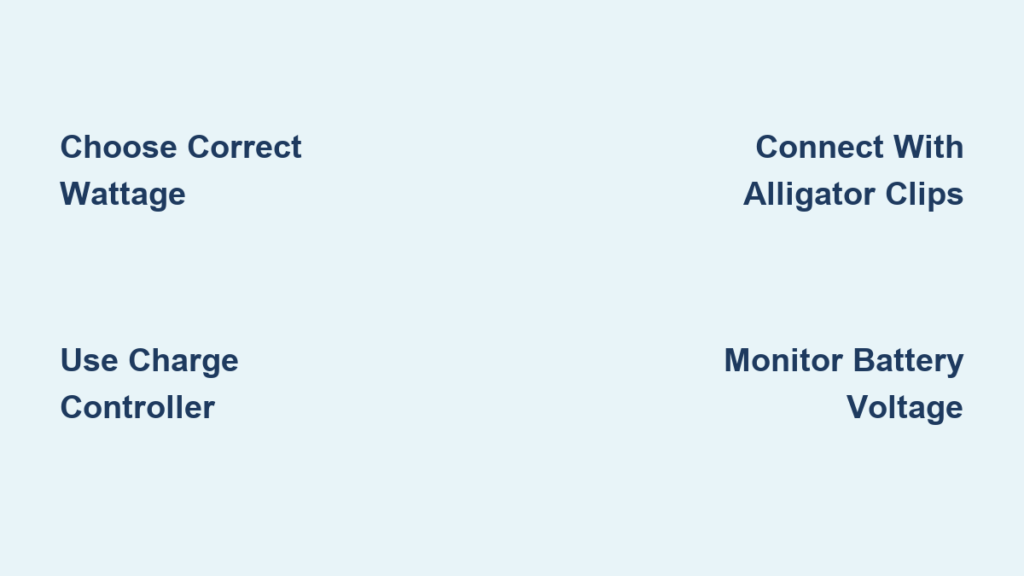
Key Takeaways for Using a Solar Car Battery Charger
When set up correctly, a solar car battery charger is a reliable, low-cost, and eco-friendly way to keep your vehicle ready to start, no matter how long it sits. The key steps are choosing the right wattage for your situation, always using a charge controller to prevent overcharging, connecting directly to battery terminals with alligator clips rather than relying on cigarette lighter sockets, and monitoring voltage regularly to ensure the battery stays above 12.4V.
Whether you go with a $24 plug-and-play kit like the Battery Tender or build a full 100W MPPT system for your van, consistency and safety matter most. A solar maintainer costs a fraction of a new battery and can extend its life by years. Now you know exactly how to use a solar car battery charger the right way.


