
If your car won’t start, your ATV is dead after winter, or your lawn mower battery has gone flat, a CEN-TECH battery charger can get you back up and running. Designed for everyday users and DIYers, these affordable chargers from Harbor Freight deliver reliable performance across automotive, marine, and powersport batteries. Whether you are using a basic 2A trickle charger or a 200A jump-start model, knowing how to use a CEN-TECH battery charger correctly ensures safety, prolongs battery life, and prevents damage to your equipment.
This guide walks you through every step, from connecting clamps to selecting the right charging mode, based on real-world testing of multiple CEN-TECH models. You will learn how to safely charge dead batteries, revive weak cells, and jump-start a vehicle while avoiding common mistakes that could lead to sparks or battery failure.
Inspect Battery and Prepare the Charging Area
Before connecting your charger, proper preparation prevents accidents and ensures effective charging results.
Check Battery Condition First
Examine the battery for visible issues before attempting any charging. Look for corrosion on the terminals, which should be cleaned with a wire brush or terminal cleaner. For flooded batteries, check electrolyte levels by removing caps and filling each cell to the indicated level. Never attempt to charge a dry or cracked battery.
Use a multimeter or the charger display to check voltage. A reading below 10.5V indicates a deeply discharged battery. Testing showed one battery at just 7.4V, signaling severe discharge but still potentially recoverable.
Never charge a frozen battery. Allow it to warm to room temperature first to prevent permanent damage to the cells.
Ensure Proper Ventilation
Lead-acid and AGM batteries release flammable hydrogen gas during charging, especially at high amperage. Always charge in a well-ventilated area away from sparks, flames, or enclosed spaces. Open a garage door or work outdoors when possible.
Connect Clamps in the Correct Order

Getting the connections right protects both you and your battery from damage.
Follow the Proper Connection Sequence
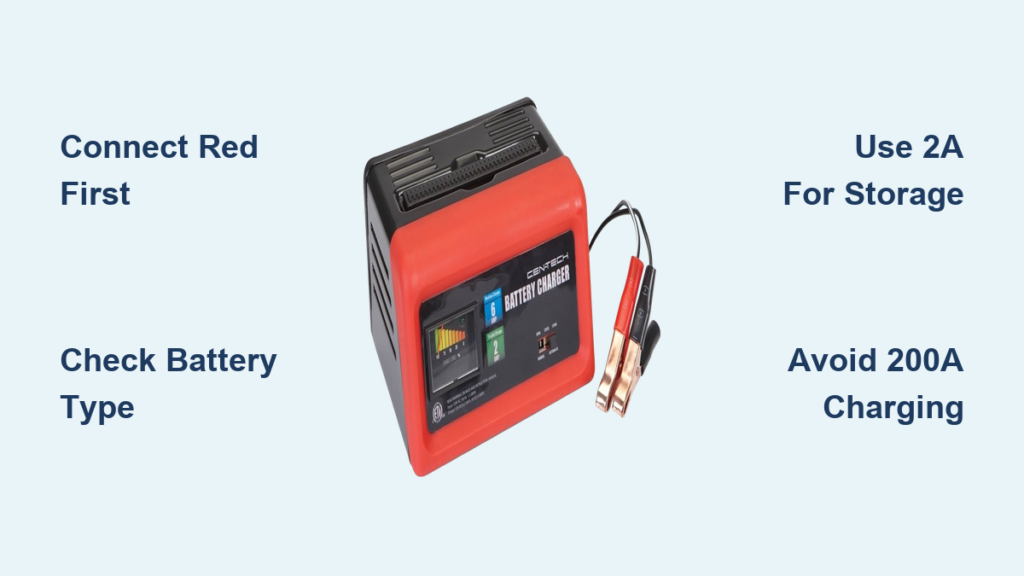
Attach the red clamp to the positive terminal first, making sure it grips firmly. Loose connections cause arcing and poor charging performance. Then attach the black clamp to the negative terminal, or connect to a grounded metal part of the vehicle frame if the terminal is corroded.
Pro Tip: Connecting the black clamp to the chassis rather than the negative terminal reduces spark risk near the battery.
Check for Reverse Polarity
If the charger displays a red light or begins beeping, reverse polarity has occurred. Disconnect immediately and reverse the clamp positions. All CEN-TECH chargers include built-in reverse polarity protection, which serves as your first safety check.
Select the Right Mode for Your Charger Model
Settings vary significantly between CEN-TECH models. Choose the correct mode based on your specific unit and battery type.
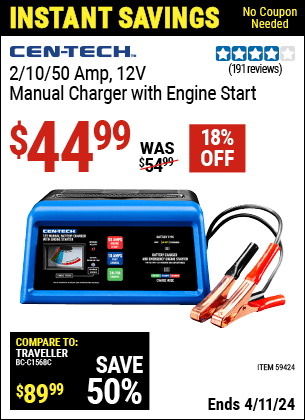
Model 59424: 12V 2/10/50A Analog Charger
This compact analog unit handles standard car and boat batteries with manual control. Set the battery type switch to AGM for sealed maintenance-free or absorbed glass mat batteries, or Standard for wet-cell lead-acid batteries.
Choose your charge rate using the three-position selector. The lower position delivers 2A for trickle charging and slow, safe reconditioning. The middle position provides 10A for fast charging moderately discharged batteries. The upper position offers 50A for engine start boost only.
Never leave the 50A mode engaged longer than 30 seconds. This setting is designed solely to assist with starting and can damage the battery if used for continuous charging.
Model 57015: 6V/12V 2A Automatic Charger
This model automatically detects voltage and manages the entire charge cycle, making it ideal for small engines and seasonal storage. Simply plug it in and the charger detects whether the battery is 6V or 12V.
The 3-stage charging process works automatically. The initial charge revives deeply discharged cells, the bulk charge delivers maximum current until approximately 80% capacity is reached, and float mode holds the full charge indefinitely.
Testing showed a dead ATV battery revived in approximately 2 hours. A Dodge Challenger battery went from 60% to 100% in 1 hour before switching to standby mode. This model works well for lawn mowers, tractors, and winter storage.
High-Power Digital Models: 2A/10A/40A/200A
These advanced units offer diagnostics, reconditioning, and jump-start capability. Press the function button to cycle through modes and select 12V/2A for overnight or gentle charging, or 12V/10A for standard fast charging.
The 40A setting provides strong boost during the charging cycle, while the 200A mode delivers engine-start assist only. This mode is not a charging setting. Testing showed voltage rising from 11.7V at 10A as charging progressed.
Power On and Monitor the Charging Process
Once connected and configured, start the process and keep an eye on progress.
Plug Into a Standard Outlet
All CEN-TECH chargers run on standard 120V household power. Plug in and the unit activates automatically, displaying status via LEDs or the digital screen.
Read the Indicator Lights
Watch for status indicators throughout the charging process. Blinking green means charging is in progress. Solid green indicates the battery is fully charged and in float mode. A red light signals reverse polarity or a fault condition, requiring you to stop and check connections.
On digital models, press the mode button to toggle between battery voltage, charging current, and estimated state of charge. One test showed a battery stabilizing at 10.8V before the charger dropped to 2A for reconditioning.
Test Engine Start After Charging
For dead batteries, test starting after the initial charge cycle completes.
Attempt to Crank the Engine
Turn off the charger and start the vehicle normally. If it starts, run the engine for 10 or more minutes to allow the alternator to recharge the battery.
If the engine fails to start, reconnect the charger and continue charging at 2A for several more hours. Try again once voltage exceeds 12.4V. Some weak batteries need extended low-current charging before they can support cranking.
Choose the Correct Mode for Your Task
Matching the mode to your goal prevents overcharging and damage to the battery.
Trickle and Maintenance Charging at 2A
This setting works best for motorcycles, ATVs, lawn mowers, and deer feeders. Small batteries between 18 and 35Ah typically require 3 to 6 hours. Large automotive batteries need 35 to 55 hours. The 57015 model can stay connected indefinitely in float mode without damage.
Fast Charging at 10A
Use this setting when you need a car ready in a few hours. It is ideal for moderately discharged 12V batteries, with typical charge times of 2 to 5 hours depending on battery size and depletion level. Avoid using 10A on small batteries due to overheating risk.
High-Power Boost and Jump-Start at 40A to 200A
The 40A or 50A setting provides strong boost during the charging cycle. The 200A mode delivers engine-start pulse only, lasting up to 30 seconds before requiring a rest period. Disconnect immediately after the engine starts.
Warning: Prolonged use of high-amp modes causes overheating. Never use 200A mode for charging.
Attempt Battery Reconditioning When Supported
Some models can revive sulfated or weak batteries that would otherwise need replacement.
Activate Reconditioning Mode
Set the charger to 200A mode for a high-current pulse. Ensure excellent ventilation, as hydrogen gas may be released during this process. Monitor cell temperature using a thermal camera or by hand feel. A cold cell indicates internal failure, while active cells generate warmth.
Stop immediately if the battery becomes hot to the touch. Then return to 2A mode for overnight reconditioning. Testing showed one battery still flagged as bad after reconditioning, signaling permanent damage that required replacement.
Know When to Replace the Battery
Even the best charger cannot fix a dead battery that has reached the end of its service life.
Replace the battery if the charger displays bad or failed after a full charge cycle. Replace if one or more cells show no thermal response during high-current pulse testing. Replace if electrolyte is low and non-refillable on sealed units. Replace if the battery will not hold charge after multiple charging attempts.
A failing battery will drain again within days, even after a full charge cycle.
Follow Critical Safety Practices
Safety is critical when working with high-current devices.
Never charge in enclosed spaces without airflow. Keep the area away from open flames, as hydrogen is explosive. Do not leave the charger unattended during 40A or higher cycles or during reconditioning. Stop immediately if the battery or charger becomes hot to the touch. Store the charger in a dry, cool place when not in use.
Monthly charging is recommended for multifunction units with internal batteries to preserve the warranty and extend lifespan.
Confirm Battery Compatibility Before Charging
Using the wrong charger on an incompatible battery can cause fire or explosion.
Compatible batteries include wet lead-acid flooded batteries, AGM batteries, and 6V and 12V systems on dual-voltage models like the 57015.
Incompatible batteries include lithium-ion, gel-cell, and calcium or EFB batteries unless explicitly supported. Charging incompatible batteries risks fire, explosion, or permanent damage.
Select the Right Model for Your Needs
Match the charger to your most common use case for the best results.
For winter storage of cars, boats, and RVs, the 57015 model fits best because its auto float mode allows safe long-term connection. For lawn mowers, tractors, and ATVs, the 57015 or 59424 works well, as the low 2A charge protects small batteries. For daily car battery maintenance, the 59424 offers dual 2A/10A modes plus 50A jump-start capability. For emergency jump-starting, the 2A/10A/40A/200A or 59424 provides high-amp boost modes from 50A to 200A. For an all-in-one garage tool, the multifunction unit combines charger, jump starter, and tire inflator. For new battery break-in, the 57015 provides gentle 2A current that prevents damage during acid filling.
Maintain Your Charger for Long-Term Reliability
CEN-TECH units are built tough, but proper maintenance extends their service life.
Charge the internal battery monthly if your model includes one. Store with clamps secured in the housing. Avoid moisture and extreme temperatures. Inspect cables regularly for fraying or damage.
Many users report over 10 years of service from earlier models, proving long-term durability when properly maintained.
Frequently Asked Questions About CEN-TECH Battery Chargers
Can I use a CEN-TECH charger on a lithium-ion battery?
No. CEN-TECH chargers are designed for lead-acid and AGM batteries only. Using them on lithium-ion batteries risks fire, explosion, or permanent damage. Use a charger specifically designed for lithium-ion batteries.
How long does it take to charge a dead car battery with a CEN-TECH 2A charger?
A large automotive battery typically requires 35 to 55 hours at 2A. For faster results, use the 10A setting, which can fully charge most batteries in 2 to 5 hours depending on size and depletion level.
Is it safe to leave a CEN-TECH charger connected overnight?
Yes, for models with automatic float mode like the 57015. These chargers transition to maintenance mode automatically once the battery is full. For manual chargers without float mode, disconnect after the recommended charging time.
What does it mean if my CEN-TECH charger shows a red light?
A red light indicates reverse polarity, meaning the clamps are connected incorrectly. Disconnect immediately and reverse the clamp positions. The charger has built-in protection to prevent damage from this error.
Can I use my CEN-TECH charger to jump-start a dead battery?
Yes, but only using the appropriate mode. Use the 50A, 40A, or 200A setting specifically designed for engine start assist. Never use these high-amp modes for continuous charging, and disconnect immediately after the engine starts.
Why does my charger say the battery is bad after a full charge cycle?
This indicates the battery has one or more failed cells that cannot hold a charge. The battery likely has permanent damage and should be replaced. Attempting further charging is unlikely to restore functionality.
Key Takeaways for Using Your CEN-TECH Battery Charger
CEN-TECH chargers offer exceptional value for DIYers and vehicle owners, ranging from the affordable 57015 to powerful 200A jump-start models. By following these steps, you will keep your batteries healthy, avoid hazards, and get the most from your investment.
Always connect red to positive and black to negative, verifying polarity with indicator lights before each use. Match the mode to your battery type, using 2A for small or dormant batteries and 10A for faster charging. Reserve 50A to 200A modes exclusively for jump-starting, never for continuous charging. Allow float mode to engage for long-term storage, and ventilate the area during high-current cycles. Monitor temperature and stop immediately if the battery or charger becomes hot. Replace batteries that fail reconditioning or display as bad after multiple attempts.
Prioritize correct connections, proper ventilation, and battery compatibility. Your safety and equipment depend on it.


