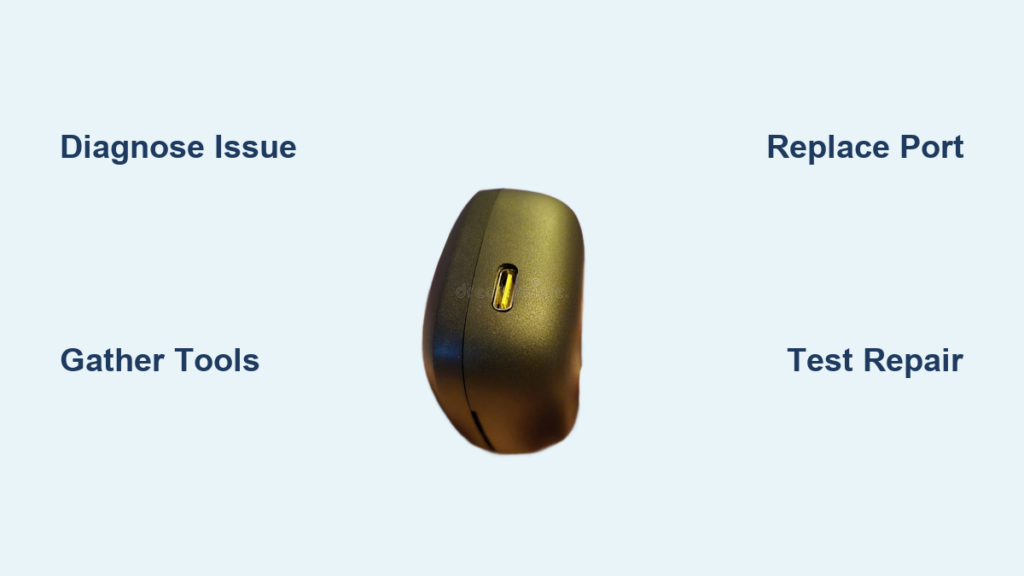
A failing charging port can turn your smartphone into a useless device. If your phone only charges when the cable is held at a strange angle, stops charging altogether, or no longer supports fast charging, the culprit is often a damaged USB-C or Lightning port. Before replacing the entire device, consider this: replacing the charger port is a cost-effective and technically feasible fix. Whether you own a OnePlus 7 Pro with a plug-in flex cable or an iPhone requiring precision soldering, this guide walks you through diagnosing the issue, cleaning the port, gathering tools, performing the replacement, and preventing future damage.
Diagnose the Charging Problem First
Before disassembling your phone, confirm the charging port is truly at fault. Many issues mimic port failure but stem from simpler causes that you should rule out first.
Rule Out Cables and Adapters
Faulty charging cables are the most common cause of charging problems. Test with the original OEM charger and cable, then try a known-working charging setup from a similar device. Generic or frayed cables often fail to deliver proper voltage or negotiate fast charging protocols. If your phone charges reliably with one cable but not another, the issue is not the port.
Check for Debris Buildup
Lint and dust accumulate in the charging port, especially in phones kept in pockets. Shine a flashlight into the port and look for visible debris blocking the pins. Use compressed air or a wooden toothpick to gently remove buildup. Never use metal objects, as they can short circuit the internal components.
Inspect Port Pins Visually
Use a magnifying glass to examine the internal contacts. Bent, broken, or corroded pins indicate physical damage. Burn marks or melted plastic suggest electrical shorts from faulty connections. If pins are visibly damaged, replacement is necessary.
Test for Software Glitches
Sometimes charging issues are not hardware related. Restart the phone completely and boot into safe mode on Android or recovery mode on iOS. Check for system updates that may fix charging bugs. If the phone charges in safe mode but not normally, a third-party app may be interfering.
Confirm Loss of Fast Charging
After port damage, some phones charge slowly even when connected to fast chargers. This happens because misaligned pins block high-current handshake between the charger and phone. Damaged data lines prevent protocol negotiation. OnePlus 7 Pro users have reported full restoration of Warp Charge after replacing a bent-pin port.
Gather the Right Tools for the Job
Using proper tools prevents costly mistakes during disassembly and replacement. Having the right equipment on hand makes the difference between a successful repair and a bricked phone.
Essential Repair Kit
You will need a precision screwdriver set that includes Phillips #000, Pentalobe, and Tri-wing bits. Plastic pry tools and spudgers separate glued components safely without damaging circuits. A suction cup helps lift screens or back covers. A heat gun or hairdryer softens adhesive on sealed backs. Fine-tipped tweezers handle small connectors, and a magnifying glass or digital microscope inspects pins and solder joints. Always use an anti-static wrist strap to prevent electrostatic damage to the logic board.
For Soldered Ports
Some ports like those on iPhones and Xiaomi Mi A1 are soldered directly to the motherboard. You will need a hot-air rework station capable of 500-550 degrees Celsius for desoldering. A fine-tip soldering iron allows precise rework. Solder wick removes excess solder from pads. Solder paste with 63% tin and 10% lead is recommended for strong joints. Isopropyl alcohol at 90% or higher cleans contact pads before reassembly.
Optional But Helpful
Pre-cut adhesive strips reseal the back cover properly. A vacuum nozzle reattaches glass backs on water-resistant models. A torque screwdriver prevents over-tightening screws that can crack components.
Understand Your Phone’s Port Design
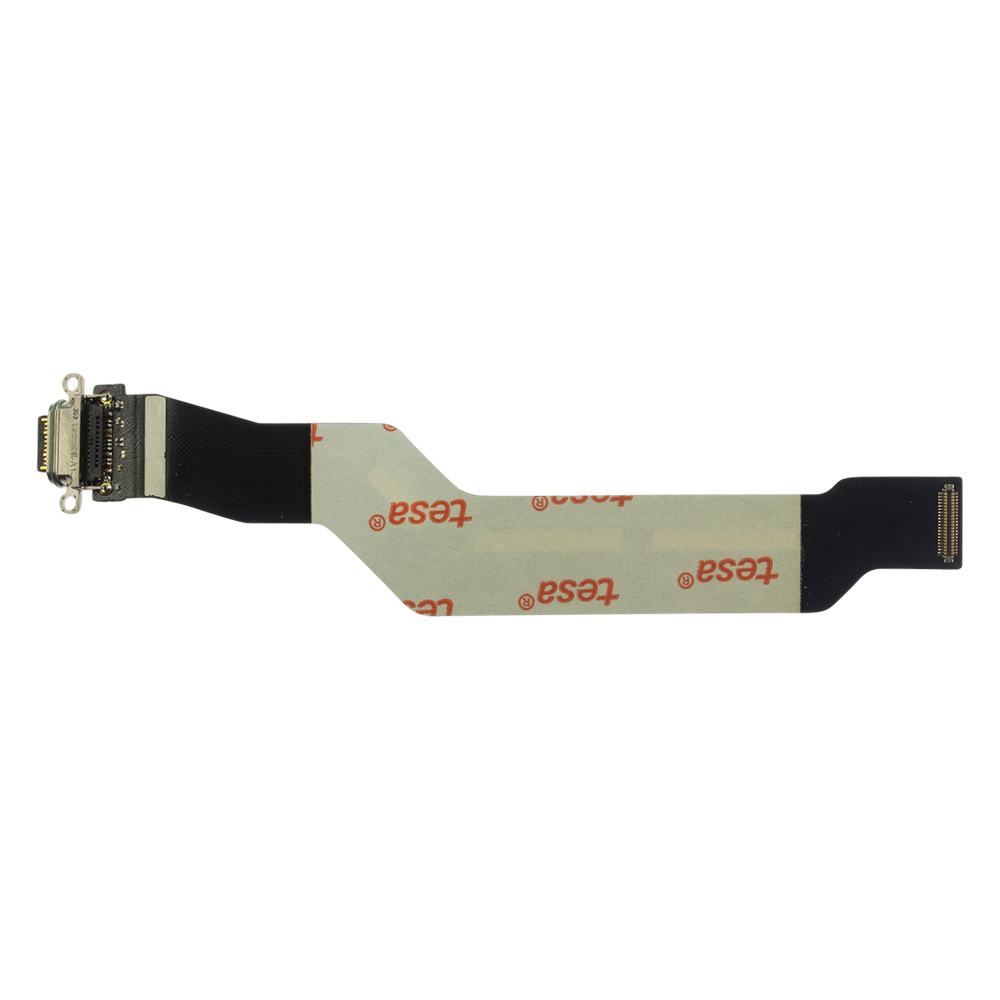
Repair difficulty varies drastically by model. Identifying your phone’s port type before buying parts saves time and money on the wrong components.
OnePlus 7 Pro: Plug-and-Play Flex Cable
The charging port is part of a flex cable assembly. No soldering is required. You simply unplug the old cable and plug in the new one. Access requires removing the glued back glass, which increases complexity. Replacement parts labeled GM1925 charging port flex cable cost around $10-15. Users report Warp Charge restored after replacement.
Xiaomi Mi A1: Soldered Port on Shared PCB
The USB-C port shares a small board with the headphone jack and speaker. Failure often occurs due to loose solder joints from drops. DIY fix requires hot-air desoldering skills. Standalone USB-C connectors cost about $1, while full PCB assemblies run around $4. Service center cost is approximately $20, making DIY worth the effort.
iPhone: Integrated Assembly with Soldered Connections
The Lightning port is often combined with the speaker and microphone. Soldering is required on iPhone 7 and newer models. These phones use Pentalobe screws and strong adhesives. There is risk of Face ID failure if the screen is improperly reconnected during reassembly.
Samsung Galaxy: Modular Flex Port
Many Samsung models use replaceable flex cables that are easier to replace than iPhone ports. Proper adhesive application is required to restore water resistance on IP68-rated devices. Some ports integrate into the motherboard bracket, requiring more disassembly.
Google Pixel: Fragile USB-C Ports
Google Pixel phones are known for early port wear due to poor cable strain relief. Repairs happen through flex cable swap. Third-party shops report high success rates with Pixel port replacements.
Foldables: High Risk and Low DIY Viability
Devices like Galaxy Fold have complex internal routing with charging port access involving hinge disassembly. Strongly consider professional repair for foldable devices to avoid causing additional damage.
Step-by-Step Charger Port Replacement
Follow these steps carefully. Rushing through any stage can damage internal components and turn a simple repair into an expensive mistake.
Power Off and Prepare Your Workspace
Turn off the phone completely and remove the SIM card tray. Work on a clean, static-free surface with adequate lighting. Organize screws in labeled containers so you know exactly where each one goes during reassembly.
Open the Device Safely
For glued back covers on OnePlus and Galaxy S models, apply heat at 80-100 degrees Celsius around the edges using a heat gun. Use a suction cup to lift the back slightly, then slide a plastic pry tool around the seam to break the adhesive. Be cautious of internal connectors still attached to the back cover.
For screw-fastened backs on older Xiaomi models, remove the 5-7 visible screws. Check under labels or seals for hidden screws. Use a plastic pick to gently separate the back cover from the frame.
Disconnect the Battery First
This step is critical for safety. Use a spudger or tweezers to lift the battery connector and disconnect it from the motherboard. This prevents short circuits that can permanently damage the phone while you work on it.
Remove Metal Shields and Access the Port
Unscrew any brackets or shields covering the logic board. In some models, you need to lift the motherboard slightly to reach the charging port underneath. Mark screw locations to avoid confusion during reassembly.
Remove the Old Charging Port
For soldered ports on iPhones and Xiaomi devices, apply hot air at 500-550 degrees Celsius evenly around the port. Move the nozzle in a side-to-side motion to avoid overheating nearby capacitors. Once the solder melts, gently lift the port with tweezers. Use solder wick to clean residual solder from the pads. Inspect under magnification for burnt traces or damaged pads.
For flex cable ports on OnePlus and Samsung devices, locate the flex cable connector near the motherboard. Disconnect the cable using a spudger or your fingernail. Remove any retaining screws and extract the old assembly.
Install the New Charging Port
For soldered ports, clean the pads with isopropyl alcohol. Apply a thin layer of solder paste. Align the new port precisely, as even 0.5mm misalignment can block cable insertion. Use hot air to reflow the joints. Check for solder bridges between pins and inspect under magnification for alignment.
For flex cable ports, route the new cable through any channels. Connect it to the motherboard socket and secure with clips or screws. Ensure the port sits flush with the casing before proceeding.
Reassemble the Device
Reconnect the battery connector first. Replace all shields, brackets, and screws in their correct positions. Reattach the back cover using new adhesive strips for glued models or reinstall all screws for screw-fastened backs. Reinsert the SIM card tray last.
Test Your Repair Before Reassembling
After reassembly, verify the fix works properly before considering the job complete.
Immediate Charging Test
Plug in the original OEM charger and look for the charging indicator. Watch for fast charging notifications like “Fast Charging” on OnePlus devices. Verify the connection is stable with no wobbling or disconnections when you touch the cable.
Functional Checks
Test data transfer capability if applicable. Verify speaker, microphone, and audio jack function properly if they were part of the same module. Charge the phone for 30 minutes and ensure no overheating occurs during the process.
Repair Cost Comparison

Understanding your options helps you make the best decision based on your budget and skill level.
DIY replacement for soldered ports costs $1-5 for parts but requires advanced skills and carries high risk with no warranty. DIY flex cable replacement costs $5-15, requires intermediate skills, and carries medium risk. Third-party repair shops charge $40-100 with beginner-friendly processes and typically offer 90-day to 1-year warranties. Authorized service centers charge $60-150 but use OEM parts and preserve water resistance with full warranties.
Prevent Future Charging Port Damage
Extend your port’s lifespan with simple habits that cost nothing to implement.
Use Quality Cables
Choose reinforced cables with strain relief built into the connector. Avoid cheap, flimsy chargers that wear out quickly and can damage ports over time.
Avoid Forceful Insertion
Always align the cable straight before inserting it into the port. Never yank the cable out by pulling on the wire. Pull by the plug head instead.
Keep the Port Clean
Clean the port every few months with compressed air. Use a dry wooden toothpick for stubborn lint that the air cannot dislodge.
Use Magnetic Adapters
Magnetic charging adapters detach under tension, protecting the solder joints inside the port. These work especially well for phones with fragile ports like Pixel and Mi A1 devices.
Charge on a Flat Surface
Avoid dangling the phone while charging. Gravity pulls on the port and stresses the internal connections. Place the phone on a table or desk while charging.
Limit Heavy Use While Charging
Heat from gaming or video calls degrades solder joints over time. Avoid processor-intensive tasks while the phone is charging to extend port life.
When to Skip DIY and Choose Professional Repair
DIY replacement is not recommended for everyone. Consider professional help in certain situations.
Benefits of Professional Repair
Professional shops offer free diagnostics to confirm the issue before proceeding. They use genuine or tested replacement parts. Warranties on labor typically last 30-90 days. Proper tools like vacuum glass sealers restore water resistance correctly. Technicians have experience with complex adhesive seals on Samsung Galaxy and iPhone devices.
When to Go Pro
Skip DIY if you lack electronics repair experience. Avoid it if the phone has complex glue seals like Galaxy S series or recent iPhones. Seek professional help if you suspect internal damage like cracked PCB or water corrosion.
Frequently Asked Questions About Mobile Phone Charger Port Replacement
Can I replace my phone charging port myself?
Yes, you can replace it yourself if you have intermediate to advanced electronics skills. Flex cable ports on phones like OnePlus 7 Pro are beginner-friendly. Soldered ports on iPhones and Xiaomi devices require advanced skills and proper tools.
How much does it cost to replace a phone charging port?
DIY costs range from $1-15 depending on the part. Third-party repair shops charge $40-100. Authorized service centers charge $60-150. The cost depends on your phone model and whether you do the work yourself.
How do I know if my charging port is damaged?
Signs include charging only when the cable is held at an angle, no charging response at all, loss of fast charging, loose physical fit when inserting the cable, and visible bent or corroded pins inside the port.
Does replacing the charging port fix fast charging?
Yes, if the original issue was physical damage to the port. Fast charging requires precise pin alignment and undamaged data lines inside the port. Replacing a bent or damaged port restores fast charging capability on most phones.
How long does it take to replace a charging port?
DIY replacement takes 1-3 hours depending on your experience and phone model. Professional repair shops typically complete the job in same-day service or within 1-2 days.
Will replacing the charging port void my phone warranty?
DIY repairs typically void manufacturer warranties. Professional third-party repairs may also void warranties, but some shops offer their own warranties on parts and labor.
Key Takeaways for Replacing Your Phone’s Charger Port
Replacing a charging port is a cost-effective alternative to buying a new phone. Start with simple troubleshooting like cleaning the port and testing different cables before attempting replacement. Identify your phone model to understand whether you need soldering skills or can do a simple flex cable swap. Gather proper tools including ESD protection to avoid static damage. Test thoroughly after repair to confirm fast charging works and the connection is stable. Consider professional repair if you lack experience with electronics, as the cost is often worth avoiding permanent damage to your device.