
If your RV’s lights flicker when plugged in or your house battery never seems to stay charged, the culprit might be your converter charger. This small but critical device powers nearly every 12-volt system in your RV, from lights and water pumps to fridge controls, while simultaneously recharging your house battery when connected to shore power. But how does a converter charger work? At its core, it transforms 120V AC from a campground pedestal or generator into 12V DC, delivering clean, regulated power to both your battery bank and onboard systems.
Most modern RVs come with a factory-installed converter charger, yet many owners do not realize it is the backbone of their electrical ecosystem. Without it, your batteries would not recharge on shore power, and your 12V appliances would fail even when plugged in. In this guide, you will learn the step-by-step process of AC-to-DC conversion, the differences between single-stage and smart chargers, how to diagnose failures, and when to upgrade for better efficiency and battery health.
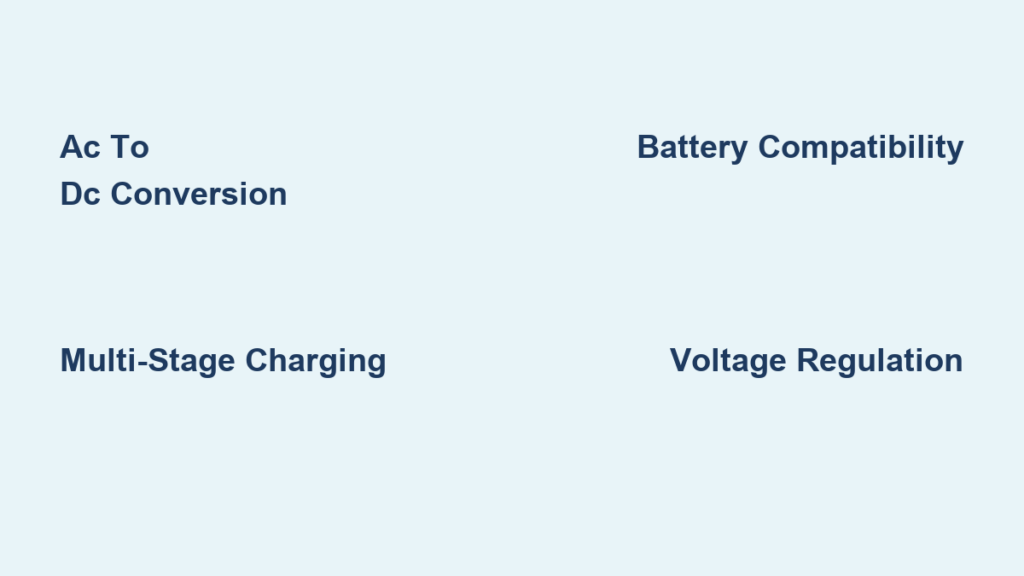
Convert AC to DC: The Core Process

A converter charger performs one essential job: change alternating current into direct current. This allows your RV to use external power sources like shore lines or generators to keep the house battery charged and run low-voltage systems.
Step-Down Voltage Transformation
The first stage inside the converter is the transformer. When 120V AC enters the unit, the transformer reduces it to a lower AC voltage, typically around 14 to 15V AC. This prepares the electricity for conversion into DC, which batteries and 12V circuits can use.
AC to DC Rectification
Next, the reduced AC voltage passes through a rectifier circuit, usually made of diodes. These components allow current to flow in only one direction, converting the alternating waveform into pulsating DC. While this is closer to usable power, it is still unstable for sensitive electronics and batteries.
Smooth and Regulate Output
To make the power safe and consistent, capacitors and voltage regulators filter out ripples in the pulsating DC. The result is a smooth, steady 12V DC output that can safely charge batteries and power lights, fans, and control boards without damaging them.
Single-Stage vs Multi-Stage Charging

Not all converter chargers charge your battery the same way. The type determines charging speed, efficiency, and battery lifespan.
Single-Stage Converter Limitations
Factory-installed units are often single-stage converters that deliver a fixed voltage, around 13.6V, regardless of the battery state. While simple and inexpensive, they have major drawbacks:
- Slow charging with no high-current bulk phase
- Overcharging risk by continuing to apply voltage even when full
- Undercharging potential that may not reach full capacity
- Battery damage, especially harmful to AGM, gel, and lithium
These units are best suited only for basic flooded lead-acid batteries and short-term use.
Multi-Stage Smart Charging Benefits
Modern multi-stage smart converter chargers follow a scientific charging profile to maximize battery life and performance. They operate in three or four distinct phases.
Bulk Stage: Fast Charge Initiation
This stage delivers maximum current at high voltage, around 14.4 to 14.8V, until the battery reaches about 80 percent capacity. This is the fastest part of the charge cycle.
Absorption Stage: Top-Off Charge
This stage holds voltage steady while current gradually decreases, finishing the charge to near 100 percent. It prevents overheating by tapering off as the battery fills.
Float Stage: Maintenance Mode
This stage reduces voltage to 13.2 to 13.6V to maintain a full charge without overcharging. It is ideal for long-term storage or continuous shore power use.
Equalization: Optional Maintenance
This applies a controlled overvoltage to flooded lead-acid batteries to prevent electrolyte stratification. It is not used with AGM, gel, or lithium batteries.
Using a smart charger means faster recharging, longer battery life, and safer operation, especially with modern battery chemistries.
Power Draw and System Integration
Your converter charger does not work in isolation. It is part of a larger electrical ecosystem that must be balanced for safety and efficiency.
Typical Power Consumption
A 55A DC output converter draws roughly 5.5A at 120V AC. That means it uses less than half of a standard 15A circuit, making it easy to integrate into most RVs. However, it should still be considered when calculating total power load on a 30A or 50A service.
Circuit Protection and Location
The converter is protected by a dedicated 15A or 20A breaker labeled Converter in your AC panel. If this trips, the unit shuts down and stops charging. Common locations include behind access panels, inside electrical compartments, and integrated into combo units with breakers and fuses. Always check this breaker first if your converter appears dead.
Standalone vs Integrated Units
How your converter is built and mounted affects serviceability and upgrade options.
Standalone Converters
These are independent units mounted separately from the main electrical panel. Advantages include easier replacement, simpler upgrades, and better airflow and cooling. They are common in older or custom RV builds.
Combination Electrical Centers
Most modern RVs use integrated units that combine AC circuit breakers, a DC fuse block, and the converter charger, all housed in one compact enclosure. While space-efficient, these can be trickier to replace unless using plug-and-play models from brands like WFCO or Progressive Dynamics.
Some advanced users replace these with all-in-one inverter chargers, such as Victron or Xantrex models, which add battery-to-AC power generation and automatic transfer switching.
Match Charger to Battery Chemistry
Using the wrong charger can shorten battery life or cause permanent damage. Voltage settings must match your battery type.
Lead-Acid and AGM Requirements
| Battery Type | Charging Voltage | Required Charger Type |
|---|---|---|
| Flooded Lead-Acid | 13.6 to 14.4V | Standard or smart |
| AGM | 14.4 to 14.8V | Smart or multi-stage only |
| Gel | 13.8 to 14.1V | Temperature-compensated smart |
AGM batteries need higher voltage than basic converters provide. Using a single-stage unit results in chronic undercharging.
Lithium LiFePO4 Compatibility

Lithium iron phosphate batteries require 14.2 to 14.6V and precise charge control. Most factory converters are not compatible with lithium.
To safely charge lithium, use a lithium-specific converter or a programmable smart charger like the Victron BlueSmart. Verify firmware supports LiFePO4 profiles.
Warning: Running a standard converter on lithium may result in incomplete charging, reduced capacity, or long-term cell imbalance.
Diagnose Converter Functionality
When things go wrong, knowing how to test your converter saves time and money.
Measure Output Voltage
Use a multimeter set to DC volts. Connect probes to battery terminals with shore power on, then read the voltage. Below 10V indicates a likely failed converter. 13.6V is normal for lead-acid. 14.4 to 14.8V is expected for AGM. 14.2 to 14.6V is correct for lithium. No increase in battery voltage after hours of charging indicates a problem.
Check Fan and Panel Indicators
Most converters have cooling fans that run under load. If the fan is silent despite being plugged in, suspect a tripped breaker, no AC input, or internal failure. Also monitor your battery display panel. Voltage should rise steadily when charging.
Observe Appliance Behavior
Dim lights, weak pump pressure, or failing appliance controls often mean the converter is not supplying stable DC power. If 120V outlets work but 12V systems do not, the issue is likely the converter or battery.
Converter vs Inverter vs Inverter Charger

Understanding the difference helps you choose the right power solution.
Key Functional Differences
| Feature | Converter Charger | Inverter | Inverter Charger |
|---|---|---|---|
| Input | 120V AC | 12V DC | 120V AC or 12V DC |
| Output | 12V DC | 120V AC | 12V DC charge plus 120V AC |
| Charges Battery | Yes | No | Yes |
| Powers AC Outlets | No | Yes | Yes |
| Automatic Switching | No | No | Yes via ATS |
Why Upgrade to an Inverter Charger
An inverter charger combines a converter, an inverter, and an automatic transfer switch. When shore power is available, it charges the battery up to two times faster than standard converters and supplies AC power via pass-through. When unplugged, it automatically switches to inverter mode and powers outlets from battery. This makes it ideal for boondocking and high-demand appliances like microwaves or air conditioners.
Troubleshoot Common Failures
Even reliable units fail over time. Recognize the signs early.
Symptoms of Failure
Lights work briefly but die when unplugged indicates the battery is not charging. Control boards reset or fail means low 12V supply. No fan noise or output voltage suggests a dead converter. A tripped breaker every time you plug in indicates a short circuit or overload.
Test Input and Output
To verify AC input, set the multimeter to AC volts and test input wires at the converter. It should read approximately 115 to 125V. No voltage means checking the shore cord, pedestal power, and converter breaker.
To test DC output, disconnect the battery temporarily and measure output leads. It should match label specifications, such as 13.8V. If output is absent or very low, the converter is likely faulty.
Integrate Solar and Advanced Systems
A converter charger alone cannot use solar power. Integration requires additional components.
Add a Solar Charge Controller
To charge from solar, install a PWM or MPPT charge controller. MPPT is up to 30 percent more efficient, especially in cloudy or cold conditions. Connect panels to the controller, then to the battery. The converter still handles shore power charging while the controller manages solar input.
All-in-One Power Hubs
Advanced systems use inverter chargers with built-in MPPT, such as Victron MultiPlus-II, Xantrex Freedom XC, or Renogy 2000W Hybrid. These unify shore charging, solar charging, battery-to-AC inversion, and automatic source selection. They are ideal for full-time RVers and off-grid living.
Maintain and Extend Lifespan
Like any electrical component, your converter needs care to perform reliably.
Inspect Regularly
Check every three to six months for loose or corroded wires, burnt smells or discoloration, fan operation, and secure mounting. Tighten connections and clean terminals as needed.
Test Before Every Trip
Before hitting the road, plug into shore power and confirm battery voltage rises. Test lights, pump, and fridge control. Listen for the converter fan. Catch issues early to avoid roadside failures.
Replace Aging Batteries
Even the best converter cannot fix a bad battery. Replace lead-acid every three to five years. Lithium lasts eight to ten or more years with proper charging. Always recycle old batteries responsibly.
Upgrade to Lithium: What You Need
Switching to LiFePO4 improves performance, but only if your charging system supports it.
Benefits of Lithium
Lithium offers 80 to 100 percent usable capacity compared to 50 percent for lead-acid. It charges faster with higher current acceptance. It is lighter weight and maintenance-free. It has longer cycle life, lasting 2,000 to 5,000 cycles.
Required Upgrades
To safely use lithium, replace the converter with a lithium-compatible model or install a programmable smart charger. Confirm voltage settings are 14.2 to 14.6V. Update firmware if needed, such as via Victron VRM.
Never assume your factory converter works with lithium. It likely does not.
Frequently Asked Questions About Converter Chargers
Can a converter charger work without a battery connected?
Yes, a converter charger can power 12V appliances directly without a battery. The converter supplies DC power to the fuse panel as long as shore power is connected. However, a battery is still recommended for backup power when unplugging or for handling surge demands.
What happens if I use the wrong type of converter for my battery?
Using an incompatible converter can cause chronic undercharging or overcharging. This shortens battery lifespan, reduces capacity, and may damage the battery permanently. AGM and lithium batteries specifically require smart chargers with proper voltage profiles.
How do I know if my converter is charging the battery?
Monitor your battery voltage with a multimeter or panel display. When shore power is connected, voltage should gradually increase and stabilize at the correct charging voltage for your battery type. If voltage remains low or unchanged after several hours, the converter may not be working.
Can I replace my converter charger myself?
Yes, most standalone converters are plug-and-play replaceable. Combination units can often be swapped directly without rewiring. Always disconnect shore power before working on electrical components, and verify the new unit matches your battery type and voltage requirements.
Do I need an inverter if I already have a converter charger?
You need an inverter if you want to power 120V AC appliances from your battery when off-grid. A converter charger only handles AC-to-DC conversion. An inverter charger combines both functions and is the best option for boondocking or running AC appliances without shore power.
How long do converter chargers typically last?
Converter chargers can last 10 to 15 years or more with proper maintenance. However, components like fans and capacitors may wear out sooner. Regular inspection and testing help identify problems before they cause system failures.
Key Takeaways for Understanding Converter Chargers
A converter charger transforms 120V AC shore power into 12V DC to charge your battery and power 12V systems. Factory-installed units are typically single-stage converters that are inefficient and unsuitable for AGM or lithium batteries. Upgrading to a multi-stage smart charger dramatically improves charging speed, battery lifespan, and system reliability. For full off-grid capability, consider an inverter charger that combines AC-to-DC conversion with DC-to-AC inversion and automatic transfer switching. Always match your converter to your battery chemistry, and perform regular maintenance to ensure reliable power for all your adventures.


